Tag Archives: pkg

Perfect Neovim Ansible Setup

Lets start with information that I did not created that config. This Ansible oriented config was handed to me by one of my mates from the Linux world … and as it takes some steps needed to make it work specific only to FreeBSD – I thought that it may be a good reason to share them.

neovim.vim.geany.desktop

I have split the article into the following parts is shown in Table of Contents below.

  • Neovim Config
  • Neovim Plugins
  • Needed Packages
  • Ansible Language Server
  • Some Modules Linuxisms
  • Alternatives
  • Summary

Lets start then.

Neovim Config

Below are the Neovim config files located at ~/.config/nvim/lua/config place.

% wc -l ~/.config/nvim/lua/config/*
       3 /home/vermaden/.config/nvim/lua/config/globals.lua
      43 /home/vermaden/.config/nvim/lua/config/init.lua
      24 /home/vermaden/.config/nvim/lua/config/keymaps.lua
      53 /home/vermaden/.config/nvim/lua/config/options.lua
     123 total


% cat ~/.config/nvim/lua/config/globals.lua
vim.g.mapleader      = " "
vim.g.maplocalleader = " "


% cat /home/vermaden/.config/nvim/lua/config/init.lua
local lazypath = vim.fn.stdpath("data") .. "/lazy/lazy.nvim"
if not vim.loop.fs_stat(lazypath) then
  vim.fn.system({
    "git",
    "clone",
    "--filter=blob:none",
    "https://github.com/folke/lazy.nvim.git",
    "--branch=stable", -- latest stable release
    lazypath,
  })
end
vim.opt.rtp:prepend(lazypath)

require('config.globals')
require('config.options')
require('config.keymaps')

local opts = {
  defaults = {
    lazy = true,
  },
  install = {
    colorscheme = { "nightfox" }
  },
  rtp = {
    disabled_plugins = {
      "gzip",
      "matchit",
      "matchparen",
      "netrw",
      "netrwPlugin",
      "tarPlugin",
      "tohtml",
      "tutor",
      "zipPlugin",
    }
  },
  change_detection = {
    notify = true
  },
}

require("lazy").setup('plugins', opts)


% cat ~/.config/nvim/lua/config/keymaps.lua
local keymap = vim.keymap

local opts = { noremap = true, silent = true }

-- DIRECTORY NAVIGATION ------------------------------------------------------
keymap.set("n", "<leader>m", ":NvimTreeFocus<CR>", opts)
keymap.set("n", "<leader>f", ":NvimTreeToggle<CR>", opts)
keymap.set("n", "<C-k>", "<C-w>k", opts) -- NAVIGATE [^] UP
keymap.set("n", "<C-h>", "<C-w>h", opts) -- NAVIGATE [<] LEFT
keymap.set("n", "<C-l>", "<C-w>l", opts) -- NAVIGATE [>] RIGHT
keymap.set("n", "<C-j>", "<C-w>j", opts) -- NAVIGATE [v] DOWN

-- WINDOW MANAGEMENT ---------------------------------------------------------
keymap.set("n", "<leader>sv", ":vsplit<CR>", opts) -- SPLIT VERTICALLY
keymap.set("n", "<leader>sh", ":split<CR>", opts)  -- SPLIT HORIZONTALLY

-- INDENT --------------------------------------------------------------------
keymap.set("v", "<", "<gv")
keymap.set("v", ">", ">gv")

-- COMMENTS ------------------------------------------------------------------
vim.api.nvim_set_keymap("n", "<C-_>", "gcc", { noremap = false })
vim.api.nvim_set_keymap("v", "<C-_>", "gcc", { noremap = false })


% cat ~/.config/nvim/lua/config/options.lua
local opt = vim.opt

-- TAB/INDENT ----------------------------------------------------------------
opt.tabstop     = 2
opt.shiftwidth  = 2
opt.softtabstop = 2
opt.expandtab   = true
opt.smartindent = true
opt.wrap        = false

-- SEARCH --------------------------------------------------------------------
opt.incsearch  = true
opt.ignorecase = true
opt.smartcase  = true
opt.hlsearch   = false

-- APPEARANCE ----------------------------------------------------------------
opt.number         = true
opt.relativenumber = false
opt.termguicolors  = true
opt.colorcolumn    = "100"
opt.signcolumn     = "yes"
opt.cmdheight      = 1
opt.scrolloff      = 10
opt.completeopt    = "menuone,noinsert,noselect"

-- MISC ----------------------------------------------------------------------
opt.hidden     = true
opt.errorbells = false
opt.swapfile   = false
opt.backup     = false
opt.undodir    = vim.fn.expand("~/.vim/undodir")
opt.undofile   = true
opt.backspace  = "indent,eol,start"
opt.splitright = true
opt.splitbelow = true
opt.autochdir  = false
opt.modifiable = true
opt.encoding   = "UTF-8"

-- APPEND --------------------------------------------------------------------
opt.mouse:append('a')
opt.iskeyword:append("-")
opt.clipboard:append("unnamedplus")

-- ANSIBLE/YAML --------------------------------------------------------------
vim.filetype.add({
  extension = {
    yml = 'yaml.ansible'
  }
})

That much for configs – now plugins.

Neovim Plugins

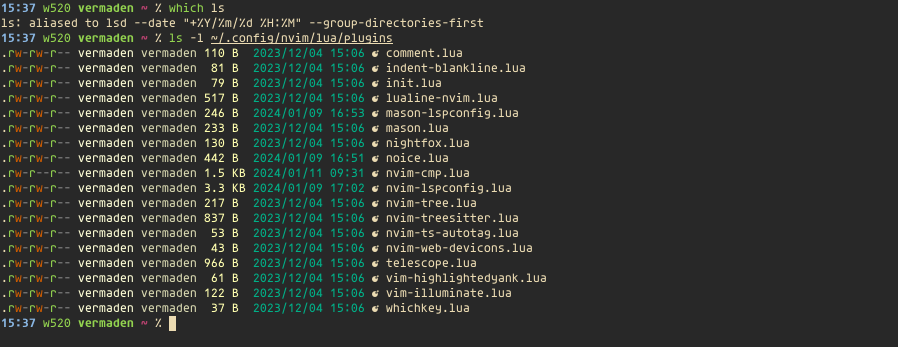
The list of Neovim plugins in this config is shown below.

neovim.plugins

… if some search engine would like to point here I will also list them in text.

  • comment.lua
  • indent-blankline.lua
  • init.lua
  • lualine-nvim.lua
  • mason-lspconfig.lua
  • mason.lua
  • nightfox.lua
  • noice.lua
  • nvim-cmp.lua
  • nvim-lspconfig.lua
  • nvim-tree.lua
  • nvim-treesitter.lua
  • nvim-ts-autotag.lua
  • nvim-web-devicons.lua
  • telescope.lua
  • vim-highlightedyank.lua
  • vim-illuminate.lua
  • whichkey.lua

Here are their contents.

% grep -A 1 return ~/.config/nvim/lua/plugins/* \
    | grep -v -e -- -e return \
    | awk '{print $NF}' \
    | tr -d "\"',{}" \
    | sort -u

EdenEast/nightfox.nvim
folke/noice.nvim
folke/which-key.nvim
hrsh7th/nvim-cmp
lukas-reineke/indent-blankline.nvim
machakann/vim-highlightedyank
neovim/nvim-lspconfig
numToStr/Comment.nvim
nvim-lualine/lualine.nvim
nvim-telescope/telescope.nvim
nvim-tree/nvim-tree.lua
nvim-tree/nvim-web-devicons
nvim-treesitter/nvim-treesitter
RRethy/vim-illuminate
williamboman/mason-lspconfig.nvim
williamboman/mason.nvim
windwp/nvim-ts-autotag

All these plugins are available – nvim-lua-plugins.tar.gz – here.

Execute below command to add them to Your Neovim dir.

% fetch -o - \
    https://github.com/vermaden/scripts/raw/master/distfiles/nvim-lua-plugins.tar.gz \
    | tar -C ~/.config/nvim/lua -xvf -
-                                                     3696  B 9804 kBps    00s
x plugins/
x plugins/noice.lua
x plugins/telescope.lua
x plugins/indent-blankline.lua
x plugins/whichkey.lua
x plugins/nvim-web-devicons.lua
x plugins/comment.lua
x plugins/nvim-tree.lua
x plugins/mason.lua
x plugins/nightfox.lua
x plugins/nvim-cmp.lua
x plugins/vim-highlightedyank.lua
x plugins/mason-lspconfig.lua
x plugins/init.lua
x plugins/nvim-treesitter.lua
x plugins/vim-illuminate.lua
x plugins/nvim-ts-autotag.lua
x plugins/lualine-nvim.lua
x plugins/nvim-lspconfig.lua

Just in case if WordPress would mess any part of Neovim config – You may find all of the configuration and plugins in one file – ~/.config/nvim – available here.

Needed Packages

Besides the obvious Neovim packages there are some additional ones needed to make entire setup work.

# pkg install -y \
    neovim \
    npm    \
    node   \
    gcc13  \
    gmake

That is it. That is probably the most simple part of this article.

Ansible Language Server

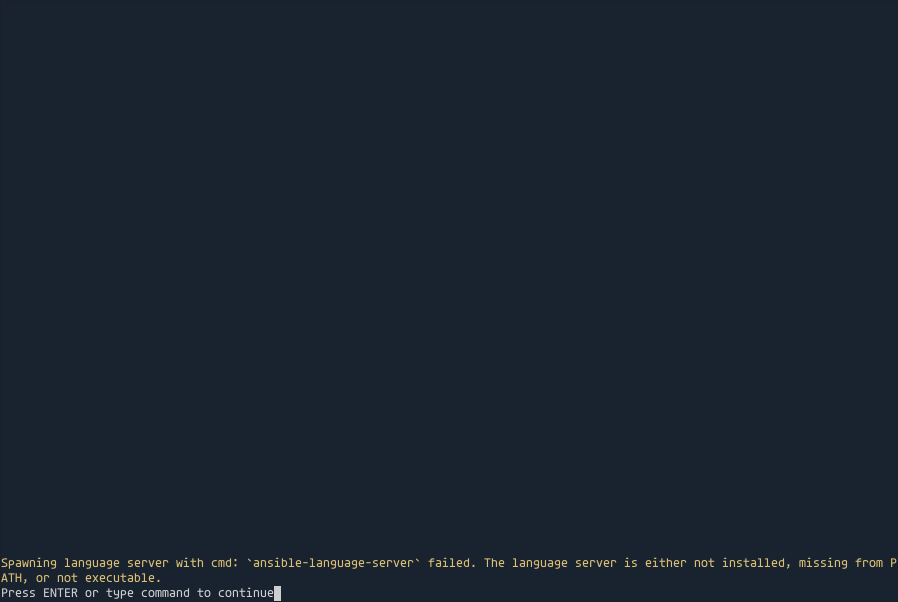
After I dumped that Neovim config into the ~/.config/nvim dir I learned that it is a lot more advanced then I thought – to the point that it needs an external dedicated ansible-language-server needed for the Ansible playbook completions.

neovim.ansible-language-server

I used the most recent 1.2.1 release of ansible-language-server … and used the ALS Documentation for the instructions to build it properly.

% fetch https://github.com/ansible/ansible-language-server/archive/refs/tags/v1.2.1.tar.gz

% tar -xzvf v1.2.1.tar.gz

% cd ansible-language-server-1.2.1

% npm install .

Lets check if the ansible-language-server built properly … and that it actually works.

% find . -name server.js -o -name ansible-language-server
./bin/ansible-language-server
./out/server/src/server.js
./node_modules/vscode-languageserver/lib/common/server.js

% node ./out/server/src/server.js --stdio  
^C

Seems to work as desired.

As I already use ~/scripts/bin place as additional ingredient to my PATH environment I will put it there … kinda.

% echo ${PATH} | tr ':' '\n' | grep scripts
/home/vermaden/scripts
/home/vermaden/scripts/bin

% pwd
/home/vermaden/ansible-language-server-1.2.1

% cd ..

% mv ansible-language-server-1.2.1 ~/scripts/

% ln -s \
    ~/scripts/ansible-language-server-1.2.1/bin/ansible-language-server \
    ~/scripts/bin/ansible-language-server

% rehash || hash -r

When we now start Neovim it does not cry that ansible-language-server is not available – so that part seems to work properly.

Some Modules Linuxisms

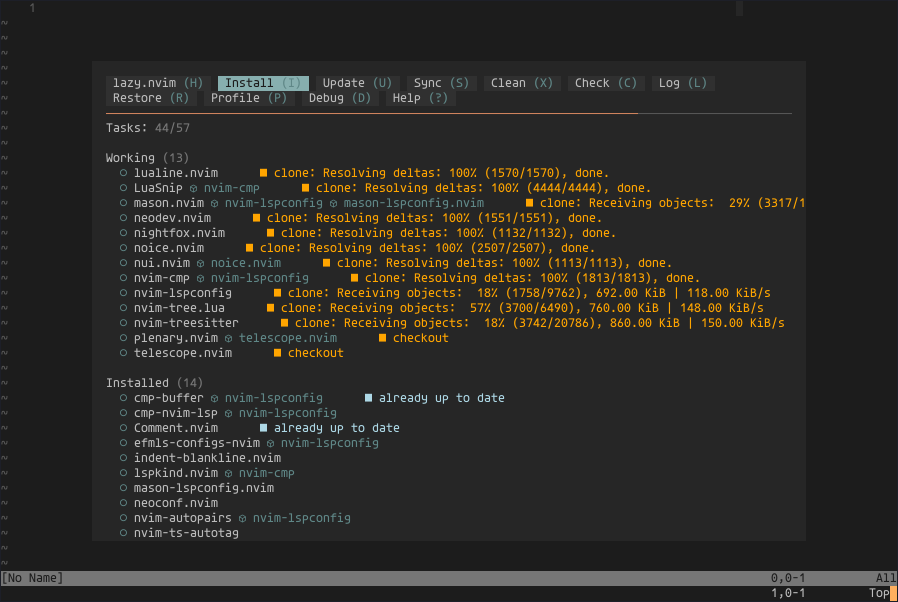
When You first start that Neovim setup it will start to fetch/build/configure all these plugins.

neovim.1st.start

For the record – if something fails its safe to remove the ~/.local/share/nvim dir and start over.

% rm -rf ~/.local/share/nvim
% nvim

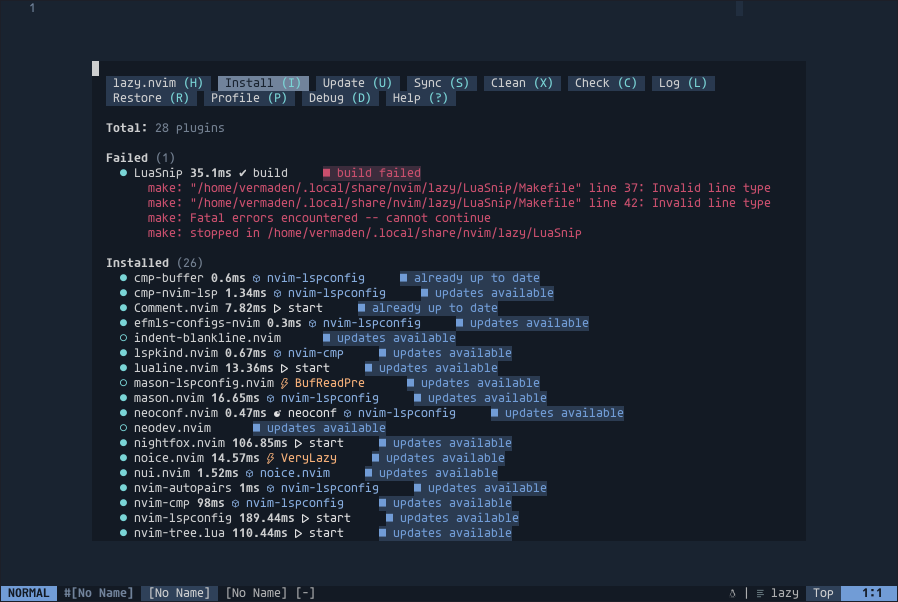
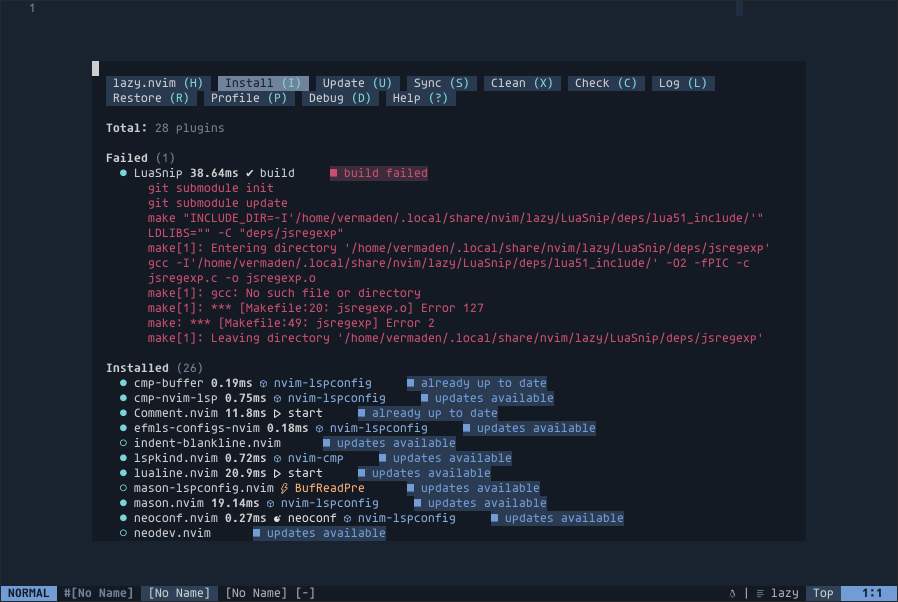
… and it fails to build LuaSnip module.

neovim.linuxisms

Maybe it will do better with GNU make(1) instead of BSD make(1) – lets try that.

~ # cd /usr/bin
/usr/bin # mv make make.FreeBSD
/usr/bin # ln -s /usr/local/bin/gmake make

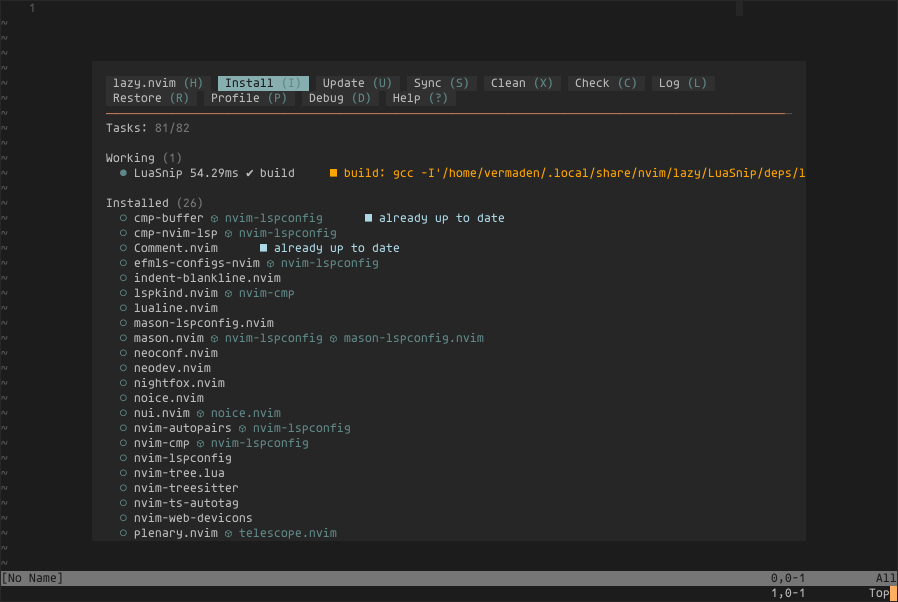
Lets try now with GNU make(1) instead.

neovim.setup.GNU.make

Now the gcc seems to be missing … but we installed lang/gcc13 packages at the beginning …

% pkg info -l gcc13 | grep bin/gcc
        /usr/local/bin/gcc-ar13
        /usr/local/bin/gcc-nm13
        /usr/local/bin/gcc-ranlib13
        /usr/local/bin/gcc13

Right … its gcc13 and not gcc

Lets create the gcc link that points to gcc13 then.

# ln -s /usr/local/bin/gcc13 /usr/local/bin/gcc

# /bin/ls -l /usr/local/bin/gcc
lrwxr-xr-x  1 root wheel 20 Mar 11 07:27 /usr/local/bin/gcc -> /usr/local/bin/gcc13

Lets try again …

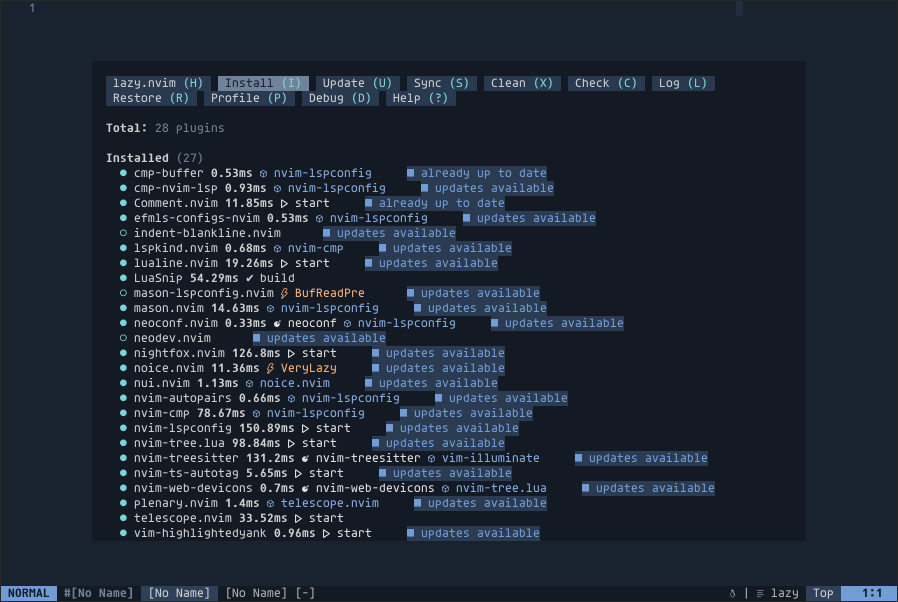
neovim.setup.gcc

Seems that it worked. All modules fetched/built/configured successfully as shown below.

neovim.setup.complete

Lets now check how it runs with some Ansible YAML file.

neovim.YAML.before

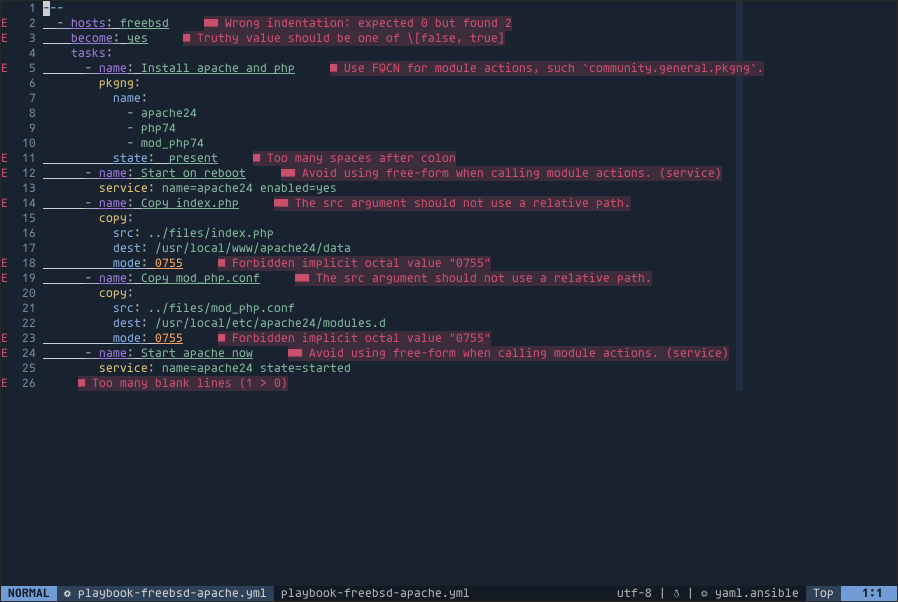
Seems that its processing it …

neovim.YAML.after

Yeah … a lot of hints for a start … sounds kinda like Clippy from some oldschool Office suite.

clippy

… always helpful with a bunch of hints πŸ™‚

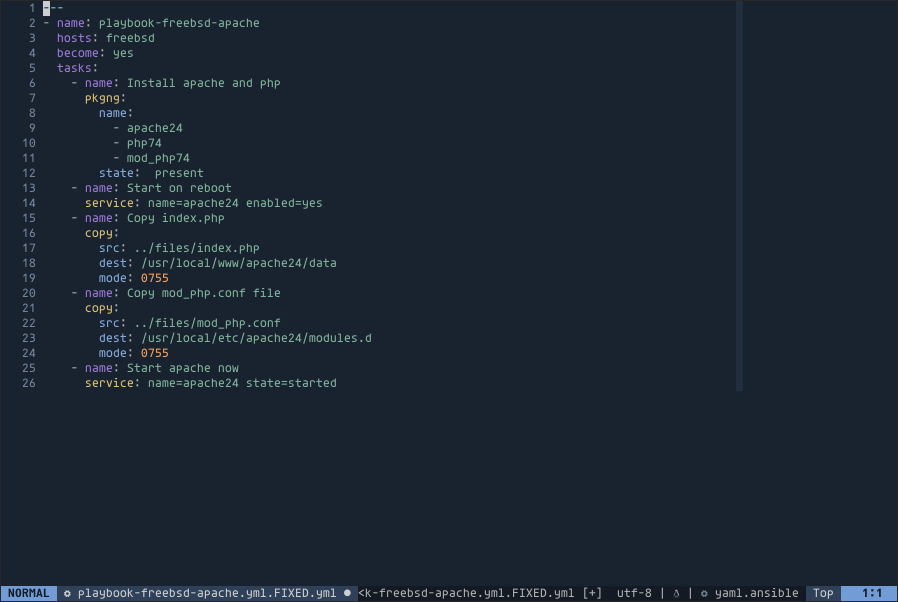
The same Ansible playbook after applying the suggestions.

neovim.YAML.fixed

Seems like fixed.

Now … lets revoke the GNU make(1) change.

~ # cd /usr/bin
/usr/bin # rm make
/usr/bin # mv make.FreeBSD make

I tried to submit this behavior as issue on LuaSnip page – https://github.com/L3MON4D3/LuaSnip/issues/1140 – but no reaction till now.

Alternatives

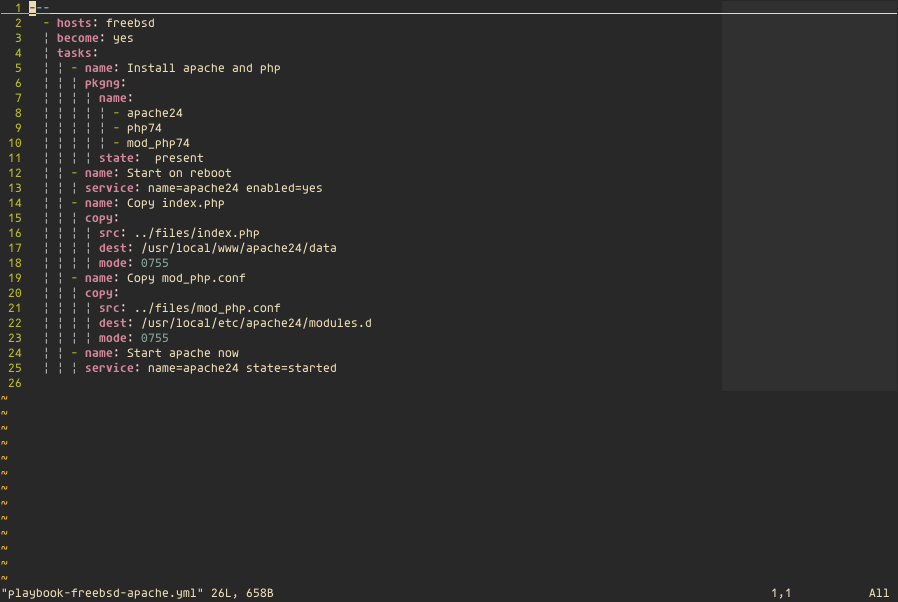
Before I got this config I tried to setup plain vim(1) as Ansible oriented setup … and to be honest it also works quite well for me. It’s also calmer as the Clippy is not available here and does not share its thoughts all the time.

vim.config

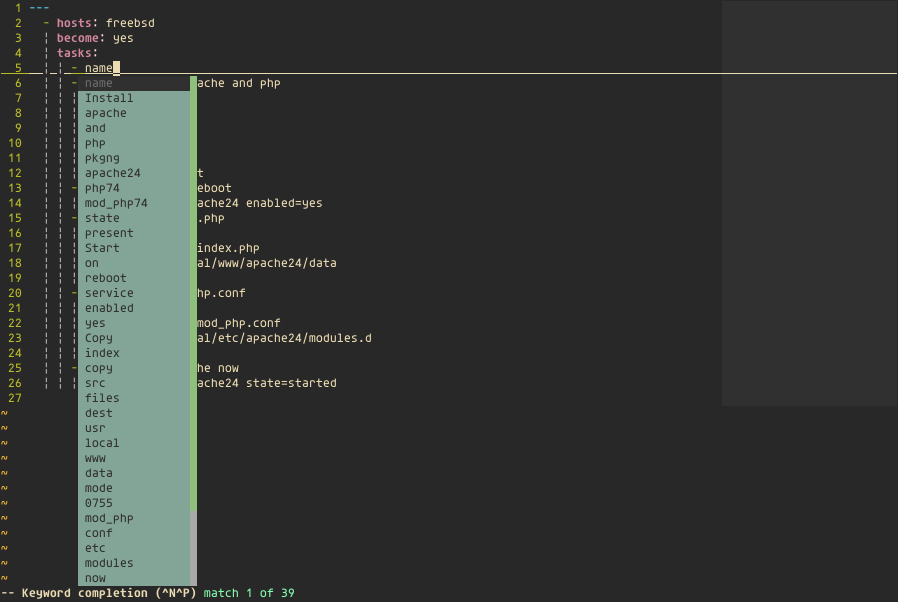
Seems pretty decent. The completion also works – but its limited and based on file contents. One may overcome that with opening TWO files at once each time to edit an Ansible playbook. The first file would be the one You want to edit – the second one would be prepared Ansible playbook that contains all modules and all options for these modules … of course the completion would not be per module aware but still – somewhat helpful. Below is simple vim(1) completion spawned by [CTRL]+[N] (also known as ^n in UNIX notation) shortcut in INSERT mode.

vim.config.completions

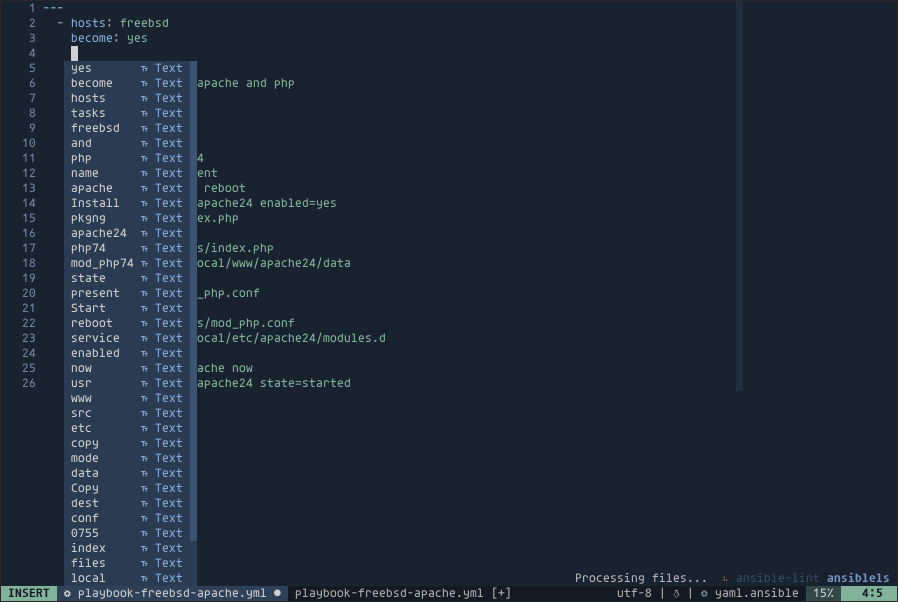
… and Neovim completion for comparison with the same shortcut used.

neovim.server.completion

It is very simple and basic vim(1) config w/o any additional modules or plugins – just plain ~/vimrc file.

% cat ~/.vimrc
" -- GENERAL --------------------------------------------------------------- "     
  syntax on                                                                            
  set nomodeline                                                                                                                                                
  set nocompatible                                                                                                                                              
  set backspace=indent,eol,start                                                                                                                                
  set autoindent                                                                                                                                                
  set nobackup                                                                                                                                                  
  set cursorline                                                                                                                                                
  set number                                                                                                                                                    
  set nowrap                                                                                                                                                    
  set history=32                                                                                                                                                
  set ignorecase                                                                                                                                                
  set showcmd                                                                                                                                                   
  set incsearch
  set hlsearch
  set tabstop=2
  set shiftwidth=2
  set softtabstop=2
  set shiftwidth=2
  set expandtab 
  set ruler
  set mouse-=a
  highlight ColorColumn ctermbg=0 guibg=blue
  let &colorcolumn="100,".join(range(100,999),",")
  let g:indentLine_char = 'Β¦' 

" -- DISABLE ~/.viminfo FILE ----------------------------------------------- "
  let skip_defaults_vim=1
  set viminfo=""

" -- COMMANDS -------------------------------------------------------------- "
  command WQ wq
  command Wq wq
  command W  w
  command Q  q

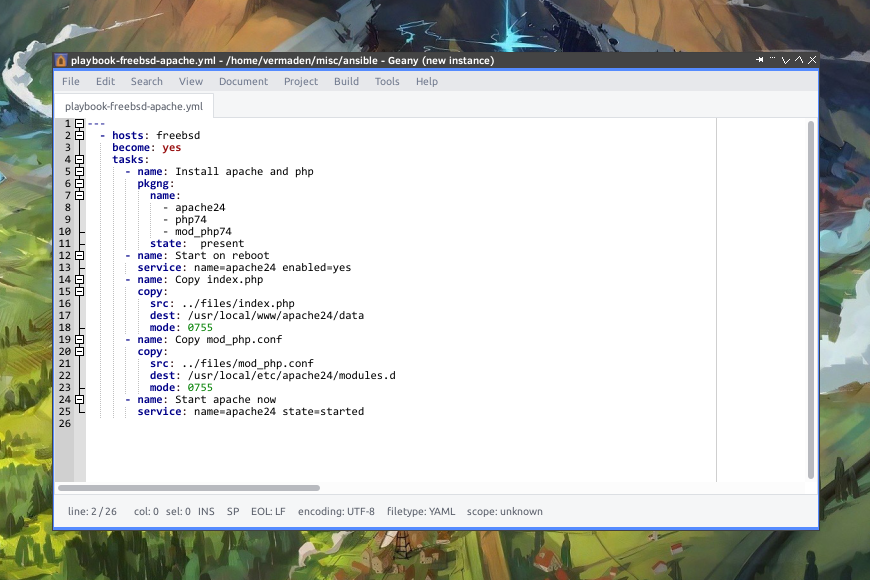
I am also a big fan of Geany IDE/editor (depending on how you configure it) and its also a good companion in the Ansible world.

geany.YAML

Summary

Hope that this Neovim config would help You in your daily Ansible work … and let me know it now and why πŸ™‚

Regards.

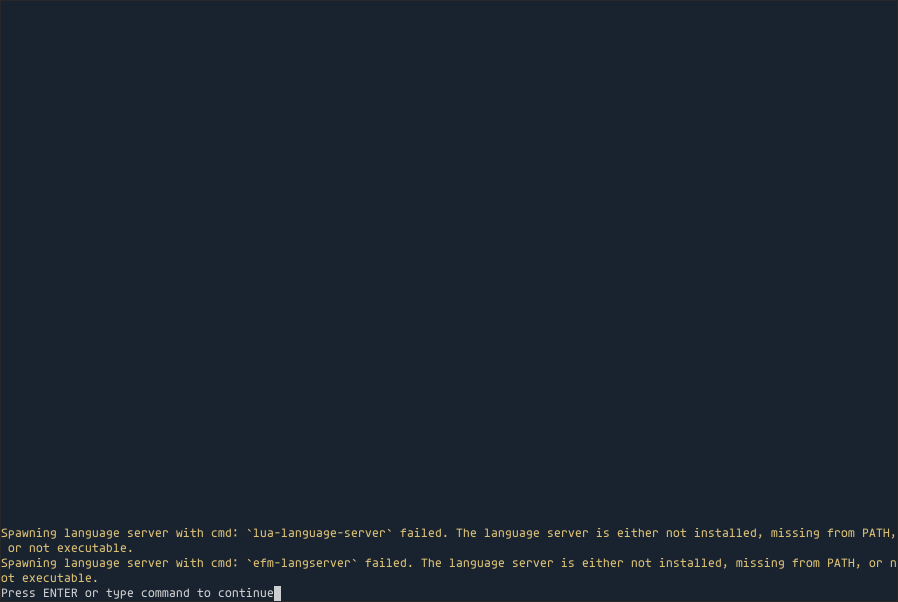
UPDATE 1 – Lua and General Purpose Language Servers

After I opened some Lua config in this nvim(1) config it welcomed me with this message below.

neovim.lua.efm

So I started to dig this topic … and as as result added both lua-language-server and efm-langserver servers to this config.

Lua Language Server

While initial research did not encouraged – https://github.com/LuaLS/lua-language-server/issues/2361 – I manged to omit the tests that are broken on FreeBSD … and the lua-language-server seems to just work.

Below are build/install instructions.

# pkg install ninja

% git clone https://github.com/LuaLS/lua-language-server.git

% cd lua-language-server

% :> 3rd/bee.lua/test/test.lua

% :> test.lua

% ./make.sh

% ./bin/lua-language-server
Content-Length: 120

{"jsonrpc":"2.0","method":"$/status/report","params":{"text":"Lua","tooltip":"Cached files: 0/0\nMemory usage: 2M"}}

Seems to work – will now copy to my preferred ${PATH} place – feel free to choose your own different place.

% cp bin/lua-language-server ~/scripts/bin

% rm -rf ~/lua-language-server

General Purpose Language Server

… and now the efm-langserver part.

# pkg install go gmake

% git clone https://github.com/mattn/efm-langserver.git

% cd efm-langserver

% gmake

% ./efm-langserver
2024/03/14 07:54:26 efm-langserver: no configuration file
2024/03/14 07:54:26 efm-langserver: reading on stdin, writing on stdout

Seems to work – now the install part as previously.

% cp efm-langserver ~/scripts/bin

% rm -rf ~/efm-langserver

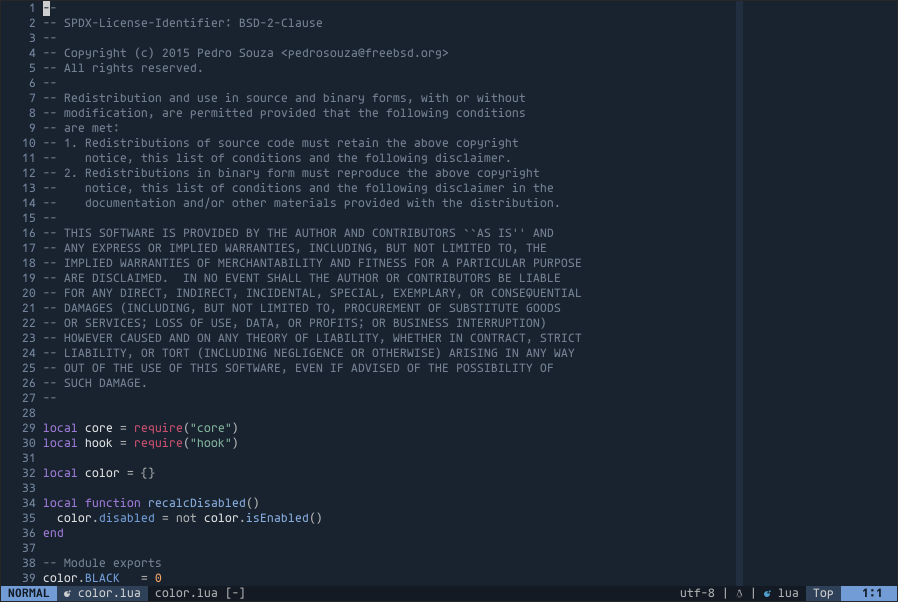
… and now Neovim starts and behaves properly.

neovim.lua.efm.works

Regards.

UPDATE 2 – Bash Language Server

I though that as Bash Language Server also exists – why also not add it to the setup?

Initially I was skeptic as there were no build instructions on the GitHub page … but that resolved even better then I though.

The only thing needed was the npm i -g bash-language-server command listed there … and it worked like a charm.

The above command of course will work after You have done all the other stuff in this guide above.

Here is how it looked in the xterm(1) terminal.

UPDATE2.bash.language.server

… and the commands to copy (for less typing).

w520 % doas npm i -g bash-language-server

added 33 packages in 3s

4 packages are looking for funding
  run `npm fund` for details

w520 % npm fund
bash-language-server

w520 % npm list -g --depth=0             
/usr/local/lib
β”œβ”€β”€ bash-language-server@5.1.2
β”œβ”€β”€ corepack@0.22.0
β”œβ”€β”€ npm@10.5.1
└── yarn@1.22.19

w520 % rehash                                                                                             

w520 % which bash-language-server 
/usr/local/bin/bash-language-server

w520 % /usr/local/bin/bash-language-server
Usage:
  bash-language-server start             Start listening on stdin/stdout
  bash-language-server -h, --help        Display this help and exit
  bash-language-server -v, --version     Print the version and exit

Environment variables:
  BASH_IDE_LOG_LEVEL                     Set the log level (default: info)

Further documentation: https://github.com/bash-lsp/bash-language-server
Regards.

UPDATE 3 – Ansible Language Server from npm(1) Packages

While having fun with Bash Language Server from previous UPDATE 2 I also found a way for easier and faster installation of the Ansible Language Server – by using npm(1) packages. I did not updated the entire article for it – as there is an older 1.1.0 version of it available – and the article focuses on the latest and supported one – but still – if You just need fast and easy a working Ansible Language Server and it does not have to be in the latest version – it will work more then well.

You will still need to install required packages by using pkg(8) manager.

w520 root ~ # pkg install -y \
                neovim       \
                npm          \
                node         \
                gcc13        \
                gmake

Then You can ‘just’ install the Ansible Language Server with npm(1) command.
w520 root ~ # npm i -g ansible-language-server 
npm WARN deprecated ansible-language-server@0.1.1-0: Package no longer supported.
Contact Support at https://www.npmjs.com/support for more info.

added 34 packages in 3s

4 packages are looking for funding
  run `npm fund` for details

And a few moments later its installed.

w520 vermaden ~ % npm list -g --depth=0                                                                 
/usr/local/lib
β”œβ”€β”€ ansible-language-server@0.1.1-0
β”œβ”€β”€ bash-language-server@5.1.2
β”œβ”€β”€ corepack@0.22.0
β”œβ”€β”€ npm@10.5.1
└── yarn@1.22.19
This is how it looked on my machine.
UPDATE3.ansible.language.server
Regards.
EOF

Keycloak Identity and Access Management on FreeBSD

Many times I wrote about FreeIPA/IDM – but I have one problem with it – its not currently possible to run FreeIPA on FreeBSD … so I searched for other open source alternatives and found Keycloak. What surprised me even more is that its even available in the FreeBSD Ports as net/keycloak port. So I wanted to check how it works/runs on FreeBSD … and this is exactly how this article happened.

keycloak.logo

My earlier FreeIPA/IDM attempts are below.

First – we will create new VM for our server. I will use sysutils/vm-bhyve-devel for Bhyve but feel free to use any other hypervisor (or even w/o one). To not waste time installing I will also use provided by FreeBSD project VM-IMAGE with ZFS enabled – FreeBSD-14.0-RELEASE-amd64-zfs.raw disk0.img

host # cat /vm/.templates/freebsd.conf
loader="bhyveload"
cpu=1
memory=256M
network0_type="virtio-net"
network0_switch="public"
disk0_type="nvme"
disk0_name="disk0.img"

host # vm create -t freebsd -c 2 -m 4G -s 10G keycloak

host # ls -lh /vm/keycloak
total 3402399
-rw-------  1 root wheel   10G Mar 10 10:47 disk0.img
-rw-r--r--  1 root wheel  209B Mar 10 07:20 keycloak.conf
-rw-r--r--  1 root wheel   96B Mar 10 07:22 vm-bhyve.log

host # cd /vm/keycloak

host # rm -f disk0.img

host # cp /vm/TEMPLATE/FreeBSD-14.0-RELEASE-amd64-zfs.raw disk0.img

host # truncate -s 10G disk0.img

host # vm start keycloak
Starting keycloak
  * found guest in /vm/keycloak
  * booting...

host # vm console keycloak

Type root as user and hit [ENTER] for empty password. Now the FreeBSD setup and needed packages.

root@freebsd:~ # :> ~/.hushlogin

root@freebsd:~ # cat << EOF > /etc/rc.conf
hostname="keycloak.lab.org"
ifconfig_DEFAULT="inet 10.1.1.211/24"
defaultrouter="10.1.1.1"
growfs_enable="YES"
zfs_enable="YES"
sshd_enable="YES"
postgresql_enable="YES"
keycloak_enable="YES"
keycloak_env="KEYCLOAK_ADMIN=admin KEYCLOAK_ADMIN_PASSWORD=password"
EOF

root@freebsd:~ # echo 10.1.1.211 keycloak.lab.org keycloak >> /etc/hosts

root@freebsd:~ # mkdir -p /usr/local/etc/pkg/repos

root@freebsd:~ # sed -e s/quarterly/latest/g /etc/pkg/FreeBSD.conf \
                   > /usr/local/etc/pkg/repos/FreeBSD.conf

root@freebsd:~ # echo nameserver 1.1.1.1 > /etc/resolv.conf

root@freebsd:~ # drill freebsd.org | grep '^[^;]'
freebsd.org.        799     IN      A       96.47.72.84

root@freebsd:~ # service netif restart

root@freebsd:~ # service routing restart

root@freebsd:~ # service hostname restart
Setting hostname: keycloak.lab.org.

root@keycloak:~ # passwd
Changing local password for root
New Password:
Retype New Password:

root@keycloak:~ # cat << EOF >> /etc/ssh/sshd_config
PermitRootLogin yes
UseDNS no
EOF

root@keycloak:~ # service sshd enable

root@keycloak:~ # service sshd start

root@keycloak:~ # exit

Now switch to ssh(1) for better experience – needed to paste larger blocks of configs/text.

host % ssh root@10.1.1.211

root@keycloak:~ # pkg install -y keycloak postgresql16-server postgresql16-client

root@keycloak:~ # service postgresql enable

root@keycloak:~ # service postgresql initdb

root@keycloak:~ # service postgresql start

root@keycloak:~ # sockstat -l4
USER     COMMAND    PID   FD  PROTO  LOCAL ADDRESS         FOREIGN ADDRESS      
postgres postgres    2265 7   tcp4   127.0.0.1:5432        *:*
root     syslogd      656 7   udp4   *:514                 *:*

root@keycloak:~ # su - postgres -c psql
psql (16.2)
Type "help" for help.

postgres=# ALTER USER postgres WITH PASSWORD 'password';

postgres=# CREATE DATABASE keycloak with encoding 'UTF8';
CREATE DATABASE

postgres=# GRANT ALL ON DATABASE keycloak TO postgres;
GRANT

postgres=# \q

root@keycloak:~ # cd /usr/local/share/java/keycloak/conf

root@keycloak:~ # openssl req -x509 -newkey rsa:2048 -keyout server.key.pem -out server.crt.pem -days 36500 -nodes -subj "/C=PL/ST=lodzkie/L=Lodz/O=Vermaden/OU=HR/CN=keycloak.lab.org"

root@keycloak:~ # chmod 600 server.crt.pem server.key.pem

root@keycloak:~ # chown keycloak:keycloak server.crt.pem server.key.pem

root@keycloak:~ # cat << EOF > /usr/local/share/java/keycloak/conf/keycloak.conf               
db=postgres
db-username=postgres
db-password=password
db-url=jdbc:postgresql://localhost:5432/keycloak
hostname-strict-https=true
hostname-url=https://keycloak.lab.org:8443/
hostname-admin-url=https://keycloak.lab.org:8443/
https-certificate-file=/usr/local/share/java/keycloak/conf/server.crt.pem
https-certificate-key-file=/usr/local/share/java/keycloak/conf/server.key.pem
proxy=edge
EOF

root@keycloak:~ # echo quarkus.transaction-manager.enable-recovery=true \
                    > /usr/local/share/java/keycloak/conf/quarkus.properties

root@keycloak:~ # chown keycloak:keycloak /usr/local/share/java/keycloak/conf/quarkus.properties

root@keycloak:~ # service keycloak enable

root@keycloak:~ # service keycloak build
The following run time non-cli properties were found, but will be ignored during build time: kc.db-url, kc.db-username, kc.db-password, kc.hostname-url, kc.hostname-admin-url, kc.hostname-strict-https, kc.https-certificate-file, kc.https-certificate-key-file, kc.proxy
Updating the configuration and installing your custom providers, if any. Please wait.
2024-03-10 09:01:17,701 INFO  [io.quarkus.deployment.QuarkusAugmentor] (main) Quarkus augmentation completed in 29796ms
Server configuration updated and persisted. Run the following command to review the configuration:

        kc.sh show-config

root@keycloak:~ # /usr/local/share/java/keycloak/bin/kc.sh show-config
Current Mode: production
Current Configuration:
        kc.config.built =  true (SysPropConfigSource)
        kc.db =  postgres (PropertiesConfigSource)
        kc.db-password =  ******* (PropertiesConfigSource)
        kc.db-url =  jdbc:postgresql://localhost:5432/keycloak (PropertiesConfigSource)
        kc.db-username =  postgres (PropertiesConfigSource)
        kc.hostname-admin-url =  https://keycloak.lab.org:8443/ (PropertiesConfigSource)
        kc.hostname-strict-https =  true (PropertiesConfigSource)
        kc.hostname-url =  https://keycloak.lab.org:8443/ (PropertiesConfigSource)
        kc.https-certificate-file =  /usr/local/share/java/keycloak/conf/server.crt.pem (PropertiesConfigSource)
        kc.https-certificate-key-file =  /usr/local/share/java/keycloak/conf/server.key.pem (PropertiesConfigSource)
        kc.log-console-output =  default (PropertiesConfigSource)
        kc.log-file =  ${kc.home.dir:default}${file.separator}data${file.separator}log${file.separator}keycloak.log (PropertiesConfigSource)
        kc.optimized =  true (PersistedConfigSource)
        kc.proxy =  edge (PropertiesConfigSource)
        kc.spi-hostname-default-admin-url =  https://keycloak.lab.org:8443/ (PropertiesConfigSource)
        kc.spi-hostname-default-hostname-url =  https://keycloak.lab.org:8443/ (PropertiesConfigSource)
        kc.spi-hostname-default-strict-https =  true (PropertiesConfigSource)
        kc.version =  23.0.6 (SysPropConfigSource)

We now have needed packages installed. Self signed certificate for HTTPS generated. PostgreSQL database and Keycloak configured. We will need small patch to enable passing env(1) variables at the Keycloak daemon start. It will allow to use keycloak_env at the /etc/rc.conf main FreeBSD config file. This is needed to configure the initial admin user as sated in the Keycloak documentation.

keycloak-0-initial-admin-user

Now back to the patch.

root@keycloak:~ # cat /root/keycloak.patch
--- /root/keycloak      2024-03-08 11:46:21.847315000 +0000
+++ /usr/local/etc/rc.d/keycloak        2024-03-08 11:47:22.027102000 +0000
@@ -28,6 +28,7 @@
 : ${keycloak_enable:=NO}
 : ${keycloak_user:=keycloak}
 : ${keycloak_group:=keycloak}
+: ${keycloak_env:=""}
 : ${keycloak_flags="start"}
 : ${keycloak_java_home="/usr/local/openjdk17"}
 
@@ -54,6 +55,7 @@
 
        echo "Starting keycloak."
         ${command} ${command_args} \
+                env ${keycloak_env} \
                 /usr/local/share/java/keycloak/bin/kc.sh \
                 ${keycloak_flags}
 }

root@keycloak:~ # cd /usr/local/etc/rc.d

root@keycloak:/usr/local/etc/rc.d # patch < /root/keycloak.patch
Hmm...  Looks like a unified diff to me...
The text leading up to this was:
--------------------------
|--- /root/keycloak      2024-03-08 11:46:21.847315000 +0000
|+++ /usr/local/etc/rc.d/keycloak        2024-03-08 11:47:22.027102000 +0000
--------------------------
Patching file keycloak using Plan A...
Hunk #1 succeeded at 28.
Hunk #2 succeeded at 55 with fuzz 2.
Hmm...  Ignoring the trailing garbage.
done

Now we will start Keycloak. Its possible to track its startup process in the /var/log/keycloak/keycloak.out file. Below You will find last 4 lines that you want to see – with Keycloak 23.0.6 on JVM (powered by Quarkus 3.2.10.Final) started in 19.251s. message πŸ™‚

root@keycloak:~ # service keycloak start

root@keycloak:~ # tail -f /var/log/keycloak/keycloak.out
(...)
2024-03-10 09:12:15,550 INFO  [io.quarkus] (main) Keycloak 23.0.6 on JVM (powered by Quarkus 3.2.10.Final) started in 19.251s. Listening on: http://0.0.0.0:8080 and https://0.0.0.0:8443
2024-03-10 09:12:15,551 INFO  [io.quarkus] (main) Profile prod activated. 
2024-03-10 09:12:15,552 INFO  [io.quarkus] (main) Installed features: [agroal, cdi, hibernate-orm, jdbc-h2, jdbc-mariadb, jdbc-mssql, jdbc-mysql, jdbc-oracle, jdbc-postgresql, keycloak, logging-gelf, micrometer, narayana-jta, reactive-routes, resteasy-reactive, resteasy-reactive-jackson, smallrye-context-propagation, smallrye-health, vertx]
2024-03-10 09:12:16,303 INFO  [org.keycloak.services] (main) KC-SERVICES0009: Added user 'admin' to realm 'master'
[CTRL]-[C]

root@keycloak:~ # top -ab -o res 10
last pid:  3067;  load averages:  0.50,  0.47,  0.42  up 0+02:56:35    09:19:04
18 processes:  1 running, 17 sleeping
CPU:  1.4% user,  0.0% nice,  0.4% system,  0.2% interrupt, 98.0% idle
Mem: 299M Active, 176M Inact, 3247M Wired, 264K Buf, 202M Free
ARC: 2965M Total, 902M MFU, 1982M MRU, 4096B Anon, 12M Header, 50M Other
     2766M Compressed, 2934M Uncompressed, 1.06:1 Ratio
Swap: 1024M Total, 1024M Free

  PID USERNAME    THR PRI NICE   SIZE    RES STATE    C   TIME    WCPU COMMAND
 2981 keycloak     41  68    0  1425M   299M uwait    1   0:37   0.00% /usr/local/openjdk17/bin/java -Dkc.config.built=true -Xms64m -Xmx512m -XX:MetaspaceSize=96M -XX:MaxMetaspaceSize=256m -Dfile.encoding=UTF-8 -Dsun.stdout.encoding=UTF-8 -Dsun.err.encoding=UTF-8 -Dstdout.encoding=UTF-8 -Dstderr.encoding=UTF-8 -XX:+ExitOnOutOfMemoryError -Djava.security.egd=file:/dev/urandom -XX:+UseParallelGC -XX:MinHeapFreeRatio=10 -XX:MaxHeapFreeRatio=20 -XX:GCTimeRatio=4 -XX:AdaptiveSizePolicyWeight=90 -XX:FlightRecorderOptions=stackdepth=512 --add-opens=java.base/java.util=ALL-UNNAMED --add-opens=java.base/java.util.concurrent=ALL-UNNAMED --add-opens=java.base/java.security=ALL-UNNAMED -Dkc.home.dir=/usr/local/share/java/keycloak/bin/.. -Djboss.server.config.dir=/usr/local/share/java/keycloak/bin/../conf -Djava.util.logging.manager=org.jboss.logmanager.LogManager -Dquarkus-log-max-startup-records=10000 -cp /usr/local/share/java/keycloak/bin/../lib/quarkus-run.jar io.quarkus.bootstrap.runner.QuarkusEntryPoint start
 3063 postgres      1  24    0   181M    49M kqread   1   0:00   0.00% postgres: postgres keycloak 127.0.0.1(21936) idle (postgres)
 2266 postgres      1  20    0   178M    48M kqread   1   0:00   0.00% postgres: checkpointer  (postgres)
 3062 postgres      1  20    0   181M    47M kqread   1   0:00   0.00% postgres: postgres keycloak 127.0.0.1(22820) idle (postgres)
 2270 postgres      1  20    0   179M    31M kqread   0   0:00   0.00% postgres: autovacuum launcher  (postgres)
 2271 postgres      1  20    0   179M    31M kqread   0   0:00   0.00% postgres: logical replication launcher  (postgres)
 2269 postgres      1  20    0   178M    31M kqread   0   0:00   0.00% postgres: walwriter  (postgres)
 2267 postgres      1  20    0   178M    31M kqread   0   0:00   0.00% postgres: background writer  (postgres)
 2265 postgres      1  20    0   178M    30M kqread   0   0:00   0.00% /usr/local/bin/postgres -D /var/db/postgres/data16
 2420 root          1  20    0    22M    11M select   1   0:01   0.00% sshd: root@pts/0 (sshd)

Add also on the host system the IP information to the /etc/hosts file and check https://keycloak.lab.org:8443 in your browser.

host # echo 10.1.1.211 keycloak.lab.org keycloak >> /etc/hosts

host % firefox 'https://keycloak.lab.org:8443'

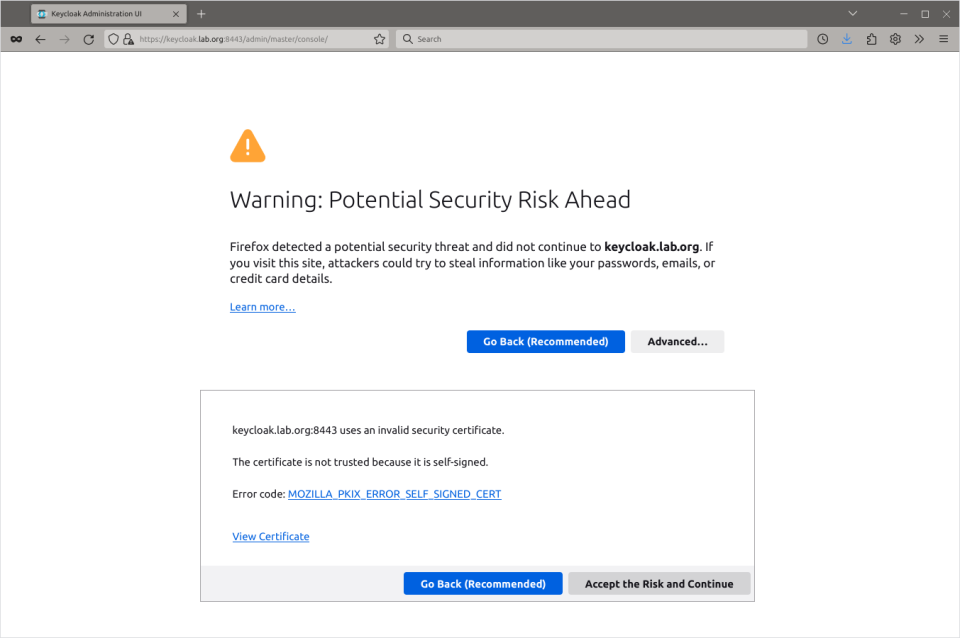
As we use self signed certificate You will be warned by potential security risk. Hit ‘Advanced’ and then ‘Accept the Risk and Continue’ buttons.

keycloak-1-self-cert

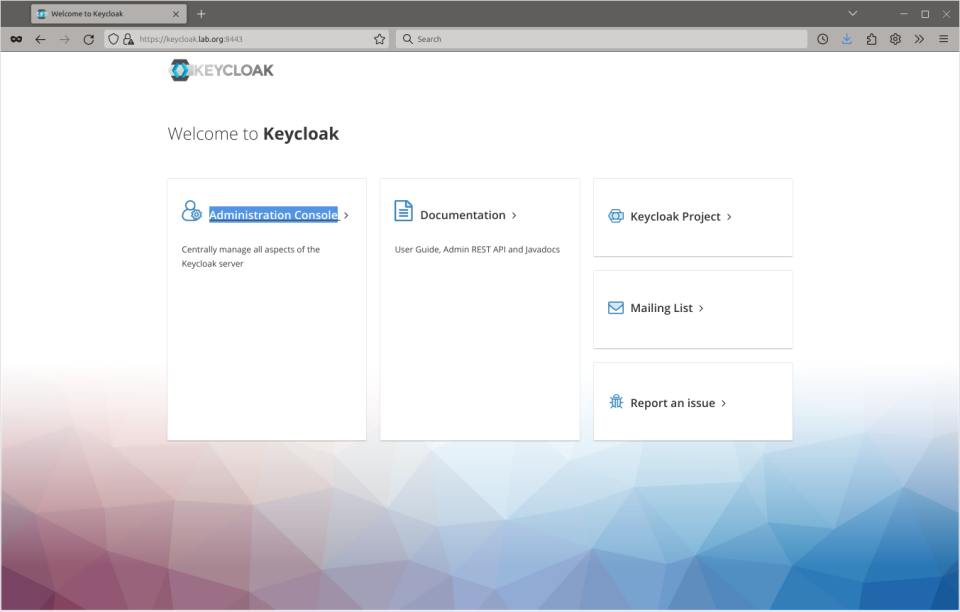
Next click the Administration Console link.

keycloak-2-main-page

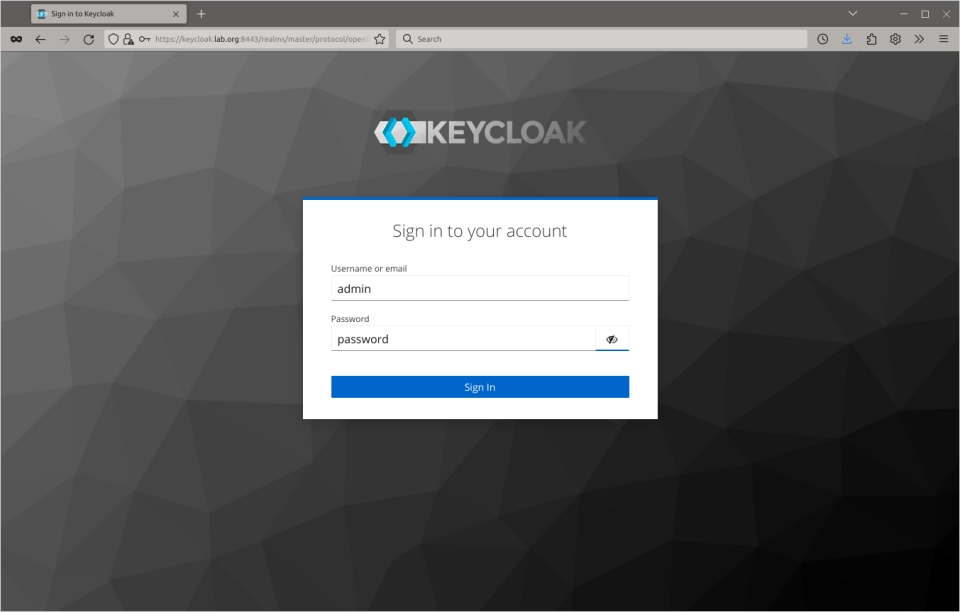
Login with admin and password (or your password if You used other one).

keycloak-3-admin-login

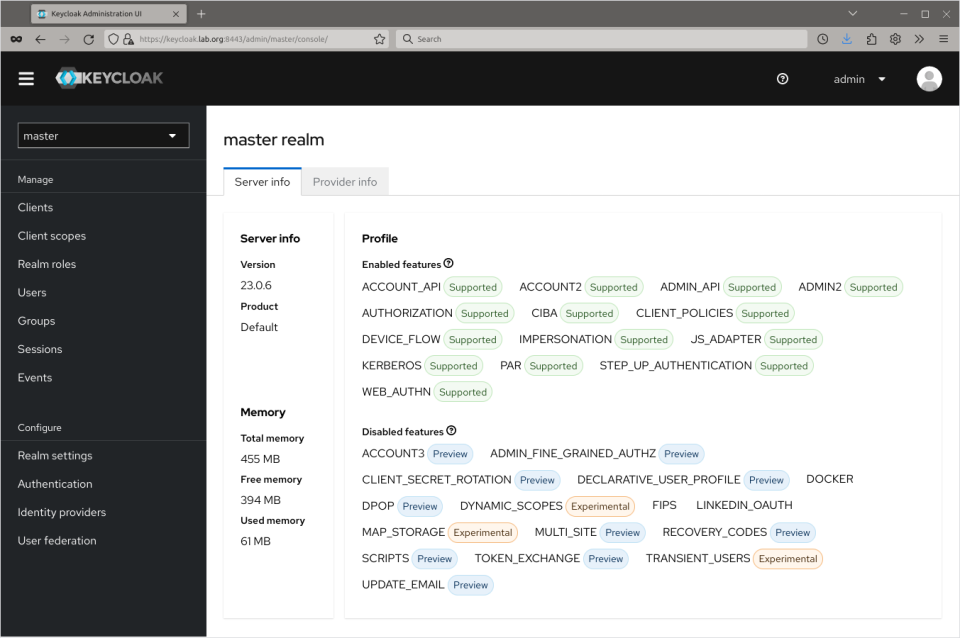
… and You can now create your new realm, add users, create groups etc. You have fully working Keycloak in production mode.

keycloak-4-admin-console

Now … like with FreeIPA/IDM – it would be nice to attach FreeBSD to it so one could login to FreeBSD system with Keycloak user … not so fast unfortunately. To make such things be possible You need a PAM module for Keycloak … and I was not able to find one that will work on FreeBSD … and the Keycloak package also comes without one.

root@keycloak:~ # pkg info -l keycloak | grep -i pam
root@keycloak:~ # 

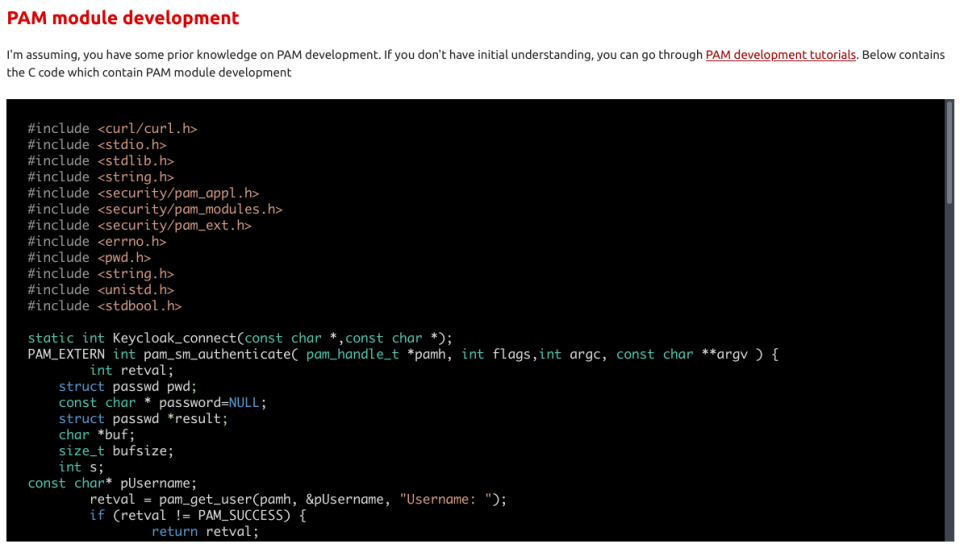
After grepping the Internet I found two solutions … but only for Linux.

One of them was a step by step Keycloak PAM Module Development Tutorial guide which showed you how to write such PAM module.

pam-dev

The other one was Keycloak SSH PAM project on GitHub which provided more or less ready solution for Linux systems.

pam-kc

So while with FreeIPA/IDM we had server on Linux that allowed to connect FreeBSD systems to it – we now hat Keycloak server hosted on FreeBSD that allows connecting Linux systems πŸ™‚

Not much of an improvement – but maybe someone will find that guide useful.

EOF

Connect FreeBSD 14.0-STABLE to FreeIPA/IDM

In the open source world everything lives/evolves/changes. This is why the new version of connecting latest FreeBSD 14.0-STABLE system to the FreeIPA/IDM is needed. One of the things that changed is that security/sssd is now deprecated and security/sssd2 is its successor. Also new version of ports-mgmt/poudriere-devel is available – with needed fixes already merged – and also with new restyled web interface.

FreeIPA-logo

I already messed with that topic several times in the past:

This article will try to address and contain all steps needed – including setting up the FreeIPA/IDM server and including the Poudriere setup. Below You will find Table of Contents for this article. All of these systems will be Bhyve virtual machines.

  • FreeIPA/IDM Server – Installation
  • FreeIPA/IDM Server – Configuration
  • Poudriere Server – Setup
  • Poudriere Server – Build FreeIPA/IDM Client Packages
  • Poudriere Server – Update Repo/Packages
  • FreeBSD 14.0-STABLE Client – Setup
  • FreeBSD 14.0-STABLE Client – Debug Commands
  • Summary

The FreeBSD project recently started to provide ZFS based VM images … but unfortunately only for 14.0-RELEASE and they are not created for 14.0-STABLE or 15-CURRENT versions – so we will use the UFS based ones for both Poudriere server and FreeBSD FreeIPA/IDM client. For the record – https://download.freebsd.org/snapshots/VM-IMAGES/14.0-STABLE/amd64/Latest/ – they are available here.

Some note about commands run in this article – different colors for various hosts.

host # top -ba -o res 3                                  // executed on the host system
[root@idm ~]# yum update -y                              // executed on IDM server
root@freebsd:~ # geom disk list                          // executed on Poudriere server
root@poudriere-devel-14-stable:~ # poudriere ports -l   Β // executed on Poudriere server
root@idm-client:~ # hostname idm-client.lab.org          // executed on IDM client (FreeBSD)
  important information                                  // marked as GREEN color

For the FreeIPA/IDM server I have used Alma Linux RHEL clone – but we know that Rocky Linux or Oracle Linux would also work well. We will use three systems in this article.

FreeIPA/IDM server – with idm.lab.org hostname.

      OS: Alma Linux
      IP: 10.0.0.200/24
      GW: 10.0.0.1
  domain: lab.org
   realm: LAB.ORG
hostname: idm.lab.org

Poudriere builder system – with poudriere-devel-14-stable.lab.org hostname.

      OS: FreeBSD 14.0-STABLE
      IP: 10.0.0.124/24
      GW: 10.0.0.1
     DNS: 1.1.1.1
  domain: -
   realm: -
hostname: poudriere-devel-14-stable.lab.org

FreeBSD client for FreeIPA/IDM system – with idm-client.lab.org hostname.

      OS: FreeBSD 14.0-STABLE
      IP: 10.0.0.233/24
      GW: 10.0.0.1
     DNS: 10.0.0.200
  domain: lab.org
   realm: LAB.ORG
hostname: idm-client.lab.org

I really like the FreeBSD Bhyve memory ballooning – which means the guest VMs only take as much RAM as guest OS allocated and not 12 GB RAM as is configured.

host # vm list | grep -e STATE -e Running
NAME                       DATASTORE  LOADER     CPU  MEMORY  VNC           AUTO     STATE
idm                        default    uefi       2    4g      0.0.0.0:5900  No       Running (25284)
idm-client-14-stable       default    bhyveload  2    1g      -             No       Running (29517)
poudriere-devel-14-stable  default    bhyveload  8    12g     -             Yes [1]  Running (23419)

host # top -ba -o res 3
last pid:  1290;  load averages:  0.09,  0.09,  0.08  up 0+00:47:08    07:05:20
32 processes:  1 running, 31 sleeping
CPU:  0.0% user,  0.0% nice,  0.6% system,  0.0% interrupt, 99.4% idle
Mem: 2983M Active, 463M Inact, 1060M Wired, 56K Buf, 27G Free
ARC: 619M Total, 115M MFU, 497M MRU, 32K Anon, 2346K Header, 4231K Other
     551M Compressed, 1080M Uncompressed, 1.96:1 Ratio
Swap: 4096M Total, 4096M Free

  PID USERNAME    THR PRI NICE   SIZE    RES STATE    C   TIME    WCPU COMMAND
25284 root         13  20    0  4159M  1168M kqread  13   3:12   1.27% bhyve: idm (bhyve)
23419 root         19  20    0    12G   109M kqread  15   0:27   0.00% bhyve: poudriere-devel-14-stable (bhyve)
29517 root         13  20    0  1075M    77M kqread   5   0:20   0.00% bhyve: idm-client-14-stable (bhyve)

As you can see I am using sysutils/vm-bhyve-devel for the Bhyve management – but You may as well use bare /usr/share/examples/bhyve/vmrun.sh instead … or even entirely different hypervisor like KVM on Linux or VirtualBox on Windows – it does not matter as long as machines have access to the Internet and they see each other in the same LAN network.

FreeIPA/IDM Server – Installation

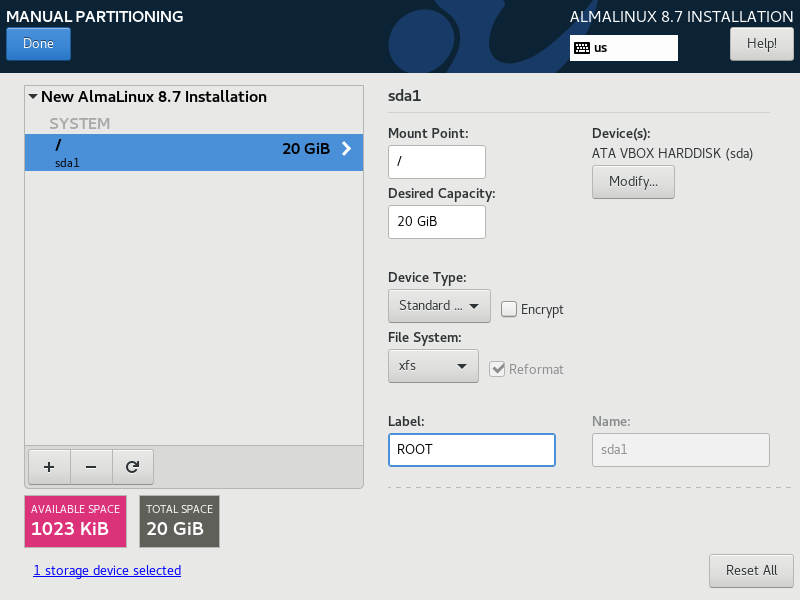
I installed the Alma Linux some time ago – so the screenshot shows older 8.7 version.

LAB.IDM.Server.ROOT

After reboot its network is configured as shown below.

[root@idm ~]# cat /etc/sysconfig/network-scripts/ifcfg-enp0s3
TYPE=Ethernet
PROXY_METHOD=none
BROWSER_ONLY=no
BOOTPROTO=none
DEFROUTE=yes
IPV4_FAILURE_FATAL=no
IPV6INIT=no
IPV6_DEFROUTE=yes
IPV6_FAILURE_FATAL=no
IPV6_ADDR_GEN_MODE=eui64
NAME=enp0s3
UUID=120efe1f-3cb6-40cf-8aad-b17066c08543
DEVICE=enp0s3
ONBOOT=yes
IPADDR=10.0.0.200
PREFIX=24
GATEWAY=10.0.0.1
DNS1=1.1.1.1
IPV6_DISABLED=yes

Some more basic setup commands below.


[root@idm ~]# echo 10.0.0.200 idm.lab.org idm >> /etc/hosts

[root@idm ~]# cat << EOF >> /etc/sysctl.conf
# DISABLE IPv6 FOR MAIN enp0s3 INTERFACE
net.ipv6.conf.enp0s3.disable_ipv6=1
EOF

[root@idm ~]# hostnamectl set-hostname idm.lab.org

[root@idm ~]# timedatectl set-timezone Europe/Warsaw

[root@idm ~]# timedatectl set-local-rtc 0

[root@idm ~]# yum update -y

[root@idm ~]# reboot

Continuation after reboot.

[root@idm ~]# yum module enable idm:DL1 -y

[root@idm ~]# yum distro-sync -y

[root@idm ~]# yum install -y bind-utils chrony nc

[root@idm ~]# ipa-server-install                        \
                    --domain lab.org                    \
                    --realm LAB.ORG                     \
                    --reverse-zone=0.0.10.in-addr.arpa. \
                    --allow-zone-overlap                \
                    --no-forwarders                     \
                    --ntp-pool pool.ntp.org             \
                    --setup-dns                         \
                    --ds-password    password           \
                    --admin-password password           \
                    --unattended

[root@idm ~]# ipactl status
Directory Service: RUNNING
krb5kdc Service: RUNNING
kadmin Service: RUNNING
named Service: RUNNING
httpd Service: RUNNING
ipa-custodia Service: RUNNING
pki-tomcatd Service: RUNNING
ipa-otpd Service: RUNNING
ipa-dnskeysyncd Service: RUNNING
ipa: INFO: The ipactl command was successful

[root@idm ~]# systemctl list-unit-files | grep ipa | grep service
ipa-ccache-sweep.service                   static   
ipa-custodia.service                       disabled 
ipa-dnskeysyncd.service                    disabled 
ipa-healthcheck.service                    disabled 
ipa-ods-exporter.service                   disabled 
ipa-otpd@.service                          static   
ipa.service                                enabled

[root@idm ~]# systemctl enable --now httpd

[root@idm ~]# systemctl list-unit-files | grep httpd.service
httpd.service                              enabled  

[root@idm ~]# systemctl disable firewalld

[root@idm ~]# systemctl stop    firewalld

[root@idm ~]# cat /etc/sssd/sssd.conf
[domain/lab.org]
  ipa_server_mode                = True
  ipa_server                     = idm.lab.org
  ipa_hostname                   = idm.lab.org
  ipa_domain                     = lab.org
  id_provider                    = ipa
  auth_provider                  = ipa
  chpass_provider                = ipa
  access_provider                = ipa
  cache_credentials              = True
  ldap_tls_cacert                = /etc/ipa/ca.crt
  krb5_store_password_if_offline = True

[sssd]
  services = nss, pam, ifp, ssh, sudo
  domains  = lab.org

[nss]
  homedir_substring = /home
  memcache_timeout  = 600

[pam]

[sudo]

[autofs]

[ssh]

[pac]

[ifp]
  allowed_uids = ipaapi, root

[session_recording]

If you would like to see what a successful ipa-server-install(8) looks like – you can take a look HERE.

We have our FreeIPA/IDM server installed.

You will need to add 10.0.0.200 as idm.lab.org to your /etc/hosts on the system where you will be using the browser (or to your local DNS).

host # grep idm /etc/hosts
10.0.0.200  idm.lab.org  idm

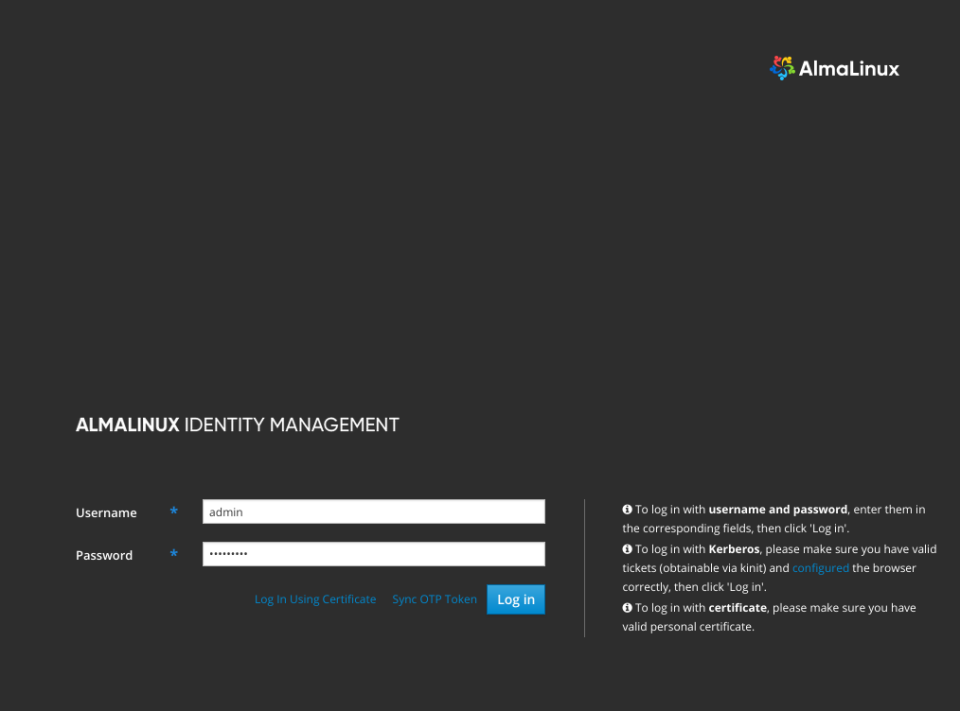
You can login to it typing https://10.0.0.200 at your local browser – you will be redirected to https://idm.lab.org/ipa/ui/ immediately and you will see the login page as shown below.

FreeIPA-login-1

You may login with admin username and the password you specified for the ipa-server-install(8) command (or password if you just copy pasted that command πŸ™‚

FreeIPA/IDM Server – Configuration

… and after logging in I created a regular vermaden user as shown below.

FreeIPA-login-2

Keep in mind to reset your password by connecting to FreeIPA/IDM server.

host # ssh -l vermaden 10.0.0.200
(vermaden@10.0.0.200) Password:
(vermaden@10.0.0.200) Password expired. Change your password now.
Current Password:
(vermaden@10.0.0.200) New password:
(vermaden@10.0.0.200) Retype new password:
Last failed login: Wed Oct 19 00:47:57 CEST 2022 from 10.0.0.33 on ssh:notty
There was 1 failed login attempt since the last successful login.

[vermaden@idm /]$ w
 12:58:50 up  6:39,  1 user,  load average: 0.02, 0.05, 0.00
USER     TTY      FROM             LOGIN@   IDLE   JCPU   PCPU WHAT
vermaden pts/0    10.0.0.4         12:58    1.00s  0.04s  0.01s w

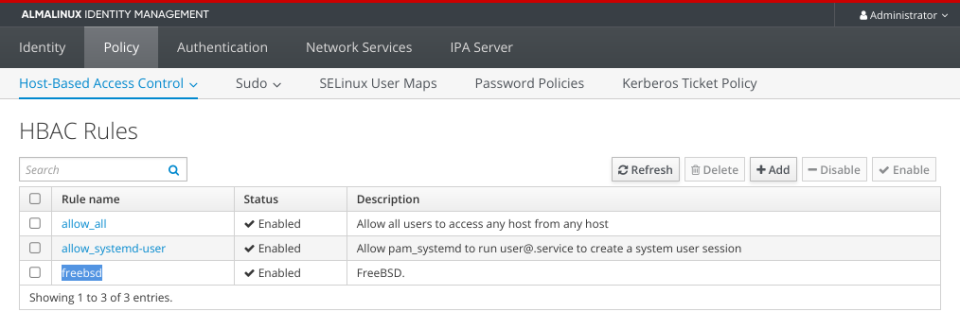
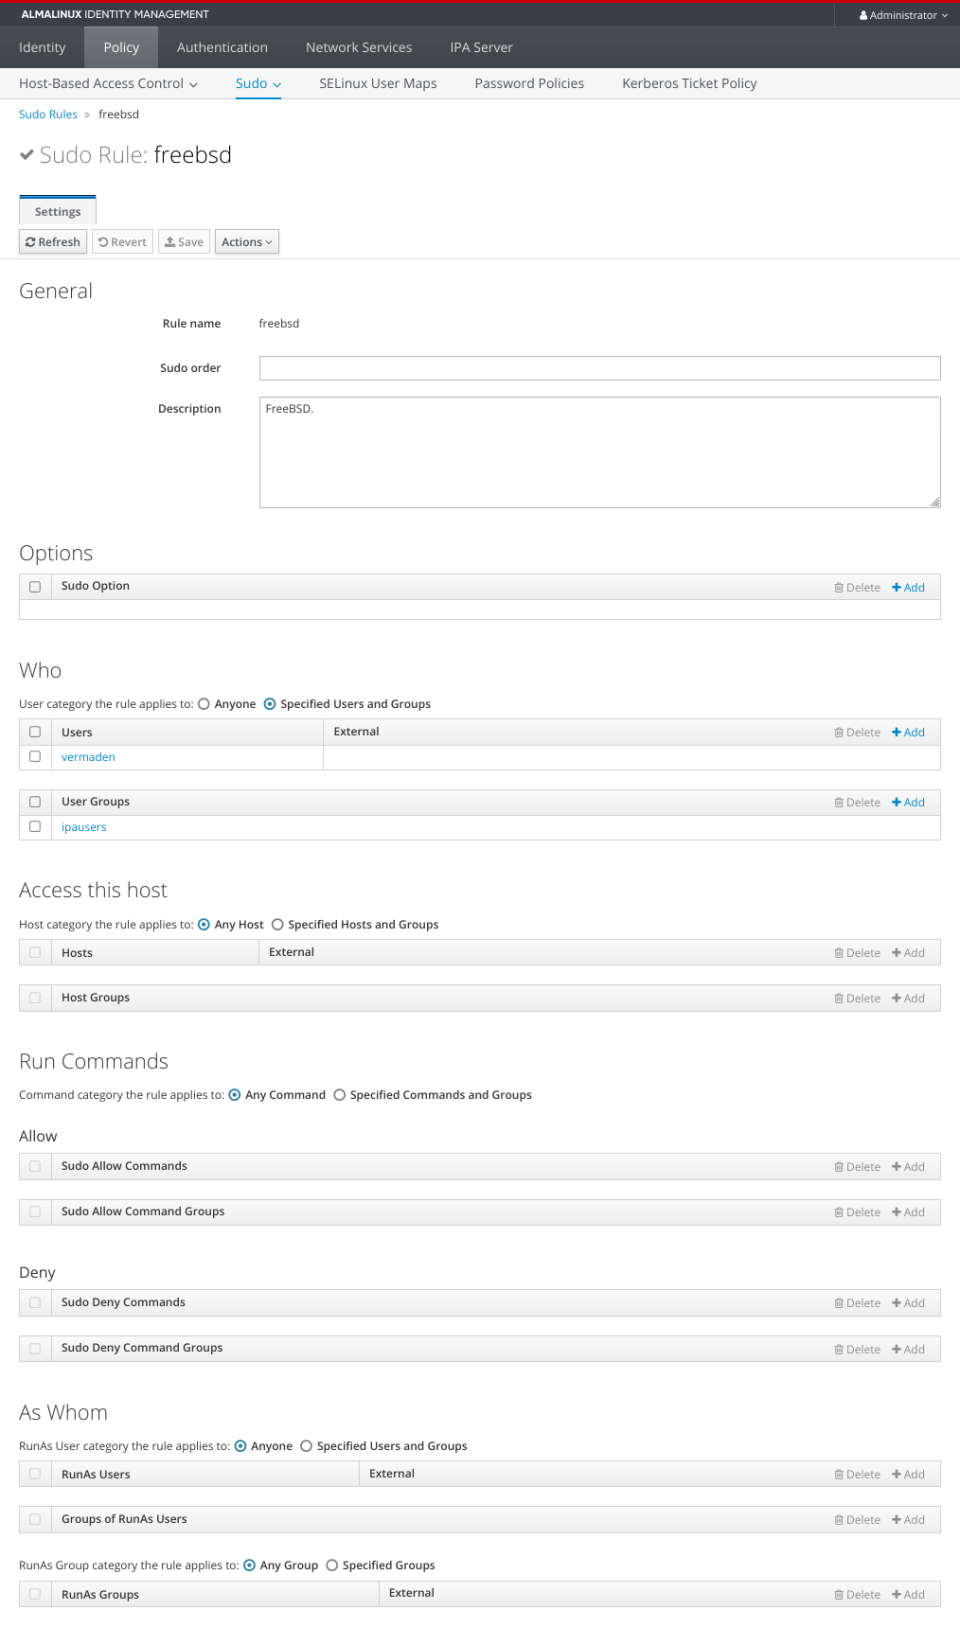
The more important configuration is in HBAC and Sudo rules.

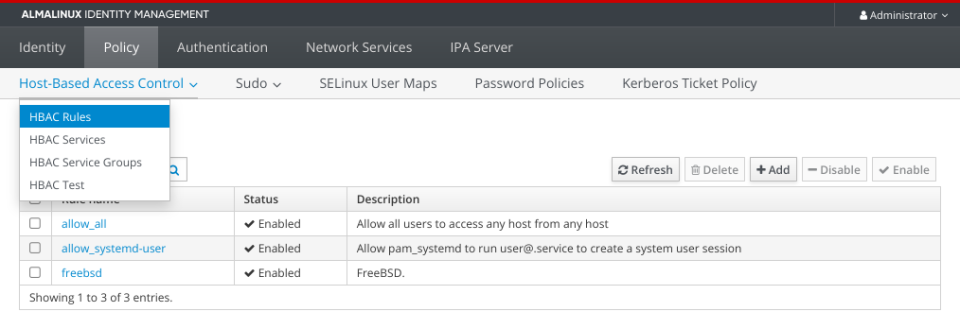
Here are HBAC related settings.

idm-1-hbac-rules-menu

idm-2-hbac-rules-menu

idm-3-hbac-rules-freebsd-details

… and the Sudo part.

idm-4-sudo-rules-menu

idm-5-sudo-rules-freebsd

idm-6-sudo-rules-freebsd-details

Poudriere Server – Setup

One note for the FreeBSD setups below – please use /bin/sh shell (default for root since 14.0-RELEASE) for the commands … or zsh(1) for example … or other POSIX compatible shell. Some of these commands may not work properly on ‘C’ based shells or in fish(1) shell.

This is the template I used for Bhyve VMs.

host # cat /vm/.templates/freebsd.conf 
loader="bhyveload"
cpu=1
memory=256M
network0_type="virtio-net"
network0_switch="public"
disk0_type="nvme"
disk0_name="disk0.img"

We will now create poudriere-devel-14-stable VM for Poudriere server.

host # vm create -t freebsd -s 20g -m 12g -c 8 poudriere-devel-14-stable

host # du -sgA /vm/poudriere-devel-14-stable/*
20      /vm/poudriere-devel-14-stable/disk0.img
1       /vm/poudriere-devel-14-stable/poudriere-devel-14-stable.conf
1       /vm/poudriere-devel-14-stable/vm-bhyve.log

Now we will replace disk0.img with Latest FreeBSD 14.0-STABLE snapshot.

host # fetch -o - 'https://download.freebsd.org/snapshots/VM-IMAGES/14.0-STABLE/amd64/Latest/FreeBSD-14.0-STABLE-amd64.raw.xz' \
         | xz -d > /vm/poudriere-devel-14-stable/disk0.img

host # file -b /vm/poudriere-devel-14-stable/disk0.img 
DOS/MBR boot sector; partition 1 : ID=0xee, start-CHS (0x0,0,2), end-CHS (0x3ff,255,63), startsector 1, 12649684 sectors

host # du -sgA /vm/poudriere-devel-14-stable/*
7       /vm/poudriere-devel-14-stable/disk0.img
1       /vm/poudriere-devel-14-stable/poudriere-devel-14-stable.conf
1       /vm/poudriere-devel-14-stable/vm-bhyve.log

We now need to add additional disk1.img disk to for ZFS pool.

host # truncate -s 10G /vm/poudriere-devel-14-stable/disk0.img

host # vm add -d disk -t file -s 100g poudriere-devel-14-stable

host # vm info poudriere-devel-14-stable | grep -A 16 virtual-disk
  virtual-disk
    number: 0
    device-type: file
    emulation: nvme
    options: -
    system-path: /vm/poudriere-devel-14-stable/disk0.img
    bytes-size: 10737418240 (10.000G)
    bytes-used: 1720046592 (1.601G)

  virtual-disk
    number: 1
    device-type: file
    emulation: nvme
    options: -
    system-path: /vm/poudriere-devel-14-stable/disk1.img
    bytes-size: 107374182400 (100.000G)
    bytes-used: 1024 (1.000K)

host # du -sgA /vm/poudriere-devel-14-stable/*
10      /vm/poudriere-devel-14-stable/disk0.img
100     /vm/poudriere-devel-14-stable/disk1.img
1       /vm/poudriere-devel-14-stable/poudriere-devel-14-stable.conf
1       /vm/poudriere-devel-14-stable/vm-bhyve.log

Now internally inside VM.

host # vm start poudriere-devel-14-stable                              
Starting poudriere-devel-14-stable
  * found guest in /vm/poudriere-devel-14-stable
  * booting...

host # vm console poudriere-devel-14-stable
(...)
Starting devd.
Starting dhclient.
DHCPDISCOVER on vtnet0 to 255.255.255.255 port 67 interval 4
DHCPOFFER from 10.0.0.1
DHCPREQUEST on vtnet0 to 255.255.255.255 port 67
DHCPACK from 10.0.0.1
bound to 10.0.0.23 -- renewal in 43200 seconds.
add host 127.0.0.1: gateway lo0 fib 0: route already in table
add host ::1: gateway lo0 fib 0: route already in table
add net fe80::: gateway ::1
add net ff02::: gateway ::1
add net ::ffff:0.0.0.0: gateway ::1
add net ::0.0.0.0: gateway ::1
Updating motd:.
Updating /var/run/os-release done.
Clearing /tmp (X related).
Creating and/or trimming log files.
Starting syslogd.
Mounting late filesystems:.
Starting cron.
Starting background file system checks in 60 seconds.

Wed Mar  6 08:23:03 UTC 2024

FreeBSD/amd64 (freebsd) (ttyu0)

login: 


Use the root user with ’empty’ password – just hit [ENTER] key on password prompt.

root@freebsd:~ # :> ~/.hushlogin

root@freebsd:~ # passwd root
Changing local password for root
New Password:
Retype New Password:

root@freebsd:~ # geom disk list
Geom name: nda0
Providers:
1. Name: nda0
   Mediasize: 10737418240 (10G)
   Sectorsize: 512
   Mode: r3w3e8
   descr: bhyve-NVMe
   lunid: 589cfc2012350001
   ident: NVME-4-0
   rotationrate: 0
   fwsectors: 0
   fwheads: 0

Geom name: nda1
Providers:
1. Name: nda1
   Mediasize: 107374182400 (100G)
   Sectorsize: 512
   Mode: r0w0e0
   descr: bhyve-NVMe
   lunid: 589cfc20d2f40001
   ident: NVME-4-1
   rotationrate: 0
   fwsectors: 0
   fwheads: 0

root@freebsd:~ # zpool create zroot nda1
ZFS filesystem version: 5
ZFS storage pool version: features support (5000)

root@freebsd:~ # zfs set mountpoint=none zroot

root@freebsd:~ # zfs list
NAME    USED  AVAIL  REFER  MOUNTPOINT
zroot   100K  96.4G    24K  none

Now some basic configuration.

root@freebsd:~ # cat /etc/rc.conf
hostname="poudriere-devel-14-stable.lab.org"
ifconfig_DEFAULT="inet 10.0.0.124/24 up"
defaultrouter="10.0.0.1"
zfs_enable="YES"
sshd_enable="YES"
nginx_enable="YES"

root@freebsd:~ # cat /etc/hosts
::1         localhost  localhost.my.domain
127.0.0.1   localhost  localhost.my.domain
10.0.0.124  poudriere-devel-14-stable.lab.org  poudriere-devel-14-stable

root@freebsd:~ # service sshd start

root@freebsd:~ # mkdir -p /usr/local/etc/pkg/repos

root@freebsd:~ # sed -e s/quarterly/latest/g /etc/pkg/FreeBSD.conf \
                   > /usr/local/etc/pkg/repos/FreeBSD.conf

root@freebsd:~ # pkg install -y    \
                   beadm           \
                   lsblk           \
                   poudriere-devel \
                   nginx           \
                   git-lite        \
                   ccache4         \
                   tree            \
                   screen

root@freebsd:~ # reboot

Fortunately we do not need to patch ports-mgmt/poudriere-devel anymore as the -u flag for sort(1) is already there.

root@poudriere-devel-14-stable:~ # grep remote_all_ /usr/local/share/poudriere/common.sh | grep sort
            "${remote_all_options}" | sort -k1.2 -u | paste -s -d ' ' -)
            "${remote_all_dept}" | sort -u | paste -s -d ' ' -)

We will now setup actual Poudriere server.

root@poudriere-devel-14-stable:~ # export SSL=/usr/local/etc/ssl

root@poudriere-devel-14-stable:~ # mkdir -p \
                                     /usr/ports/distfiles \
                                     ${SSL}/keys \
                                     ${SSL}/certs

root@poudriere-devel-14-stable:~ # chmod 0600 ${SSL}/keys

root@poudriere-devel-14-stable:~ # openssl genrsa -out ${SSL}/keys/poudriere.key 4096

root@poudriere-devel-14-stable:~ # openssl rsa \
                                     -in  ${SSL}/keys/poudriere.key -pubout \
                                     -out ${SSL}/certs/poudriere.cert

root@poudriere-devel-14-stable:~ # zfs create -p -o mountpoint=/var/ccache zroot/var/ccache

root@poudriere-devel-14-stable:~ # zfs list
NAME               USED  AVAIL  REFER  MOUNTPOINT
zroot              213K  96.4G    24K  none
zroot/var           48K  96.4G    24K  none
zroot/var/ccache    24K  96.4G    24K  /var/ccache

root@poudriere-devel-14-stable:~ # export IP=10.0.0.124

root@poudriere-devel-14-stable:~ # cat << EOF > /usr/local/etc/poudriere.conf
ZPOOL=zroot
BASEFS=/usr/local/poudriere
ZROOTFS=/usr/local/poudriere
FREEBSD_HOST=ftp://ftp.freebsd.org
POUDRIERE_DATA=/usr/local/poudriere/data
CHECK_CHANGED_OPTIONS=verbose
CHECK_CHANGED_DEPS=yes
PKG_REPO_SIGNING_KEY=/usr/local/etc/ssl/keys/poudriere.key
URL_BASE=http://${IP}/
USE_TMPFS=no
TMPFS_LIMIT=12
MAX_MEMORY=12
PARALLEL_JOBS=8
PREPARE_PARALLEL_JOBS=8
MAX_FILES=4096
DISTFILES_CACHE=/usr/ports/distfiles
KEEP_OLD_PACKAGES=yes
KEEP_OLD_PACKAGES_COUNT=3
CHECK_CHANGED_OPTIONS=verbose
CHECK_CHANGED_DEPS=yes
CCACHE_DIR=/var/ccache
RESTRICT_NETWORKING=no
EOF

root@poudriere-devel-14-stable:~ # mkdir -p /usr/local/poudriere/data/logs/bulk

root@poudriere-devel-14-stable:~ # ln -s \
                                     /usr/local/etc/ssl/certs/poudriere.cert \
                                     /usr/local/poudriere/data/logs/bulk/poudriere.cert

root@poudriere-devel-14-stable:~ # service nginx enable

root@poudriere-devel-14-stable:~ # sed -i '' -E 's|text/plain[\t\ ]*txt|text/plain txt log|g' /usr/local/etc/nginx/mime.types

root@poudriere-devel-14-stable:~ # export IP=10.0.0.124

root@poudriere-devel-14-stable:~ # cat << EOF > /usr/local/etc/nginx/nginx.conf
events {
  worker_connections 1024;
}

http {
  include      mime.types;
  default_type application/octet-stream;

  server {
    listen 80 default;
    server_name ${IP};
    root /usr/local/share/poudriere/html;

    location /data {
      alias /usr/local/poudriere/data/logs/bulk;
      autoindex on;
    }

    location /packages {
      root /usr/local/poudriere/data;
      autoindex on;
    }
  }
}
EOF

root@poudriere-devel-14-stable:~ # service nginx restart

root@poudriere-devel-14-stable:~ # mkdir -p /root/.cache/ccache                                  

root@poudriere-devel-14-stable:~ # ln -sf /var/ccache /root/.cache/ccache

root@poudriere-devel-14-stable:~ # cat << EOF > /usr/local/etc/poudriere.d/make.conf
ALLOW_UNSUPPORTED_SYSTEM=yes
DISABLE_LICENSES=yes
EOF

root@poudriere-devel-14-stable:~ # cat << EOF > /var/ccache/ccache.conf
max_size = 0
cache_dir = /var/ccache
base_dir = /var/ccache
hash_dir = false
EOF

root@poudriere-devel-14-stable:~ # poudriere jail -c -j 14-0-S-amd64 -v 14.0-STABLE
(...)
[00:20:45] Jail 14-0-S-amd64 14.0-STABLE amd64 is ready to be used

root@poudriere-devel-14-stable:~ # poudriere jail -l
JAILNAME     VERSION     ARCH  METHOD TIMESTAMP           PATH
14-0-S-amd64 14.0-STABLE amd64 http   2024-03-06 09:44:27 /usr/local/poudriere/jails/14-0-S-amd64

root@poudriere-devel-14-stable:~ # poudriere ports -c -p idm
[00:00:00] Creating idm fs at /usr/local/poudriere/ports/idm... done
[00:00:00] Cloning the ports tree... done

root@poudriere-devel-14-stable:~ # poudriere ports -l
PORTSTREE METHOD    TIMESTAMP           PATH
idm       git+https 2024-03-06 10:10:53 /usr/local/poudriere/ports/idm


Poudriere Server – Build FreeIPA/IDM Client Packages

Now we will choose needed options for our FreeBSD Ports and then start the bulk process of fetching and building them.

root@poudriere-devel-14-stable:~ # poudriere options -c -n -p idm security/cyrus-sasl2-gssapi
//   SELECT: (*) GSSAPI_MIT

root@poudriere-devel-14-stable:~ # poudriere options -c -n -p idm net/openldap26-client
//   SELECT: [x] GSSAPI

root@poudriere-devel-14-stable:~ # poudriere options -c -n -p idm security/sudo
// DESELECT: [ ] PAM
//   SELECT: (*) GSSAPI_MIT
//   SELECT: (*) SSSD2

root@poudriere-devel-14-stable:~ # cat << EOF > /usr/local/etc/poudriere.d/idm
security/krb5
security/sudo
security/sssd2
security/cyrus-sasl2
security/cyrus-sasl2-gssapi
security/pam_mkhomedir
net/openldap26-client
net/samba416
EOF

root@poudriere-devel-14-stable:~ # poudriere bulk -j 14-0-S-amd64 -b latest -p idm -f /usr/local/etc/poudriere.d/idm

root@poudriere-devel-14-stable:~ # zfs list
NAME                                           USED  AVAIL  REFER  MOUNTPOINT
zroot                                         1.51G  94.9G    24K  none
zroot/usr                                     1.39G  94.9G    24K  none
zroot/usr/local                               1.39G  94.9G    24K  none
zroot/usr/local/poudriere                     1.39G  94.9G    24K  none
zroot/usr/local/poudriere/jails               1.07G  94.9G    24K  none
zroot/usr/local/poudriere/jails/14-0-S-amd64  1.07G  94.9G  1.07G  /usr/local/poudriere/jails/14-0-S-amd64
zroot/usr/local/poudriere/ports                328M  94.9G    24K  none
zroot/usr/local/poudriere/ports/idm            328M  94.9G   328M  /usr/local/poudriere/ports/idm
zroot/var                                      117M  94.9G    24K  none
zroot/var/ccache                               117M  94.9G   117M  /var/ccache


This is how the Poudriere build process looks like from the terminal … and a view for its new ZFS datasets that Poudriere created.

xterm-poudriere

It was 2nd or 3rd run so when You first will run the bulk there will be more information about fetching packages etc.

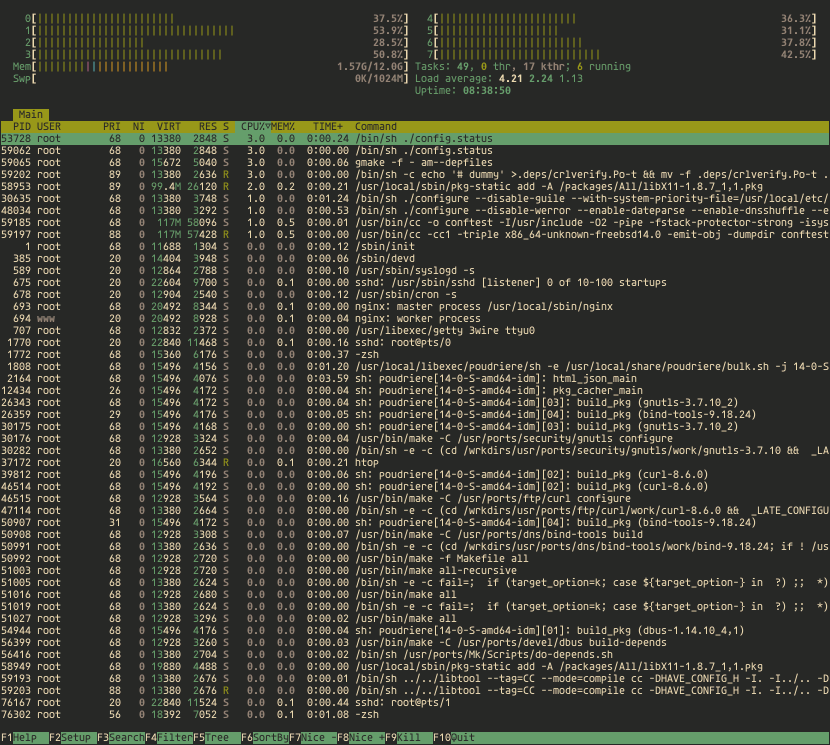
Below You can see what processes are running in htop(1) during the build.

xterm-htop

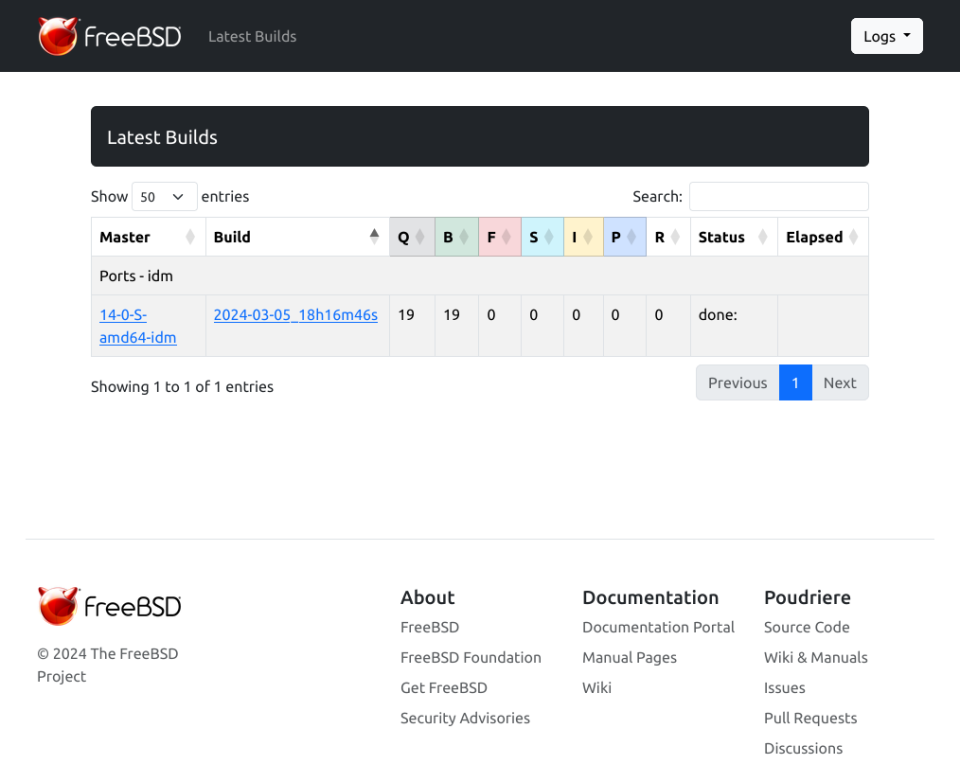
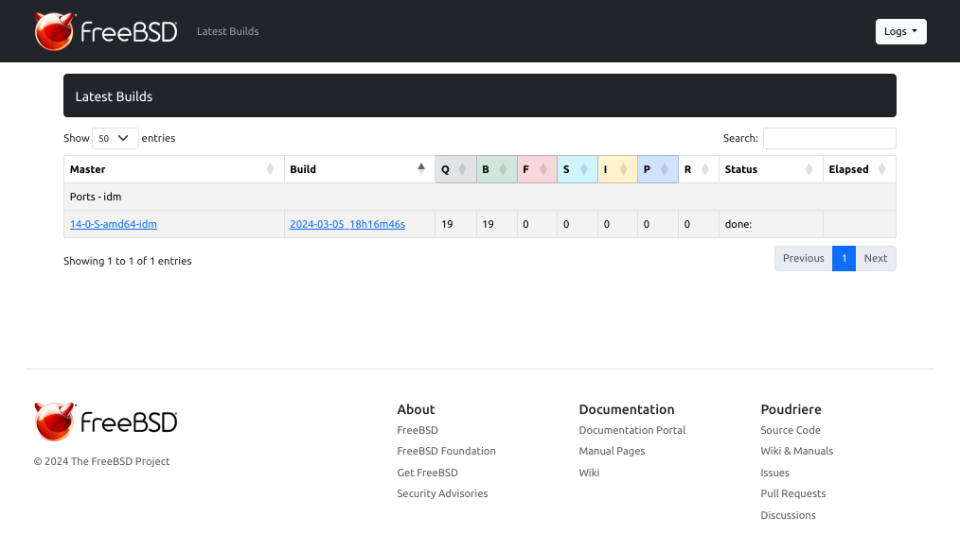
You can also follow the status of the build process in the browser at https://10.0.0.124 page.

poudriere-devel-100-latest-builds

Generally the new Poudriere interface is quite ‘large’ I would say – so I use it at 70% scale/zoom on Firefox and IMHO its more usable like that.

poudriere-devel-70-latest-builds

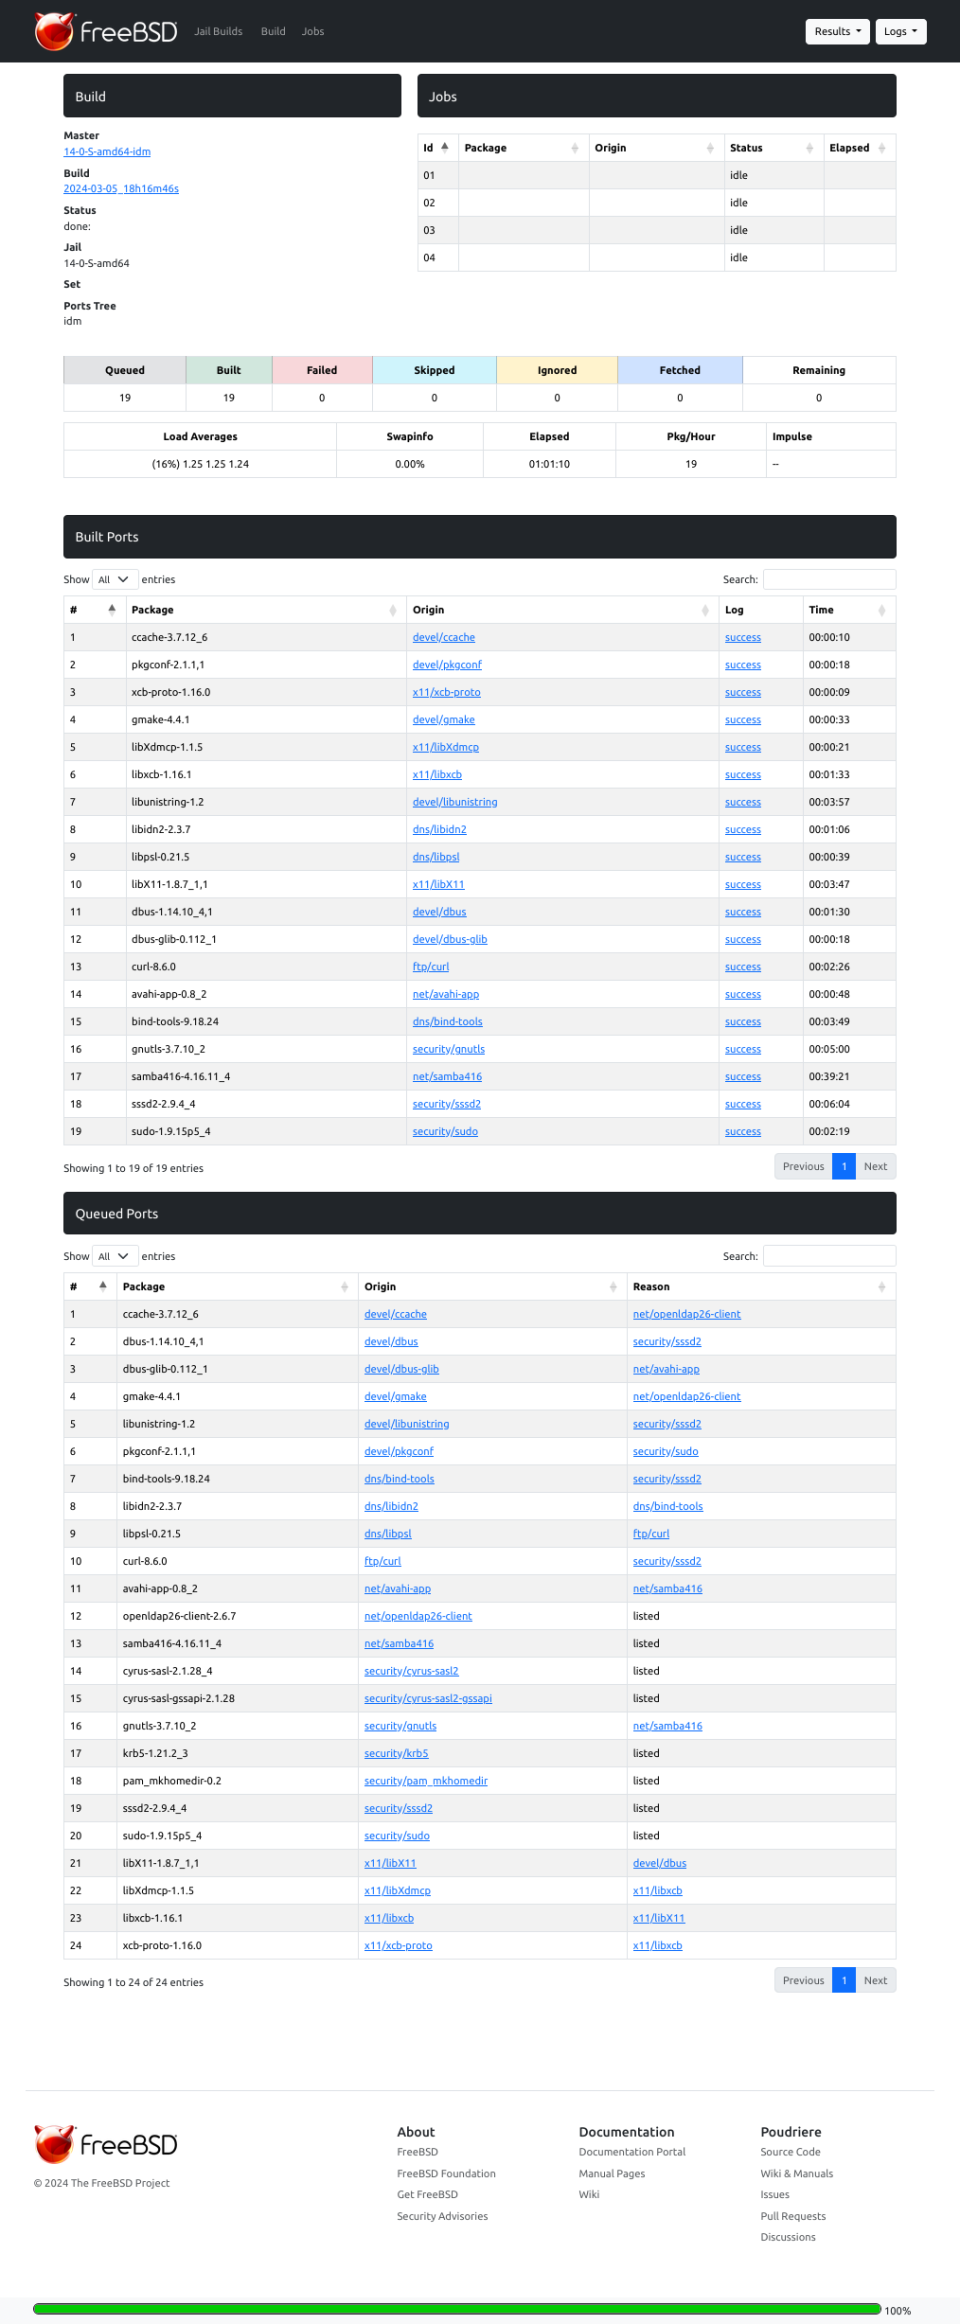
And below are the details about our build job.

poudriere-devel-70-build-complete

Poudriere Server – Update Repo/Packages

Everytime you will need to update the packages in that FreeIPA/IDM repo You will need to run these commands.

root@poudriere-devel-14-stable:~ # poudriere ports -u -p idm

root@poudriere-devel-14-stable:~ # poudriere bulk -j 14-0-S-amd64 -b latest -p idm -f /usr/local/etc/poudriere.d/idm

You may as well update the FreeBSD Jail when needed.

root@poudriere-devel-14-stable:~ # poudriere jail -u -j 14-0-S-amd64

FreeBSD 14.0-STABLE Client – Setup

I will not repeat the process – but the same as with Poudriere server – you need to create FreeBSD client – for example as Bhyve VM.

Now – the needed configuration on FreeBSD 14.0-STABLE system to connect it to FreeIPA/IDM server.

root@idm-client:~ # :> ~/.hushlogin

root@idm-client:~ # mkdir -p              \
                     /usr/local/etc/ipa   \
                     /var/log/sssd        \
                     /var/run/sss/private \
                     /var/db/sss

root@idm-client:~ # echo '10.0.0.233  idm-client.lab.org  idm-client' >> /etc/hosts

root@idm-client:~ # echo '10.0.0.200  idm.lab.org         idm'        >> /etc/hosts

root@idm-client:~ # hostname idm-client.lab.org

root@idm-client:~ # sysrc hostname=idm-client.lab.org

root@idm-client:~ # fetch -o /usr/local/etc/ipa/ca.crt http://idm.lab.org/ipa/config/ca.crt

Now we will need to add or FreeBSD client to FreeIPA/IDM. Instructions below.

[root@idm ~]# kinit admin

[root@idm ~]# ipa dnsrecord-add lab.org idm-client --a-rec=10.0.0.233 --a-create-reverse
  Record name: idm-client
  A record: 10.0.0.233

[root@idm ~]# ipa host-add idm-client.lab.org
-------------------------------
Added host "idm-client.lab.org"
-------------------------------
  Host name: idm-client.lab.org
  Principal name: host/idm-client.lab.org@LAB.ORG
  Principal alias: host/idm-client.lab.org@LAB.ORG
  Password: False
  Keytab: False
  Managed by: idm-client.lab.org

[root@idm ~]# ipa-getkeytab -s idm.lab.org -p host/idm-client.lab.org@LAB.ORG -k /root/idm-client.lab.org.keytab
Keytab successfully retrieved and stored in: /root/idm-client.lab.org.keytab

[root@idm ~]# cp /root/idm-client.lab.org.keytab /usr/share/ipa/html/

[root@idm ~]# chmod 644 /usr/share/ipa/html/idm-client.lab.org.keytab

Now lets get back to our FreeBSD client.

root@idm-client:~ # fetch -o /usr/local/etc/ipa/krb5.keytab \
                      http://idm.lab.org/ipa/config/idm-client.lab.org.keytab

root@idm-client:~ # chmod 600 /usr/local/etc/ipa/krb5.keytab

root@idm-client:~ # mkdir -p /usr/local/etc/ssl/certs

root@idm-client:~ # mkdir -p /usr/local/etc/pkg/repos

root@idm-client:~ # sed -e 's|quarterly|latest|g' /etc/pkg/FreeBSD.conf \
                      > /usr/local/etc/pkg/repos/FreeBSD.conf

root@idm-client:~ # pkg install -y beadm

root@idm-client:~ # fetch -o /usr/local/etc/ssl/certs/poudriere.cert \
                      http://poudriere-devel-14-stable.lab.org/data/poudriere.cert

root@idm-client:~ # export IP=10.0.0.124

root@idm-client:~ # cat << EOF > /usr/local/etc/pkg/repos/14-0-S-amd64.conf
14-0-S-amd64-idm: {
  url: "http://${IP}/packages/14-0-S-amd64-idm/",
  mirror_type: "http",
  signature_type: "pubkey",
  pubkey: "/usr/local/etc/ssl/certs/poudriere.cert",
  enabled: yes,
  priority: 100
}
EOF

root@idm-client:~ # pkg update -f

root@idm-client:~ # pkg install -y      \
                      krb5              \
                      sudo              \
                      sssd2             \
                      cyrus-sasl        \
                      cyrus-sasl-gssapi \
                      openldap26-client \
                      pam_mkhomedir

root@idm-client:~ # cat << EOF >> /etc/ssh/ssh_config
GSSAPIAuthentication yes
EOF

root@idm-client:~ # cat << EOF >> /etc/ssh/sshd_config
GSSAPIAuthentication yes
UsePAM yes
EOF

root@idm-client:~ # cat << EOF > /usr/local/etc/sssd/sssd.conf
[sssd]
  config_file_version      = 2
  services                 = pam, ssh, sudo, ifp, pac, nss
  domains                  = lab.org
  timeout                  = 20

[domain/lab.org]
  ipa_server               = idm.lab.org
  ipa_domain               = lab.org
  pam_gssapi_services      = sudo, sudo-i
  enumerate                = True
  cache_credentials        = True
  override_shell           = /usr/local/bin/bash
  override_homedir         = /home/%u
  default_shell            = /bin/sh
  ldap_group_nesting_level = 10
  default_ccache_template  = FILE:/tmp/krb5cc_:%U

  krb5_ccache_template     = FILE:/tmp/krb5cc_:%U
  krb5_server              = idm.lab.org:88
  krb5_realm               = LAB.ORG
  krb5_keytab              = /usr/local/etc/ipa/krb5.keytab
  krb5_auth_timeout        = 20

  id_provider              = ipa
  sudo_provider            = ipa
  access_provider          = ipa
  subdomains_provider      = ipa
  auth_provider            = ipa
  chpass_provider          = ipa
  selinux_provider         = none
EOF

root@idm-client:~ # chmod 600 /usr/local/etc/sssd/sssd.conf

root@idm-client:~ # cat << EOF > /etc/nsswitch.conf
#
# nsswitch.conf(5) - name service switch configuration file
# $FreeBSD$
#
group: files sss
group_compat: nis
hosts: files dns
networks: files
passwd: files sss
passwd_compat: nis
shells: files
services: compat
services_compat: nis
protocols: files
rpc: files
sudoers: sss files
netgroup: files
EOF

root@idm-client:~ # cat /etc/rc.conf
hostname="idm-client.lab.org"
ifconfig_vtnet0="inet 10.0.0.233/24"
defaultrouter="10.0.0.1"
syslogd_flags="-ss"
clear_tmp_enable="YES"
sshd_enable="YES"
zfs_enable="YES"
sssd_enable="YES"

root@idm-client:~ # cat << EOF > /usr/local/etc/openldap/ldap.conf
BASE        dc=org,dc=lab
URI         ldap://idm.lab.org/
SASL_MECH   GSSAPI
SASL_REALM  LAB.ORG
ssl         start_tls
TLS_CACERT  /usr/local/etc/ipa/ca.crt
EOF

root@idm-client:~ # cat << EOF > /etc/krb5.conf
[libdefaults]
  default_realm        = LAB.ORG
  default_keytab_name  = FILE:/usr/local/etc/ipa/krb5.keytab
  default_tkt_enctypes = aes256-cts des-cbc-crc aes128-cts arcfour-hmac
  default_tgs_enctypes = aes256-cts des-cbc-crc aes128-cts arcfour-hmac
  dns_lookup_realm     = false
  dns_lookup_kdc       = false
  rdns                 = false
  ticket_lifetime      = 24h
  forwardable          = yes

[realms]
  LAB.ORG = {
    kdc            = idm.lab.org:88
    master_kdc     = idm.lab.org:88
    admin_server   = idm.lab.org:749
    default_domain = lab.org
    pkinit_anchors = FILE:/usr/local/etc/ipa/ca.crt
  }

[domain_realm]
  .lab.org = LAB.ORG
   lab.org = LAB.ORG

[logging]
  kdc          = FILE:/var/log/krb5/krb5kdc.log
  admin_server = FILE:/var/log/krb5/kadmin.log
  kadmin_local = FILE:/var/log/krb5/kadmin_local.log
  default      = FILE:/var/log/krb5/krb5lib.log
EOF

root@idm-client:~ # cat << EOF > /etc/pam.d/system
#
#
# System-wide defaults
#

# AUTH
  auth      sufficient  pam_krb5.so                      no_warn try_first_pass
# auth      sufficient  pam_ssh.so                       no_warn try_first_pass
  auth      sufficient  /usr/local/lib/pam_sss.so        no_warn use_first_pass
  auth      required    pam_unix.so                      no_warn try_first_pass nullok

# ACCOUNT
# account   required    pam_krb5.so
  account   required    pam_login_access.so
  account   required    /usr/local/lib/pam_sss.so        ignore_unknown_user ignore_authinfo_unavail
  account   required    pam_unix.so

# SESSION
# session   optional    pam_ssh.so                       want_agent
  session   required    pam_lastlog.so                   no_fail
  session   required    /usr/local/lib/pam_mkhomedir.so  mode=0700

# PASSWORD
# password  sufficient  pam_krb5.so                      no_warn try_first_pass
  password  sufficient  /usr/local/lib/pam_sss.so        no_warn use_authtok
  password  required    pam_unix.so                      no_warn try_first_pass
EOF

root@idm-client:~ # cat << EOF > /etc/pam.d/sshd
#
#
# PAM configuration for the "sshd" service
#

# AUTH
  auth      sufficient  pam_krb5.so                      no_warn try_first_pass
# auth      sufficient  pam_ssh.so                       no_warn try_first_pass
  auth      sufficient  /usr/local/lib/pam_sss.so        no_warn use_first_pass
  auth      required    pam_unix.so                      no_warn try_first_pass

# ACCOUNT
  account   required    pam_nologin.so
# account   required    pam_krb5.so
  account   required    pam_login_access.so
  account   required    pam_unix.so
  account   required    /usr/local/lib/pam_sss.so        ignore_unknown_user ignore_authinfo_unavail

# SESSION
# session   optional    pam_ssh.so                       want_agent
  session   required    pam_permit.so
  session   required    /usr/local/lib/pam_mkhomedir.so  mode=0700
  session   optional    /usr/local/lib/pam_sss.so

# PASSWORD
# password  sufficient  pam_krb5.so                      no_warn try_first_pass
  password  sufficient  /usr/local/lib/pam_sss.so        no_warn use_authtok
  password  required    pam_unix.so                      no_warn try_first_pass
EOF

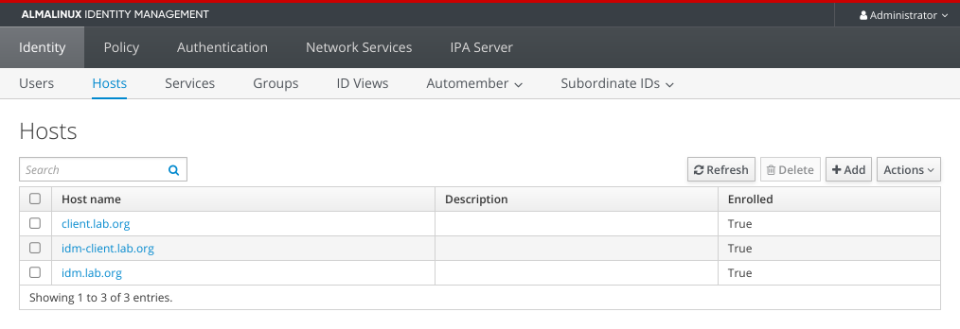
Our idm-client.lab.org in the FreeIPA/IDM below.

idm-hosts

Now reboot your idm-client.lab.org and You should be able to login to it with FreeIPA/IDM account.

host # ssh vermaden@10.0.0.233
(vermaden@10.0.0.233) Password:
Last login: Wed Mar  6 07:04:42 2024

vermaden@idm-client:~ $ id
uid=1374600003(vermaden) gid=1374600000(admins) groups=1374600000(admins)

vermaden@idm-client:~ $ klist
Credentials cache: FILE:/tmp/krb5cc_1374600003
        Principal: vermaden@LAB.ORG

  Issued                Expires               Principal
Mar  6 07:04:34 2024  Mar  7 06:19:19 2024  krbtgt/LAB.ORG@LAB.ORG

vermaden@idm-client:~ $ sudo -i
Password for vermaden@LAB.ORG:

root@idm-client:~ # id
uid=0(root) gid=0(wheel) groups=0(wheel),5(operator)

FreeBSD 14.0-STABLE Client – Debug Commands

Below are some commands that you may (or may not) find useful.

root@idm-client:~ # sssctl user-checks vermaden
user: vermaden
action: acct 
service: system-auth

SSSD nss user lookup result:
 - user name: vermaden
 - user id: 1374600003
 - group id: 1374600000
 - gecos: Vermaden Nedamrev
 - home directory: /home/vermaden
 - shell: /bin/sh
  
Unable to connect to system bus!
InfoPipe User lookup with [vermaden] failed.
testing pam_acct_mgmt   
  
pam_acct_mgmt: Success  
  
PAM Environment:
 - no env -


root@idm-client:~ # ldapsearch -H ldap://idm.lab.org -x -b "" -s base -LLL supportedSASLMechanisms
dn:
supportedSASLMechanisms: EXTERNAL
supportedSASLMechanisms: GSS-SPNEGO                      
supportedSASLMechanisms: GSSAPI
supportedSASLMechanisms: DIGEST-MD5
supportedSASLMechanisms: CRAM-MD5
supportedSASLMechanisms: LOGIN
supportedSASLMechanisms: PLAIN
supportedSASLMechanisms: ANONYMOUS


root@idm-client:~ # ldapsearch -x -v -W -D 'cn=Directory Manager' uid=vermaden
ldap_initialize(  )
Enter LDAP Password: 
filter: uid=vermaden
requesting: All userApplication attributes
# extended LDIF
#
# LDAPv3
# base  (default) with scope subtree
# filter: uid=vermaden
# requesting: ALL
#

# search result
search: 2
result: 32 No such object

# numResponses: 1


root@idm-client:~ # ldapsearch -Y GSSAPI -Omaxssf=0 -H ldaps://idm.lab.org -b dc=lab,dc=org CN=vermaden
SASL/GSSAPI authentication started
SASL username: vermaden@LAB.ORG
SASL SSF: 0
# extended LDIF
#
# LDAPv3
# base  with scope subtree
# filter: CN=vermaden
# requesting: ALL
#

# vermaden, groups, compat, lab.org
dn: cn=vermaden,cn=groups,cn=compat,dc=lab,dc=org
objectClass: posixGroup
objectClass: ipaOverrideTarget
objectClass: ipaexternalgroup
objectClass: top
gidNumber: 1374600003
ipaAnchorUUID:: OklQQTpsYWIub3JnOjcyN2FlMjM2LTMyMTktMTFlZS04OGMyLTU4OWNmYzA4MW
 QzNQ==
cn: vermaden

# vermaden, groups, accounts, lab.org
dn: cn=vermaden,cn=groups,cn=accounts,dc=lab,dc=org
objectClass: posixgroup
objectClass: ipaobject
objectClass: mepManagedEntry
objectClass: top
cn: vermaden
gidNumber: 1374600003
description: User private group for vermaden
mepManagedBy: uid=vermaden,cn=users,cn=accounts,dc=lab,dc=org
ipaUniqueID: 727ae236-3219-11ee-88c2-589cfc081d35

# search result
search: 4
result: 0 Success

# numResponses: 3
# numEntries: 2


Thats it – you have FreeBSD 14.0-STABLE connected to FreeIPA/IDM server.

Summary

Let me know in comments how it went.

EOF

Personal FreeBSD PKGBASE Update Server

FreeBSD UNIX system can be updated in many ways. You can use freebsd-update(8) command to fetch and install the official binary patches. You can download the FreeBSD sources and compile your new version. You can download and install base.txz and kernel.txz sets in a new ZFS Boot Environment along with copying over your config files there – Other FreeBSD Version in ZFS Boot Environment – as documented here.

While for most users these three options will be more then enough – there is a small group or people that need something else. Companies. People that like to use custom FreeBSD version or enterprise corporate world that needs to fulfill many compliance regulations. For their multiple reasons – including but not limited to – security – they want to have their own trusted FreeBSD update infra under their control.

Recently I was seeking any possible way to build and serve my own FreeBSD versions and making updates of it possible – either with freebsd-update(8) command or with new PKGBASE concept that utilizes the pkg(8) command.

I first started with the official FreeBSD project article titled Build Your Own FreeBSD Update Server – but it was last updated … 10 years ago. I still persisted to try it as there were no other places that documented this and while I tried it – I figured out that instead of *-disc1.iso I should use *-dvd.iso image and that these scripts use SHA512 checksums and not SHA256 (as described in its comments) … but that still did not make it work for 13.2-RELEASE – hence the bug report – Broken for 13.2-RELEASE? … with zero replies … and its still open.

The only thing that changed was an addition of Warning to the article that “The instructions in this article refer to an older version of FreeBSD and may not work properly on recent versions of the OS. With the availability of pkgbase, the freebsd-update utility is scheduled to be removed from FreeBSD in the future. When that happens, this article is either updated to reflect the new procedures or removed entirely”. Seems this is NOT the way.

In the mean time – as FreeBSD 14.0-RELEASE was prepared with its ALPHA/BETA/RC releases – some FreeBSD developers started to share new info about long awaited PKGBASE solution. Seeing that personal freebsd-update(8) based solution seems to be a dead end – I reached out for some PKGBASE info with Personal FreeBSD PKGBASE Server message on the freebsd-pkgbase FreeBSD Mailing Lists. Encouraged by the responses I tried various solutions – and this article will summarize what I was able to achieve – with what I know. I assume that I am far from being PKGBASE expert – so its possible that there are more optimized ways to do what I try to achieve here – hence the article will probably be updated.

While investigating the topic and writing it I also followed the FreeBSD Wiki PKGBASE Page – that helped.

This is the Table of Contents for this article.

  • Personal FreeBSD PKGBASE Update Server
  • Personal freebsd-update(8) Server
  • GhostBSD Way
  • Enter PKGBASE
    • Setup Build Server
    • CCACHE Improvement
    • PKGBASE First Build
    • Update PKGBASE Packages
    • Update PKGBASE Packages on Client System
    • Poudriere Automation
  • Summary

Personal freebsd-update(8) Server

The title of this section – Personal freebsd-update(8) Server – was meant to be the title of that article – I really wanted to utilize the known and tested freebsd-update(8) tool – but as You see even the official way is doomed to failure. While I still believed it is possible – I also reached to other then official sources for that topic. For the record – this is not a sponsored article nor advertisement or a marketing attempt – but I would like to share that I am really grateful to Ganbold Tsagaankhuu and A-Team Systems that they shared their solution to mirror official freebsd-update(8) servers content. The A-Team Systems has been working with FreeBSD for over 20 years and has the experience to provide enterprise level support for it … and they have been a proud sponsor of the FreeBSD Foundation for years. Not to mention that Adam Strohl was FreeBSD project contributor since 1996.

The FreeBSD Update Mirroring solution is ready to use and available – if You just want to mirror the official FreeBSD updates for freebsd-update(8) tool. You can also use another third party tool called freebsd-update-probe.sh that will speed up the check if the freebsd-update(8) updates are available at all.

GhostBSD Way

While I was seeking for some silver bullet for FreeBSD personal upgrade server I also asked Eric Turgeon – the GhostBSD creator – how the GhostBSD does and maintains its update and upgrades.

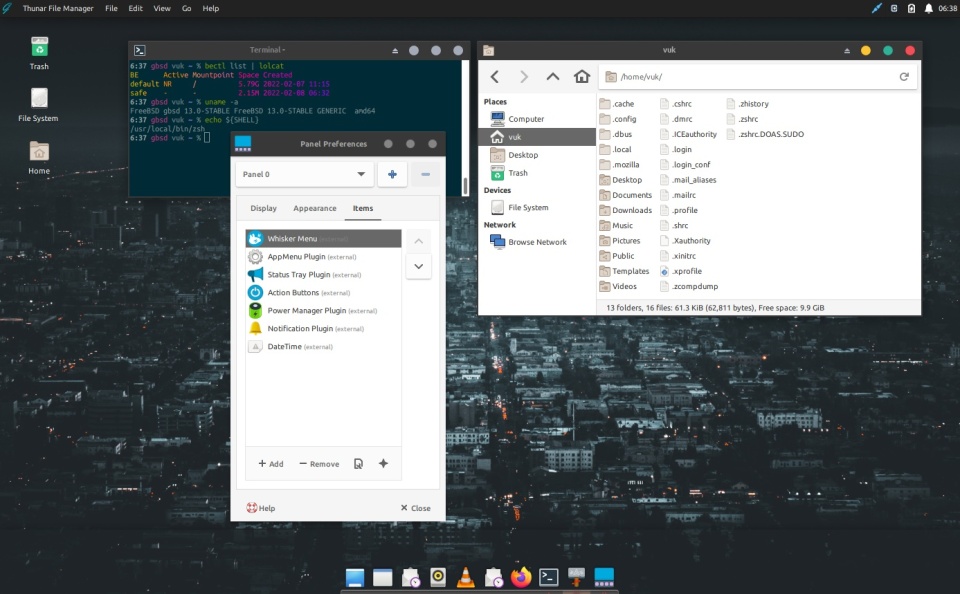
xfce-ghostbsd

To be honest GhostBSD solution here is really nice and interesting. The GhostBSD project maintains its own Ports tree – https://github.com/ghostbsd/ghostbsd-ports – available here. For the GhostBSD system updates there is just a separate os category – https://github.com/ghostbsd/ghostbsd-ports/tree/main/os – shown here.

Its quite convenient – as they are ‘just’ Ports – they are Poudriere friendly.

Here are the instructions (shared by Eric Turgeon) I used to test the GhostBSD build process.

# // CREATE GhostBSD PORTS MIRROR //
builder # poudriere ports -c -p ghostbsd -m git -U "https://github.com/ghostbsd/ghostbsd-ports" -B main

# // UPDATE GhostBSD PORTS MIRROR //
builder # poudriere ports -u -p ghostbsd -m git -U "https://github.com/ghostbsd/ghostbsd-ports" -B main

# // BUILD GhostBSD os BASE PORTS //
builder # poudriere bulk -j 13-2-R-amd64-src -p ghostbsd \
    os/buildkernel \
    os/buildkernel-debug \
    os/buildworld \
    os/kernel \
    os/kernel-debug \
    os/kernel-debug-symbols \
    os/kernel-symbols \
    os/userland \
    os/userland-base \
    os/userland-base-bootstrap \
    os/userland-bin \
    os/userland-boot \
    os/userland-conf \
    os/userland-debug \
    os/userland-devtools \
    os/userland-docs \
    os/userland-lib \
    os/userland-lib32 \
    os/userland-lib32-development \
    os/userland-rescue \
    os/userland-sbin \
    os/userland-tests \
    os/ports \
    os/src

The good part of that approach is that You just build the Base System parts as any other packages – and then update them in a new ZFS Boot Environment without interfering with running system. After the update process is complete You can reboot to a fresh and updated ZFS BE.

To create a new GhostBSD ISO you will have to use GhostBSD build.sh script … or at least some personal modification of it – but at least its all there and available.

Enter PKGBASE

The idea is not special in any way – to be honest its just a ‘way’ of what most Linux distributions do in their idea of operating system distribution management. The only thing that is different – is that on most Linux systems all packages (even kernel) are treated the same while on FreeBSD the PKGBASE is still in the faith of Base System concept – thus there would be BASE packages and all other packages of third party software … and this is very healthy and good separation. Using FreeBSD for almost two decades I definitely believe that “This is the way!” – to have separate packages for the system and separate for the additional optional packages that anyone can install or not.

Setup Build Server

We will use just released FreeBSD 14.0-RELEASE for the build system – along with some packages installed. Here are the instructions that will get us into that. Without an idea for a better name I will just call it builder … yes I am not the best at naming systems – not to mention that my laptop hostname is named after its model – w520 πŸ™‚

We will install the following pkg(8) packages.

builder # pkg install -y   \
            devel/ccache4  \
            devel/git      \
            net/gitup      \
            sysutils/beadm \
            sysutils/htop  \
            www/nginx

builder # cp /usr/local/etc/gitup.conf.sample \
             /usr/local/etc/gitup.conf

As You probably guessed from the added packages above – we will use CCACHE 4.x to speed up the build process. How much CCACHE helps here? A lot!

The CCACHE config on the host /etc/make.conf file looks as follows.

builder # cat /etc/make.conf
CCACHE_DIR=/var/cache/ccache
WITH_CCACHE_BUILD=yes

You can also make additional time gains by using ramdisk for WRKDIRPREFIX option in the /etc/make.conf file.

builder # cat /etc/make.conf
CCACHE_DIR=/var/cache/ccache
WITH_CCACHE_BUILD=yes
WRKDIRPREFIX=/RAM

You will need that config in the /etc/fstab file.

builder # grep -e RAM -e MNT /etc/fstab
#DEV  #MNT  #FS    #OPTS                  #DUMP/PASS
none  /RAM  tmpfs  rw,size=10g,mode=1777  0 0

The www/nginx and sysutils/htop are optional – first is to eventually share the built pkg(8) repo over the network and htop(1) to check how much the machine is utilized during the build process.

If you want to check how to share this repo with www/nginx then check FreeBSD on FreeIPA/IDM with Poudriere Repo article for the details.

CCACHE Improvement

Below is a simple benchmark showing how much CCACHE helps in build times. It measures time to buildworld and buildkernel of FreeBSD using 8 CPUs in a Bhyve VM – as showed below.

builder # cd /usr/src

builder # rm -rf /usr/obj

builder # time make -j 8 buildworld buildkernel

Below are the timed results of 3 builds.

34018.13s user 1769.90s system 781% cpu 1:16:16.91 total # // 1st // simplified result: ~75 minutes
 1159.49s user  545.14s system 595% cpu    4:46.35 total # // 2nd // simplified result:  ~5 minutes (15 times faster)
 1133.67s user  531.76s system 595% cpu    4:39.73 total # // 3rd // simplified result:  ~5 minutes (15 times faster)

Before doing the benchmark I expected CCACHE to cut the build times in half or something like that – I never expected such a good improvement of 15 times faster build times. From hours to minutes – literally – and this is on older (now budget option) AMD Ryzen 7 1700 8C/16T CPU that cost me $45 a year ago and it is not even fully utilized as I make the build in a 8 CPU Bhyve VM. For storage on that system I have some cheap 512 GB NVMe SSD in M.2 slot on the motherboard and that Bhyve VM have a file based disk with type of virtual NVMe … and also 12 GB RAM … and my RAM is not one of the most expensive gaming one shelf. Does not seem like a huge and expensive build machine to me.

games

If You are curious how is the games system built – AMD Based FreeBSD Desktop – its described here … and Yes I upgraded CPU since the article release πŸ™‚ My CCACHE config is the same as the one used in the FreeBSD on FreeIPA/IDM with Poudriere Repo article.

I started to use ‘external’ machine instead of my ThinkPad W520 for such more heavy loads as I do not like my laptop trying to become a drone with its fan to cool the things I ask it to do while doing other regular work πŸ™‚

PKGBASE First Build

First we need to fetch the FreeBSD source code (if we do not have them already) with gitup(1) command.

builder # gitup release

builder # grep -e '^REVISION' -e '^BRANCH' /usr/src/sys/conf/newvers.sh
REVISION="14.0"
BRANCH="RELEASE"

We will create new pkgbase empty ZFS Boot Environment for our tests.

builder # zfs create -o mountpoint=/ -o canmount=off zroot/ROOT/pkgbase

builder # beadm mount pkgbase /var/tmp/pkgbase

Our new empty ZFS BE is mounted at /var/tmp/pkgbase dir.

Now we will build the world and kernel and then create the packages with make(1) command.


builder # cd /usr/src

builder # rm -rf /usr/obj /var/tmp/pkgbase/repo

builder # mkdir -p /var/tmp/pkgbase/repo

builder # time make REPRODUCIBLE_BUILD=1 REPODIR=/var/tmp/pkgbase/repo -j 10 buildworld buildkernel

builder # time make REPRODUCIBLE_BUILD=1 REPODIR=/var/tmp/pkgbase/repo -j 10 packages

Now we should have our new PKGBASE packages ready.

builder # ls /var/tmp/pkgbase/repo
FreeBSD:14:amd64

builder # ls -l /var/tmp/pkgbase/repo/FreeBSD:14:amd64             
total 17
drwxr-xr-x  2 root wheel 424 2023.12.08 06:37 14/
lrwxr-xr-x  1 root wheel   2 2023.12.08 06:37 latest -> 14

The latest points to our (currently one and only) 14 branch.

Now we will install world and kernel into the new ZFS BE. We also need to make(1) the distribution target to have /etc populated with default configs.

builder # cd /usr/src

builder # make DESTDIR=/var/tmp/pkgbase installworld

builder # make DESTDIR=/var/tmp/pkgbase installkernel

builder # make DESTDIR=/var/tmp/pkgbase distribution

Next we will chroot(8) into new pkgbase ZFS BE and bootstrap the default pkg(8).


builder # env PS1='BE # ' chroot /var/tmp/pkgbase /bin/sh

BE # echo nameserver 1.1.1.1 > /etc/resolv.conf

BE # mount -t devfs devfs /dev

BE # pkg 
The package management tool is not yet installed on your system.
Do you want to fetch and install it now? [y/N]: y

Next – still being in the chroot(8) world – we will create our local PKGBASE repo config and update its metadata.

BE # mkdir -p /usr/local/etc/pkg/repos

BE # cat < /usr/local/etc/pkg/repos/FreeBSD-base.conf
FreeBSD-base: {
  url: "file:///repo/\${ABI}/latest",
  mirror_type: "none",
  enabled: yes
}
EOF

BE # pkg update -r FreeBSD-base
Updating FreeBSD-base repository catalogue...
Fetching meta.conf: 100%    163 B   0.2kB/s    00:01    
Fetching packagesite.pkg: 100%   31 KiB  31.6kB/s    00:01    
Processing entries: 100%
FreeBSD-base repository update completed. 417 packages processed.
All repositories are up to date.

We have our PKGBASE pkg(8) repo metadata – we may now install all the PKGBASE packages over our pkgbase system.

BE # pkg install -g 'FreeBSD-*'

More details below.

BE # pkg install -g 'FreeBSD-*'
Updating FreeBSD repository catalogue...
Fetching meta.conf: 100%    163 B   0.2kB/s    00:01    
Fetching packagesite.pkg: 100%    7 MiB   1.0MB/s    00:07    
Processing entries: 100%
FreeBSD repository update completed. 33994 packages processed.
Updating FreeBSD-base repository catalogue...
FreeBSD-base repository is up to date.
All repositories are up to date.
Updating database digests format: 100%
Checking integrity... done (0 conflicting)
The following 417 package(s) will be affected (of 0 checked):

New packages to be INSTALLED:
        FreeBSD-acct: 14 [FreeBSD-base]
        FreeBSD-acct-dbg: 14 [FreeBSD-base]
        FreeBSD-acpi: 14 [FreeBSD-base]
        FreeBSD-acpi-dbg: 14 [FreeBSD-base]
        FreeBSD-apm: 14 [FreeBSD-base]
        FreeBSD-apm-dbg: 14 [FreeBSD-base]
        FreeBSD-at: 14 [FreeBSD-base]
        FreeBSD-at-dbg: 14 [FreeBSD-base]
        FreeBSD-autofs: 14 [FreeBSD-base]
        FreeBSD-autofs-dbg: 14 [FreeBSD-base]
        FreeBSD-bhyve: 14 [FreeBSD-base]
        FreeBSD-bhyve-dbg: 14 [FreeBSD-base]
        FreeBSD-bluetooth: 14 [FreeBSD-base]
        FreeBSD-bluetooth-dbg: 14 [FreeBSD-base]
        FreeBSD-bluetooth-dbg-lib32: 14 [FreeBSD-base]
        FreeBSD-bluetooth-dev: 14 [FreeBSD-base]
        FreeBSD-bluetooth-dev-lib32: 14 [FreeBSD-base]
        FreeBSD-bluetooth-lib32: 14 [FreeBSD-base]
        FreeBSD-bootloader: 14 [FreeBSD-base]
        FreeBSD-bsdinstall: 14 [FreeBSD-base]
        FreeBSD-bsdinstall-dbg: 14 [FreeBSD-base]
        FreeBSD-bsnmp: 14 [FreeBSD-base]
        FreeBSD-bsnmp-dbg: 14 [FreeBSD-base]
        FreeBSD-bsnmp-dbg-lib32: 14 [FreeBSD-base]
        FreeBSD-bsnmp-dev: 14 [FreeBSD-base]
        FreeBSD-bsnmp-dev-lib32: 14 [FreeBSD-base]
        FreeBSD-bsnmp-lib32: 14 [FreeBSD-base]
        FreeBSD-caroot: 14 [FreeBSD-base]
        FreeBSD-ccdconfig: 14 [FreeBSD-base]
        FreeBSD-ccdconfig-dbg: 14 [FreeBSD-base]
        FreeBSD-certctl: 14 [FreeBSD-base]
        FreeBSD-clang: 14 [FreeBSD-base]
        FreeBSD-clang-dbg: 14 [FreeBSD-base]
        FreeBSD-clibs: 14 [FreeBSD-base]
        FreeBSD-clibs-dbg: 14 [FreeBSD-base]
        FreeBSD-clibs-dbg-lib32: 14 [FreeBSD-base]
        FreeBSD-clibs-dev: 14 [FreeBSD-base]
        FreeBSD-clibs-dev-lib32: 14 [FreeBSD-base]
        FreeBSD-clibs-lib32: 14 [FreeBSD-base]
        FreeBSD-console-tools: 14 [FreeBSD-base]
        FreeBSD-console-tools-dbg: 14 [FreeBSD-base]
        FreeBSD-csh: 14 [FreeBSD-base]
        FreeBSD-csh-dbg: 14 [FreeBSD-base]
        FreeBSD-ctf-tools: 14 [FreeBSD-base]
        FreeBSD-ctf-tools-dbg: 14 [FreeBSD-base]
        FreeBSD-cxgbe-tools: 14 [FreeBSD-base]
        FreeBSD-cxgbe-tools-dbg: 14 [FreeBSD-base]
        FreeBSD-devd: 14 [FreeBSD-base]
        FreeBSD-devd-dbg: 14 [FreeBSD-base]
        FreeBSD-devmatch: 14 [FreeBSD-base]
        FreeBSD-devmatch-dbg: 14 [FreeBSD-base]
        FreeBSD-devmatch-dbg-lib32: 14 [FreeBSD-base]
        FreeBSD-devmatch-dev: 14 [FreeBSD-base]
        FreeBSD-devmatch-dev-lib32: 14 [FreeBSD-base]
        FreeBSD-devmatch-lib32: 14 [FreeBSD-base]
        FreeBSD-dhclient: 14 [FreeBSD-base]
        FreeBSD-dhclient-dbg: 14 [FreeBSD-base]
        FreeBSD-dma: 14 [FreeBSD-base]
        FreeBSD-dma-dbg: 14 [FreeBSD-base]
        FreeBSD-dpv: 14 [FreeBSD-base]
        FreeBSD-dpv-dbg: 14 [FreeBSD-base]
        FreeBSD-dpv-dbg-lib32: 14 [FreeBSD-base]
        FreeBSD-dpv-dev: 14 [FreeBSD-base]
        FreeBSD-dpv-dev-lib32: 14 [FreeBSD-base]
        FreeBSD-dpv-lib32: 14 [FreeBSD-base]
        FreeBSD-dtrace: 14 [FreeBSD-base]
        FreeBSD-dtrace-dbg: 14 [FreeBSD-base]
        FreeBSD-dtrace-dbg-lib32: 14 [FreeBSD-base]
        FreeBSD-dtrace-dev: 14 [FreeBSD-base]
        FreeBSD-dtrace-dev-lib32: 14 [FreeBSD-base]
        FreeBSD-dtrace-lib32: 14 [FreeBSD-base]
        FreeBSD-dwatch: 14 [FreeBSD-base]
        FreeBSD-ee: 14 [FreeBSD-base]
        FreeBSD-ee-dbg: 14 [FreeBSD-base]
        FreeBSD-efi-tools: 14 [FreeBSD-base]
        FreeBSD-efi-tools-dbg: 14 [FreeBSD-base]
        FreeBSD-efi-tools-dbg-lib32: 14 [FreeBSD-base]
        FreeBSD-efi-tools-dev: 14 [FreeBSD-base]
        FreeBSD-efi-tools-dev-lib32: 14 [FreeBSD-base]
        FreeBSD-efi-tools-lib32: 14 [FreeBSD-base]
        FreeBSD-elftoolchain: 14 [FreeBSD-base]
        FreeBSD-elftoolchain-dbg: 14 [FreeBSD-base]
        FreeBSD-fetch: 14 [FreeBSD-base]
        FreeBSD-fetch-dbg: 14 [FreeBSD-base]
        FreeBSD-fetch-dbg-lib32: 14 [FreeBSD-base]
        FreeBSD-fetch-dev: 14 [FreeBSD-base]
        FreeBSD-fetch-dev-lib32: 14 [FreeBSD-base]
        FreeBSD-fetch-lib32: 14 [FreeBSD-base]
        FreeBSD-ftp: 14 [FreeBSD-base]
        FreeBSD-ftp-dbg: 14 [FreeBSD-base]
        FreeBSD-ftpd: 14 [FreeBSD-base]
        FreeBSD-ftpd-dbg: 14 [FreeBSD-base]
        FreeBSD-fwget: 14 [FreeBSD-base]
        FreeBSD-games: 14 [FreeBSD-base]
        FreeBSD-games-dbg: 14 [FreeBSD-base]
        FreeBSD-geom: 14 [FreeBSD-base]
        FreeBSD-geom-dbg: 14 [FreeBSD-base]
        FreeBSD-geom-dbg-lib32: 14 [FreeBSD-base]
        FreeBSD-geom-lib32: 14 [FreeBSD-base]
        FreeBSD-ggate: 14 [FreeBSD-base]
        FreeBSD-ggate-dbg: 14 [FreeBSD-base]
        FreeBSD-hast: 14 [FreeBSD-base]
        FreeBSD-hast-dbg: 14 [FreeBSD-base]
        FreeBSD-hostapd: 14 [FreeBSD-base]
        FreeBSD-hostapd-dbg: 14 [FreeBSD-base]
        FreeBSD-hyperv-tools: 14 [FreeBSD-base]
        FreeBSD-inetd: 14 [FreeBSD-base]
        FreeBSD-inetd-dbg: 14 [FreeBSD-base]
        FreeBSD-ipf: 14 [FreeBSD-base]
        FreeBSD-ipf-dbg: 14 [FreeBSD-base]
        FreeBSD-ipfilter: 14 [FreeBSD-base]
        FreeBSD-ipfw: 14 [FreeBSD-base]
        FreeBSD-ipfw-dbg: 14 [FreeBSD-base]
        FreeBSD-iscsi: 14 [FreeBSD-base]
        FreeBSD-iscsi-dbg: 14 [FreeBSD-base]
        FreeBSD-jail: 14 [FreeBSD-base]
        FreeBSD-jail-dbg: 14 [FreeBSD-base]
        FreeBSD-kerberos: 14 [FreeBSD-base]
        FreeBSD-kerberos-dbg: 14 [FreeBSD-base]
        FreeBSD-kerberos-dbg-lib32: 14 [FreeBSD-base]
        FreeBSD-kerberos-lib: 14 [FreeBSD-base]
        FreeBSD-kerberos-lib-dbg: 14 [FreeBSD-base]
        FreeBSD-kerberos-lib-dbg-lib32: 14 [FreeBSD-base]
        FreeBSD-kerberos-lib-dev: 14 [FreeBSD-base]
        FreeBSD-kerberos-lib-dev-lib32: 14 [FreeBSD-base]
        FreeBSD-kerberos-lib-lib32: 14 [FreeBSD-base]
        FreeBSD-kerberos-lib32: 14 [FreeBSD-base]
        FreeBSD-kernel-generic: 14 [FreeBSD-base]
        FreeBSD-kernel-generic-dbg: 14 [FreeBSD-base]
        FreeBSD-lib9p: 14 [FreeBSD-base]
        FreeBSD-lib9p-dbg: 14 [FreeBSD-base]
        FreeBSD-lib9p-dbg-lib32: 14 [FreeBSD-base]
        FreeBSD-lib9p-dev: 14 [FreeBSD-base]
        FreeBSD-lib9p-dev-lib32: 14 [FreeBSD-base]
        FreeBSD-lib9p-lib32: 14 [FreeBSD-base]
        FreeBSD-libarchive: 14 [FreeBSD-base]
        FreeBSD-libarchive-dbg: 14 [FreeBSD-base]
        FreeBSD-libarchive-dbg-lib32: 14 [FreeBSD-base]
        FreeBSD-libarchive-dev: 14 [FreeBSD-base]
        FreeBSD-libarchive-dev-lib32: 14 [FreeBSD-base]
        FreeBSD-libarchive-lib32: 14 [FreeBSD-base]
        FreeBSD-libbegemot: 14 [FreeBSD-base]
        FreeBSD-libbegemot-dbg: 14 [FreeBSD-base]
        FreeBSD-libbegemot-dbg-lib32: 14 [FreeBSD-base]
        FreeBSD-libbegemot-dev: 14 [FreeBSD-base]
        FreeBSD-libbegemot-dev-lib32: 14 [FreeBSD-base]
        FreeBSD-libbegemot-lib32: 14 [FreeBSD-base]
        FreeBSD-libblocksruntime: 14 [FreeBSD-base]
        FreeBSD-libblocksruntime-dbg: 14 [FreeBSD-base]
        FreeBSD-libblocksruntime-dbg-lib32: 14 [FreeBSD-base]
        FreeBSD-libblocksruntime-dev: 14 [FreeBSD-base]
        FreeBSD-libblocksruntime-dev-lib32: 14 [FreeBSD-base]
        FreeBSD-libblocksruntime-lib32: 14 [FreeBSD-base]
        FreeBSD-libbsdstat: 14 [FreeBSD-base]
        FreeBSD-libbsdstat-dbg: 14 [FreeBSD-base]
        FreeBSD-libbsdstat-dbg-lib32: 14 [FreeBSD-base]
        FreeBSD-libbsdstat-dev: 14 [FreeBSD-base]
        FreeBSD-libbsdstat-dev-lib32: 14 [FreeBSD-base]
        FreeBSD-libbsdstat-lib32: 14 [FreeBSD-base]
        FreeBSD-libbsm: 14 [FreeBSD-base]
        FreeBSD-libbsm-dbg: 14 [FreeBSD-base]
        FreeBSD-libbsm-dbg-lib32: 14 [FreeBSD-base]
        FreeBSD-libbsm-dev: 14 [FreeBSD-base]
        FreeBSD-libbsm-dev-lib32: 14 [FreeBSD-base]
        FreeBSD-libbsm-lib32: 14 [FreeBSD-base]
        FreeBSD-libbz2: 14 [FreeBSD-base]
        FreeBSD-libbz2-dbg: 14 [FreeBSD-base]
        FreeBSD-libbz2-dbg-lib32: 14 [FreeBSD-base]
        FreeBSD-libbz2-dev: 14 [FreeBSD-base]
        FreeBSD-libbz2-dev-lib32: 14 [FreeBSD-base]
        FreeBSD-libbz2-lib32: 14 [FreeBSD-base]
        FreeBSD-libcasper: 14 [FreeBSD-base]
        FreeBSD-libcasper-dbg: 14 [FreeBSD-base]
        FreeBSD-libcasper-dbg-lib32: 14 [FreeBSD-base]
        FreeBSD-libcasper-dev: 14 [FreeBSD-base]
        FreeBSD-libcasper-dev-lib32: 14 [FreeBSD-base]
        FreeBSD-libcasper-lib32: 14 [FreeBSD-base]
        FreeBSD-libcompat: 14 [FreeBSD-base]
        FreeBSD-libcompat-dev: 14 [FreeBSD-base]
        FreeBSD-libcompat-dev-lib32: 14 [FreeBSD-base]
        FreeBSD-libcompiler_rt: 14 [FreeBSD-base]
        FreeBSD-libcompiler_rt-dev: 14 [FreeBSD-base]
        FreeBSD-libcompiler_rt-dev-lib32: 14 [FreeBSD-base]
        FreeBSD-libcompiler_rt-lib32: 14 [FreeBSD-base]
        FreeBSD-libcuse: 14 [FreeBSD-base]
        FreeBSD-libcuse-dbg: 14 [FreeBSD-base]
        FreeBSD-libcuse-dbg-lib32: 14 [FreeBSD-base]
        FreeBSD-libcuse-dev: 14 [FreeBSD-base]
        FreeBSD-libcuse-dev-lib32: 14 [FreeBSD-base]
        FreeBSD-libcuse-lib32: 14 [FreeBSD-base]
        FreeBSD-libdwarf: 14 [FreeBSD-base]
        FreeBSD-libdwarf-dbg: 14 [FreeBSD-base]
        FreeBSD-libdwarf-dbg-lib32: 14 [FreeBSD-base]
        FreeBSD-libdwarf-dev: 14 [FreeBSD-base]
        FreeBSD-libdwarf-dev-lib32: 14 [FreeBSD-base]
        FreeBSD-libdwarf-lib32: 14 [FreeBSD-base]
        FreeBSD-libevent1: 14 [FreeBSD-base]
        FreeBSD-libevent1-dbg: 14 [FreeBSD-base]
        FreeBSD-libevent1-dbg-lib32: 14 [FreeBSD-base]
        FreeBSD-libevent1-dev: 14 [FreeBSD-base]
        FreeBSD-libevent1-dev-lib32: 14 [FreeBSD-base]
        FreeBSD-libevent1-lib32: 14 [FreeBSD-base]
        FreeBSD-libexecinfo: 14 [FreeBSD-base]
        FreeBSD-libexecinfo-dbg: 14 [FreeBSD-base]
        FreeBSD-libexecinfo-dbg-lib32: 14 [FreeBSD-base]
        FreeBSD-libexecinfo-dev: 14 [FreeBSD-base]
        FreeBSD-libexecinfo-dev-lib32: 14 [FreeBSD-base]
        FreeBSD-libexecinfo-lib32: 14 [FreeBSD-base]
        FreeBSD-libipt: 14 [FreeBSD-base]
        FreeBSD-libipt-dbg: 14 [FreeBSD-base]
        FreeBSD-libipt-dev: 14 [FreeBSD-base]
        FreeBSD-libldns: 14 [FreeBSD-base]
        FreeBSD-libldns-dbg: 14 [FreeBSD-base]
        FreeBSD-libldns-dbg-lib32: 14 [FreeBSD-base]
        FreeBSD-libldns-dev: 14 [FreeBSD-base]
        FreeBSD-libldns-dev-lib32: 14 [FreeBSD-base]
        FreeBSD-libldns-lib32: 14 [FreeBSD-base]
        FreeBSD-liblzma: 14 [FreeBSD-base]
        FreeBSD-liblzma-dbg: 14 [FreeBSD-base]
        FreeBSD-liblzma-dbg-lib32: 14 [FreeBSD-base]
        FreeBSD-liblzma-dev: 14 [FreeBSD-base]
        FreeBSD-liblzma-dev-lib32: 14 [FreeBSD-base]
        FreeBSD-liblzma-lib32: 14 [FreeBSD-base]
        FreeBSD-libmagic: 14 [FreeBSD-base]
        FreeBSD-libmagic-dbg: 14 [FreeBSD-base]
        FreeBSD-libmagic-dbg-lib32: 14 [FreeBSD-base]
        FreeBSD-libmagic-dev: 14 [FreeBSD-base]
        FreeBSD-libmagic-dev-lib32: 14 [FreeBSD-base]
        FreeBSD-libmagic-lib32: 14 [FreeBSD-base]
        FreeBSD-libpathconv: 14 [FreeBSD-base]
        FreeBSD-libpathconv-dbg: 14 [FreeBSD-base]
        FreeBSD-libpathconv-dbg-lib32: 14 [FreeBSD-base]
        FreeBSD-libpathconv-dev: 14 [FreeBSD-base]
        FreeBSD-libpathconv-dev-lib32: 14 [FreeBSD-base]
        FreeBSD-libpathconv-lib32: 14 [FreeBSD-base]
        FreeBSD-librpcsec_gss: 14 [FreeBSD-base]
        FreeBSD-librpcsec_gss-dbg: 14 [FreeBSD-base]
        FreeBSD-librpcsec_gss-dbg-lib32: 14 [FreeBSD-base]
        FreeBSD-librpcsec_gss-dev: 14 [FreeBSD-base]
        FreeBSD-librpcsec_gss-dev-lib32: 14 [FreeBSD-base]
        FreeBSD-librpcsec_gss-lib32: 14 [FreeBSD-base]
        FreeBSD-librss: 14 [FreeBSD-base]
        FreeBSD-librss-dbg: 14 [FreeBSD-base]
        FreeBSD-librss-dbg-lib32: 14 [FreeBSD-base]
        FreeBSD-librss-dev: 14 [FreeBSD-base]
        FreeBSD-librss-dev-lib32: 14 [FreeBSD-base]
        FreeBSD-librss-lib32: 14 [FreeBSD-base]
        FreeBSD-libsdp: 14 [FreeBSD-base]
        FreeBSD-libsdp-dbg: 14 [FreeBSD-base]
        FreeBSD-libsdp-dbg-lib32: 14 [FreeBSD-base]
        FreeBSD-libsdp-dev: 14 [FreeBSD-base]
        FreeBSD-libsdp-dev-lib32: 14 [FreeBSD-base]
        FreeBSD-libsdp-lib32: 14 [FreeBSD-base]
        FreeBSD-libsqlite3: 14 [FreeBSD-base]
        FreeBSD-libsqlite3-dbg: 14 [FreeBSD-base]
        FreeBSD-libsqlite3-dbg-lib32: 14 [FreeBSD-base]
        FreeBSD-libsqlite3-dev: 14 [FreeBSD-base]
        FreeBSD-libsqlite3-dev-lib32: 14 [FreeBSD-base]
        FreeBSD-libsqlite3-lib32: 14 [FreeBSD-base]
        FreeBSD-libstdbuf: 14 [FreeBSD-base]
        FreeBSD-libstdbuf-dbg: 14 [FreeBSD-base]
        FreeBSD-libstdbuf-dbg-lib32: 14 [FreeBSD-base]
        FreeBSD-libstdbuf-dev: 14 [FreeBSD-base]
        FreeBSD-libstdbuf-dev-lib32: 14 [FreeBSD-base]
        FreeBSD-libstdbuf-lib32: 14 [FreeBSD-base]
        FreeBSD-libstdthreads: 14 [FreeBSD-base]
        FreeBSD-libstdthreads-dbg: 14 [FreeBSD-base]
        FreeBSD-libstdthreads-dbg-lib32: 14 [FreeBSD-base]
        FreeBSD-libstdthreads-dev: 14 [FreeBSD-base]
        FreeBSD-libstdthreads-dev-lib32: 14 [FreeBSD-base]
        FreeBSD-libstdthreads-lib32: 14 [FreeBSD-base]
        FreeBSD-libthread_db: 14 [FreeBSD-base]
        FreeBSD-libthread_db-dbg: 14 [FreeBSD-base]
        FreeBSD-libthread_db-dbg-lib32: 14 [FreeBSD-base]
        FreeBSD-libthread_db-dev: 14 [FreeBSD-base]
        FreeBSD-libthread_db-dev-lib32: 14 [FreeBSD-base]
        FreeBSD-libthread_db-lib32: 14 [FreeBSD-base]
        FreeBSD-libucl: 14 [FreeBSD-base]
        FreeBSD-libucl-dbg: 14 [FreeBSD-base]
        FreeBSD-libucl-dbg-lib32: 14 [FreeBSD-base]
        FreeBSD-libucl-dev: 14 [FreeBSD-base]
        FreeBSD-libucl-dev-lib32: 14 [FreeBSD-base]
        FreeBSD-libucl-lib32: 14 [FreeBSD-base]
        FreeBSD-libvgl: 14 [FreeBSD-base]
        FreeBSD-libvgl-dbg: 14 [FreeBSD-base]
        FreeBSD-libvgl-dbg-lib32: 14 [FreeBSD-base]
        FreeBSD-libvgl-dev: 14 [FreeBSD-base]
        FreeBSD-libvgl-dev-lib32: 14 [FreeBSD-base]
        FreeBSD-libvgl-lib32: 14 [FreeBSD-base]
        FreeBSD-libvmmapi: 14 [FreeBSD-base]
        FreeBSD-libvmmapi-dbg: 14 [FreeBSD-base]
        FreeBSD-libvmmapi-dev: 14 [FreeBSD-base]
        FreeBSD-liby-dev: 14 [FreeBSD-base]
        FreeBSD-liby-dev-lib32: 14 [FreeBSD-base]
        FreeBSD-lld: 14 [FreeBSD-base]
        FreeBSD-lld-dbg: 14 [FreeBSD-base]
        FreeBSD-lldb: 14 [FreeBSD-base]
        FreeBSD-lldb-dbg: 14 [FreeBSD-base]
        FreeBSD-locales: 14 [FreeBSD-base]
        FreeBSD-mlx-tools: 14 [FreeBSD-base]
        FreeBSD-mlx-tools-dbg: 14 [FreeBSD-base]
        FreeBSD-mtree: 14 [FreeBSD-base]
        FreeBSD-mtree-dbg: 14 [FreeBSD-base]
        FreeBSD-natd: 14 [FreeBSD-base]
        FreeBSD-natd-dbg: 14 [FreeBSD-base]
        FreeBSD-natd-dbg-lib32: 14 [FreeBSD-base]
        FreeBSD-natd-dev: 14 [FreeBSD-base]
        FreeBSD-natd-dev-lib32: 14 [FreeBSD-base]
        FreeBSD-natd-lib32: 14 [FreeBSD-base]
        FreeBSD-netmap: 14 [FreeBSD-base]
        FreeBSD-netmap-dbg: 14 [FreeBSD-base]
        FreeBSD-netmap-dbg-lib32: 14 [FreeBSD-base]
        FreeBSD-netmap-dev: 14 [FreeBSD-base]
        FreeBSD-netmap-dev-lib32: 14 [FreeBSD-base]
        FreeBSD-netmap-lib32: 14 [FreeBSD-base]
        FreeBSD-newsyslog: 14 [FreeBSD-base]
        FreeBSD-newsyslog-dbg: 14 [FreeBSD-base]
        FreeBSD-nfs: 14 [FreeBSD-base]
        FreeBSD-nfs-dbg: 14 [FreeBSD-base]
        FreeBSD-nvme-tools: 14 [FreeBSD-base]
        FreeBSD-nvme-tools-dbg: 14 [FreeBSD-base]
        FreeBSD-openssl: 14 [FreeBSD-base]
        FreeBSD-openssl-dbg: 14 [FreeBSD-base]
        FreeBSD-openssl-lib: 14 [FreeBSD-base]
        FreeBSD-openssl-lib-dbg: 14 [FreeBSD-base]
        FreeBSD-openssl-lib-dbg-lib32: 14 [FreeBSD-base]
        FreeBSD-openssl-lib-dev: 14 [FreeBSD-base]
        FreeBSD-openssl-lib-dev-lib32: 14 [FreeBSD-base]
        FreeBSD-openssl-lib-lib32: 14 [FreeBSD-base]
        FreeBSD-periodic: 14 [FreeBSD-base]
        FreeBSD-pf: 14 [FreeBSD-base]
        FreeBSD-pf-dbg: 14 [FreeBSD-base]
        FreeBSD-pf-dev: 14 [FreeBSD-base]
        FreeBSD-pkg-bootstrap: 14 [FreeBSD-base]
        FreeBSD-pkg-bootstrap-dbg: 14 [FreeBSD-base]
        FreeBSD-ppp: 14 [FreeBSD-base]
        FreeBSD-ppp-dbg: 14 [FreeBSD-base]
        FreeBSD-quotacheck: 14 [FreeBSD-base]
        FreeBSD-quotacheck-dbg: 14 [FreeBSD-base]
        FreeBSD-rc: 14 [FreeBSD-base]
        FreeBSD-rc-dbg: 14 [FreeBSD-base]
        FreeBSD-rcmds: 14 [FreeBSD-base]
        FreeBSD-rcmds-dbg: 14 [FreeBSD-base]
        FreeBSD-rdma: 14 [FreeBSD-base]
        FreeBSD-rdma-dbg: 14 [FreeBSD-base]
        FreeBSD-rescue: 14 [FreeBSD-base]
        FreeBSD-resolvconf: 14 [FreeBSD-base]
        FreeBSD-runtime: 14 [FreeBSD-base]
        FreeBSD-runtime-dbg: 14 [FreeBSD-base]
        FreeBSD-runtime-dbg-lib32: 14 [FreeBSD-base]
        FreeBSD-runtime-dev: 14 [FreeBSD-base]
        FreeBSD-runtime-dev-lib32: 14 [FreeBSD-base]
        FreeBSD-runtime-lib32: 14 [FreeBSD-base]
        FreeBSD-sendmail: 14 [FreeBSD-base]
        FreeBSD-sendmail-dbg: 14 [FreeBSD-base]
        FreeBSD-sendmail-dbg-lib32: 14 [FreeBSD-base]
        FreeBSD-sendmail-dev: 14 [FreeBSD-base]
        FreeBSD-sendmail-dev-lib32: 14 [FreeBSD-base]
        FreeBSD-sendmail-lib32: 14 [FreeBSD-base]
        FreeBSD-smbutils: 14 [FreeBSD-base]
        FreeBSD-smbutils-dbg: 14 [FreeBSD-base]
        FreeBSD-smbutils-dbg-lib32: 14 [FreeBSD-base]
        FreeBSD-smbutils-dev: 14 [FreeBSD-base]
        FreeBSD-smbutils-dev-lib32: 14 [FreeBSD-base]
        FreeBSD-smbutils-lib32: 14 [FreeBSD-base]
        FreeBSD-ssh: 14 [FreeBSD-base]
        FreeBSD-ssh-dbg: 14 [FreeBSD-base]
        FreeBSD-ssh-dbg-lib32: 14 [FreeBSD-base]
        FreeBSD-ssh-dev: 14 [FreeBSD-base]
        FreeBSD-ssh-dev-lib32: 14 [FreeBSD-base]
        FreeBSD-ssh-lib32: 14 [FreeBSD-base]
        FreeBSD-syscons: 14 [FreeBSD-base]
        FreeBSD-syslogd: 14 [FreeBSD-base]
        FreeBSD-syslogd-dbg: 14 [FreeBSD-base]
        FreeBSD-tcpd: 14 [FreeBSD-base]
        FreeBSD-tcpd-dbg: 14 [FreeBSD-base]
        FreeBSD-tcpd-dbg-lib32: 14 [FreeBSD-base]
        FreeBSD-tcpd-dev: 14 [FreeBSD-base]
        FreeBSD-tcpd-dev-lib32: 14 [FreeBSD-base]
        FreeBSD-tcpd-lib32: 14 [FreeBSD-base]
        FreeBSD-telnet: 14 [FreeBSD-base]
        FreeBSD-telnet-dbg: 14 [FreeBSD-base]
        FreeBSD-tests: 14 [FreeBSD-base]
        FreeBSD-tests-dbg: 14 [FreeBSD-base]
        FreeBSD-tests-dev: 14 [FreeBSD-base]
        FreeBSD-ufs: 14 [FreeBSD-base]
        FreeBSD-ufs-dbg: 14 [FreeBSD-base]
        FreeBSD-ufs-dbg-lib32: 14 [FreeBSD-base]
        FreeBSD-ufs-dev: 14 [FreeBSD-base]
        FreeBSD-ufs-dev-lib32: 14 [FreeBSD-base]
        FreeBSD-ufs-lib32: 14 [FreeBSD-base]
        FreeBSD-unbound: 14 [FreeBSD-base]
        FreeBSD-unbound-dbg: 14 [FreeBSD-base]
        FreeBSD-unbound-dbg-lib32: 14 [FreeBSD-base]
        FreeBSD-unbound-dev: 14 [FreeBSD-base]
        FreeBSD-unbound-dev-lib32: 14 [FreeBSD-base]
        FreeBSD-unbound-lib32: 14 [FreeBSD-base]
        FreeBSD-utilities: 14 [FreeBSD-base]
        FreeBSD-utilities-dbg: 14 [FreeBSD-base]
        FreeBSD-utilities-dbg-lib32: 14 [FreeBSD-base]
        FreeBSD-utilities-dev: 14 [FreeBSD-base]
        FreeBSD-utilities-dev-lib32: 14 [FreeBSD-base]
        FreeBSD-utilities-lib32: 14 [FreeBSD-base]
        FreeBSD-vi: 14 [FreeBSD-base]
        FreeBSD-vi-dbg: 14 [FreeBSD-base]
        FreeBSD-vt-data: 14 [FreeBSD-base]
        FreeBSD-wpa: 14 [FreeBSD-base]
        FreeBSD-wpa-dbg: 14 [FreeBSD-base]
        FreeBSD-yp: 14 [FreeBSD-base]
        FreeBSD-yp-dbg: 14 [FreeBSD-base]
        FreeBSD-zfs: 14 [FreeBSD-base]
        FreeBSD-zfs-dbg: 14 [FreeBSD-base]
        FreeBSD-zfs-dbg-lib32: 14 [FreeBSD-base]
        FreeBSD-zfs-dev: 14 [FreeBSD-base]
        FreeBSD-zfs-dev-lib32: 14 [FreeBSD-base]
        FreeBSD-zfs-lib32: 14 [FreeBSD-base]
        FreeBSD-zoneinfo: 14 [FreeBSD-base]

Number of packages to be installed: 417

The process will require 3 GiB more space.

Proceed with this action? [y/N]: y


Voila! We have fresh FreeBSD 14.0-RELEASE system installed with new PKGBASE way.

Some pkg(8) stats below.

BE # pkg stats
Local package database:
        Installed packages: 418
        Disk space occupied: 3 GiB

Remote package database(s):
        Number of repositories: 2
        Packages available: 34411
        Unique packages: 34411
        Total size of packages: 121 GiB

BE # pkg -vv | grep -A 99 '^Repositories:'
Repositories:
  FreeBSD: { 
    url             : "pkg+http://pkg.FreeBSD.org/FreeBSD:14:amd64/quarterly",
    enabled         : yes,
    priority        : 0,
    mirror_type     : "SRV",
    signature_type  : "FINGERPRINTS",
    fingerprints    : "/usr/share/keys/pkg"
  }
  FreeBSD-base: { 
    url             : "file:///repo/FreeBSD:14:amd64/latest",
    enabled         : yes,
    priority        : 0
  }


Update PKGBASE Packages

Now – when the new version arrives – or just we want to add some changes and reflect them in the packages – we would like to update our PKGBASE packages and update the pkgbase system.

With my limited knowledge of C I will modify our /usr/src source tree and then build updated packages.

First – we need to change BRANCH into something different – so that it will be obvious for the PKGBASE build method that packages needs to be updated.

builder # vi /usr/src/sys/conf/newvers.sh

builder # grep -e '^REVISION' -e '^BRANCH' /usr/src/sys/conf/newvers.sh
REVISION="14.0"
BRANCH="RELEASE-p1"

I have changed BRANCH="RELEASE" into BRANCH="RELEASE-p1" for the record.

Now lets modify some FreeBSD tool to check if it will be updated in the process – lets try ls(1).

I will add an EMPTY and useless function to it.


builder # vi /usr/src/bin/ls/ls.c

builder # grep -n -A 4 EMPTY /usr/src/bin/ls/ls.c
100:int          EMPTY(int);
101-static void  traverse(int, char **, int);
102-
103-#define     COLOR_OPT       (CHAR_MAX + 1)
104-
--
1033:int EMPTY(int nope)
1034-{
1035-   return nope;
1036-}

Lets update the PKGBASE packages.

builder # rm -rf /usr/obj

builder # cd /usr/src

builder # time make REPRODUCIBLE_BUILD=1 REPODIR=/var/tmp/pkgbase/repo -j 10 buildworld buildkernel

builder # time make REPRODUCIBLE_BUILD=1 REPODIR=/var/tmp/pkgbase/repo -j 10 update-packages

Lets see how our /repo looks like now.

builder # find /var/tmp/pkgbase/repo -maxdepth 2 -ls | sed -e 's.      ..g'
     2  1 drwxr-xr-x    3 root     wheel     3 Dec  8 06:31 /var/tmp/pkgbase/repo
   128  1 drwxr-xr-x    4 root     wheel     5 Dec  8 21:48 /var/tmp/pkgbase/repo/FreeBSD:14:amd64
 32768 33 drwxr-xr-x    2 root     wheel   424 Dec  8 21:48 /var/tmp/pkgbase/repo/FreeBSD:14:amd64/14p1
   129 33 drwxr-xr-x    2 root     wheel   424 Dec  8 06:37 /var/tmp/pkgbase/repo/FreeBSD:14:amd64/14
 33907  1 lrwxr-xr-x    1 root     wheel     4 Dec  8 21:48 /var/tmp/pkgbase/repo/FreeBSD:14:amd64/latest -> 14p1

So the latest now points to the 14p1 branch. Looks promising.

Update PKGBASE Packages on Client System

Now – as our /repo is updated – we will do the usual update process with pkg(8) tool.

I assume that pkgbase is still mounted at the /var/tmp/pkgbase place and that devfs is still mounted /dev inside pkgbase ZFS BE.

builder # env PS1='BE # ' chroot /var/tmp/pkgbase /bin/sh

BE # mount | grep -q /var/tmp/pkgbase/dev || mount -t devfs devfs /dev

BE # pkg update -f -r FreeBSD-repo
Updating FreeBSD-base repository catalogue...
Fetching meta.conf: 100%    163 B   0.2kB/s    00:01    
Fetching packagesite.pkg: 100%   31 KiB  31.7kB/s    00:01    
Processing entries: 100%
FreeBSD-base repository update completed. 417 packages processed.
All repositories are up to date.

BE # pkg upgrade
Updating FreeBSD repository catalogue...
FreeBSD repository is up to date.
Updating FreeBSD-base repository catalogue...
FreeBSD-base repository is up to date.
All repositories are up to date.
Checking for upgrades (8 candidates): 100%
Processing candidates (8 candidates): 100%
Checking integrity... done (0 conflicting)
The following 7 package(s) will be affected (of 0 checked):

Installed packages to be UPGRADED:
        FreeBSD-ftpd: 14 -> 14p1 [FreeBSD-base]
        FreeBSD-ftpd-dbg: 14 -> 14p1 [FreeBSD-base]
        FreeBSD-kernel-generic: 14 -> 14p1 [FreeBSD-base]
        FreeBSD-kernel-generic-dbg: 14 -> 14p1 [FreeBSD-base]
        FreeBSD-rescue: 14 -> 14p1 [FreeBSD-base]
        FreeBSD-runtime: 14 -> 14p1 [FreeBSD-base]
        FreeBSD-runtime-dbg: 14 -> 14p1 [FreeBSD-base]

Number of packages to be upgraded: 7

Proceed with this action? [y/N]: y
[1/7] Upgrading FreeBSD-runtime from 14 to 14p1...
[1/7] Extracting FreeBSD-runtime-14p1: 100%
[2/7] Upgrading FreeBSD-ftpd from 14 to 14p1...
[2/7] Extracting FreeBSD-ftpd-14p1: 100%
[3/7] Upgrading FreeBSD-kernel-generic-dbg from 14 to 14p1...
[3/7] Extracting FreeBSD-kernel-generic-dbg-14p1: 100%
[4/7] Upgrading FreeBSD-ftpd-dbg from 14 to 14p1...
[4/7] Extracting FreeBSD-ftpd-dbg-14p1: 100%
[5/7] Upgrading FreeBSD-rescue from 14 to 14p1...
[5/7] Extracting FreeBSD-rescue-14p1: 100%
[6/7] Upgrading FreeBSD-runtime-dbg from 14 to 14p1...
[6/7] Extracting FreeBSD-runtime-dbg-14p1: 100%
[7/7] Upgrading FreeBSD-kernel-generic from 14 to 14p1...
[7/7] Extracting FreeBSD-kernel-generic-14p1: 100%

So we just did our first binary pkg(8) update using PKGBASE packages created on our personal build system.

Lets check where /bin/ls has been packaged.

BE # pkg which -o /bin/ls
/bin/ls was installed by package base

Not much of a help. Lets check if its one of the updated FreeBSD-runtime PKGBASE packages.

BE # pkg info -l FreeBSD-runtime | grep /bin/ls
        /bin/ls

Yep. That is the one.

We can also check what freebsd-version(1) thinks about it.

BE # freebsd-version -k
14.0-RELEASE-p1

BE # freebsd-version -u
14.0-RELEASE-p1

BE # freebsd-version 
14.0-RELEASE-p1

Seems legit.

Poudriere Automation

I did not (yet) persuaded the Poudriere way of doing it – but Mina Galic was kind enough to share his HOWTO on the topic – PKGBASE HOWTO – but besides reading it – I did not yet persuaded its instructions live.

Summary

These are early stages of PKGBASE (especially for me) so way of things may change in the future – but for now – this one should just work.

Being here – I would like to help all people that helped me with this topic – You know who You are πŸ™‚

Feel free to share your experiences about it.

EOF

FreeBSD Bhyve Virtualization

The Bhyve FreeBSD hypervisor (called/spelled ‘beehive’ usually) was created almost 10 years ago. Right now it offers speed and features that other similar solutions provide – such as KVM/VMware/XEN. You can check all the details in the FreeBSD Handbook for details. One of the last things Bhyve lacks is so called live migration between physical hosts but save state and resume from saved state are in the works currently so not long before that live migration. Up until recently I used mostly VirtualBox for my small virtualization needs. Recently I started to evaluate Bhyve and this time I am very pleased – the FreeBSD VirtualBox integration is not perfect anyway – for example – the USB passthru does not work since several years – and even when it worked – it was limited to USB 1.x speeds only. Also because of FreeBSD policy of pkg(8) packages building process – the VirtualBox packages remain broken for 3 months after each *.1 or upper release (*.2/*.3/…). The other impulse that forced me to switch from VirtualBox to Bhyve was the VirtualBox (in)stability. I often needed to restart crashed VirtualBox VMs because they failed for some unspecified reason.

bhyve-logo

One of the Bhyve features that I especially liked was that by default Bhyve only uses memory that guest system wanted to allocate. For example a FreeBSD virtual machine with 2 GB RAM set will use after boot about 70 MB RAM πŸ™‚

Another great feature I really liked about Bhyve was that I could suspend the host machine with all the VMs started – both on my ThinkPad W520 laptop and AMD Based FreeBSD Desktop and then it all successfully resumed. With VirtualBox you would have to poweroff all VMs because if you suspend with running VirtualBox VMs – it will just crash – its not possible to do suspend/resume cycle with VirtualBox.

The Table of Contents for this article is as follows:

  • FreeBSD Bhyve Virtualization
  • Bhyve Managers
  • Bhyve versus KVM and VMware
  • Bhyve libvirt/virt-manager GUI
  • vm-bhyve
    • Install/Setup
    • Networking
      • Server/Desktop LAN Bridge
      • Laptop WiFi NAT
      • Networking Restart
    • Datastores
    • Templates
    • NVMe
    • ISO Images
    • Guest OS Install
      • FreeBSD
      • Linux
      • Windows 7
      • Windows 10
        • Force Windows 10 Offline Account
        • Windows 10 Bloat Removers
      • Windows 11
    • Dealing with Locked VMs
    • Disk Resize
  • Summary

Bhyve Managers

While VirtualBox has quite usable QT based GUI – the Bhyve does not have anything like that. I once seen some GUI QT prototype for Bhyve but it was very basic – so forget about that currently. There are however several web interfaces such as TrueNAS CORE or CBSD/CloneOS. There are also several terminal managers such as vm-bhyve. The older one iohyve has not been maintained for at least 6 long years. There is also libvirt Bhyve driver but more on that later.

Bhyve versus KVM and VMware

Klara Systems compared Bhyve to KVM and Benjamin Bryan compared it against VMware hypervisor. While Bhyve remains competitive against both of them there are two important aspects from Klara Systems that stand out and are worth repeating here.

First – using nvme driver is a lot faster then using more traditional virtio-blk or ahci-hd backends.

bhyve-nvme

Second – and this one seems strange – using a raw file is faster then using ZFS zvol device.

bhyve-raw-zvol

To summarize these thoughts – just just file on a disk like disk0.img and use nvme as storage backend everytime the guest operating system supports it.

Bhyve libvirt/virt-manager GUI

Theoretically the libvirt virtualization API supports Bhyve as one of its backends and the details about Bhyve driver – https://libvirt.org/drvbhyve.html – are available here. I have tried it with virt-manager and after some basic configuration I was able to start FreeBSD 13.2 installation … but it got frozen at the kernel messages and nothing more happened.

virt-manager-boot-menu

… and the moment it hanged below. I have tried multiple times with the same effect.

virt-manager-hang

I really liked the virtual machine settings window of virt-manager.

virt-manager-machine-settings

vm-bhyve

While You can use Bhyve directly with bhyve(8) and bhyvectl(8) commands – which I was doing in the past – after trying the vm-bhyve both on the desktop and server space – I really liked it and this is what I currently use. I just moved from vm-bhyve package to the newer vm-bhyve-devel one.

The vm(8) command is simple and provides all needed use cases.

host # vm help
vm-bhyve: Bhyve virtual machine management v1.6-devel (rev. 106001)
Usage: vm ...
    version
    init
    set [setting=value] [...]
    get [all|setting] [...]
    switch list
    switch info [name] [...]
    switch create [-t type] [-i interface] [-n vlan-id] [-m mtu] [-a address/prefix-len] [-b bridge] [-p] 
    switch vlan  
    switch nat  
    switch private  
    switch add  
    switch remove  
    switch destroy 
    datastore list
    datastore add  
    datastore remove 
    datastore add  
    list
    info [name] [...]
    create [-d datastore] [-t template] [-s size] [-m memory] [-c vCPUs] 
    install [-fi]  
    start [-fi]  [...]
    stop  [...]
    restart 
    console  [com1|com2]
    configure 
    rename  
    add [-d device] [-t type] [-s size|switch] 
    startall
    stopall
    reset  [-f] 
    poweroff [-f] 
    destroy [-f] 
    passthru
    clone  
    snapshot [-f] 
    rollback [-r] 
    iso [url]
    img [url]
    image list
    image create [-d description] [-u] 
    image destroy 
    image provision [-d datastore]  

Install/Setup

We need only several packages to add.

host # pkg install -y \
         vm-bhyve-devel \
         uefi-edk2-bhyve-csm \
         bhyve-firmware \
         edk2-bhyve \
         dnsmasq \
         grub2-bhyve \
         tigervnc-viewer \
         rdesktop

The setup is pretty easy also.

First we need to add several vm_* settings into the main FreeBSD /etc/rc.conf file.

  vm_enable=YES
  vm_dir="zfs:zroot/vm"
  vm_list=""
  vm_delay=3

Keep in mind that you will later use the vm_list="" for the list of VMs that you would like to be started at boot. Like vm_list="freebsd13 freebsd14uefi" for example. Then the vm list command would place [1] in at the freebsd13 name (as its first) and [2] in the freebsd14uefi name as this one is second on the list. See below.

host # vm list
NAME           DATASTORE  LOADER     CPU  MEMORY  VNC           AUTO     STATE
almalinux8     default    uefi       2    2G      0.0.0.0:5908  No       Running (11819)
freebsd13      default    bhyveload  1    256M    -             Yes [1]  Running (2342)
freebsd14      default    bhyveload  1    256M    -             No       Stopped
freebsd14uefi  default    uefi       2    8G      -             Yes [2]  Running (35394)
windows10      default    uefi       2    2G      -             No       Stopped
windows7       default    uefi       2    2G      -             No       Stopped

We need to create a dedicated ZFS dataset for our VMs. You can also use directory on UFS – check vm-bhyve documentation.

host # zfs create -o mountpoint=/vm zroot/vm

We will also copy the available templates to our new /vm dir.

host # cp -a /usr/local/share/examples/vm-bhyve /vm/.templates

Remember to check /vm/.templates/config.sample as it has the documentation for all available options.

host # head -12 /vm/.templates/config.sample
# This is a sample configuration file containing all supported options
# Please do not try and use this file itself for a guest
# For any option that contains a number in the name, such as "network0_type",
# you can add additional devices of that type by creating a new set of
# variables using the next number in sequence, e.g "network1_type"
#
# Please make sure all option names are specified in lowercase and
# at the beginning of the line. If there is any whitespace before
# the option name, the line will be ignored.
# The '#' character signifies the start of a comment, even within
# double-quotes, and so cannot be used inside any values.

We can now start initialize the vm-bhyve.

host # service vm start

Networking

There as many network setups as many FreeBSD has network capabilities – a lot! I this guide I will cover two most typical network setups for Bhyve. One would be the most server (or desktop) oriented – as it requires a LAN card to be used. The other one I would call a laptop one – that one would provide network connectivity using wlan0 WiFi interface.

No matter which one we will choose – we need to enable port forwarding on our FreeBSD host. Do that with these two commands.

host # sysrc gateway_enable=YES

host # sysctl net.inet.ip.forwarding=1

host # echo net.link.tap.up_on_open=1 >> /etc/sysctl.conf

host # sysctl net.link.tap.up_on_open=1

I assume that our FreeBSD host system would use 10.0.0.10/24 IP address and that 10.0.0.1 would be its default gateway.

Your host system main /etc/rc.conf file can looks as follows then.

host # cat /etc/rc.conf
# NETWORK
  hostname=host
  ifconfig_re0="inet 10.0.0.10/24 up"
  defaultrouter="10.0.0.1"
  gateway_enable=YES

# DAEMONS
  sshd_enable=YES
  zfs_enable=YES

# BHYVE
  vm_enable="YES"
  vm_dir="zfs:zroot/vm"
  vm_list=""
  vm_delay="3"

Server/Desktop LAN Bridge

We will use 10.0.0.0/24 network – the same that our host system uses. We will need one bridge/switch named vm-public with 10.0.0.100/24 address on it. Without that address later the dnsmasq will complain unknown interface vm-public about it. Information about the switches is kept in the /vm/.config/system.conf file. We will also need to add out LAN interface to the public switch. It will beΒ re0 interface in my case.

host # vm switch create -a 10.0.0.100/24 public

host # vm switch add public re0

host # vm switch list
NAME    TYPE      IFACE      ADDRESS        PRIVATE  MTU  VLAN  PORTS
public  standard  vm-public  10.0.0.100/24  no       -    -     re0

host # cat /vm/.config/system.conf
switch_list="public"
type_public="standard"
addr_public="10.0.0.100/24"
ports_public="re0"

To be honest the networking part setup is complete.

When you will be setting up your Bhyve VMs you will either use static 10.0.0.0/24 IP address space or just use DHCP and the one that is already on your network will take care of the rest (assuming you have one).

If you do not have one you may use dnsmasq service to do that easily.

host # cat /usr/local/etc/dnsmasq.conf
port=0
no-resolv
server=1.1.1.1
except-interface=lo0
bind-interfaces
local-service
dhcp-authoritative
interface=vm-public
dhcp-range=10.0.0.69,10.0.0.96

host # service dnsmasq enable

host # service dnsmasq start

That should do.

Now – to access the VMs in this bridged networking mode you can just ssh(1) to their IP address directly.

Laptop WiFi NAT

This is one of the cases where VirtualBox has one more feature over Bhyve. With VirtualBox its possible to use bridge mode over WiFi interface. Its not possible with Bhyve currently. I have submitted a proposal to FreeBSD Foundation to implement such configuration – especially as open source VirtualBox code already exists. Time will tell if it will be implemented or if there would be more important tasks to take care of.

We will use 10.1.1.0/24 network for our VM needs. We will also need only one vm-bhyve switch that we will use – and it will be the vm-public one with 10.1.1.1/24 address – we will be using it as a gateway for our VMs in NAT. Information about the switches is kept in the /vm/.config/system.conf file.

host # vm switch create -a 10.1.1.1/24 public

host # vm switch list
NAME    TYPE      IFACE      ADDRESS      PRIVATE  MTU  VLAN  PORTS
public  standard  vm-public  10.1.1.1/24  no       -    -     -

host # cat /vm/.config/system.conf 
switch_list="public"
type_public="standard"
addr_public="10.1.1.1/24"

Now the NAT part – we will do that with very simple pf(4) config.

host # cat /etc/pf.conf
# SKIP LOOPBACK
  set skip on lo0

# bhyve(8) VMS NAT 
  nat on wlan0 from {10.1.1.1/24} to any -> (wlan0)

# PASS IN/OUT ALL
  pass in all
  pass out all

host # service pf enable

host # service pf start

You can check the stats of that pf(4) rules like that.

host # pfctl -Psn -vv
No ALTQ support in kernel
ALTQ related functions disabled
@0 nat on wlan0 inet from 10.1.1.0/24 to any -> (wlan0) round-robin
  [ Evaluations: 18774     Packets: 362277    Bytes: 352847937   States: 0     ]
  [ Inserted: uid 0 pid 69837 State Creations: 38    ]

Feel free to add all your pf(4) rules into the /etc/pf.conf file.

Now the DHCP server. For simplicity of the setup we will use dnsmasq daemon – but nothing prevents you from setting up a Highly Available DHCP Server instead using isc-dhcp44-server package.

host # cat /usr/local/etc/dnsmasq.conf
port=0
no-resolv
server=1.1.1.1
except-interface=lo0
bind-interfaces
local-service
dhcp-authoritative
interface=vm-public
dhcp-range=10.1.1.11,10.1.1.99

host # service dnsmasq enable

host # service dnsmasq start

Now you should be ready to setup Bhyve VMs on your laptop.

When I was using VirtualBox – it allowed me to use its Port Forwarding feature where I could add as many mappings in the NAT network type as shown below.
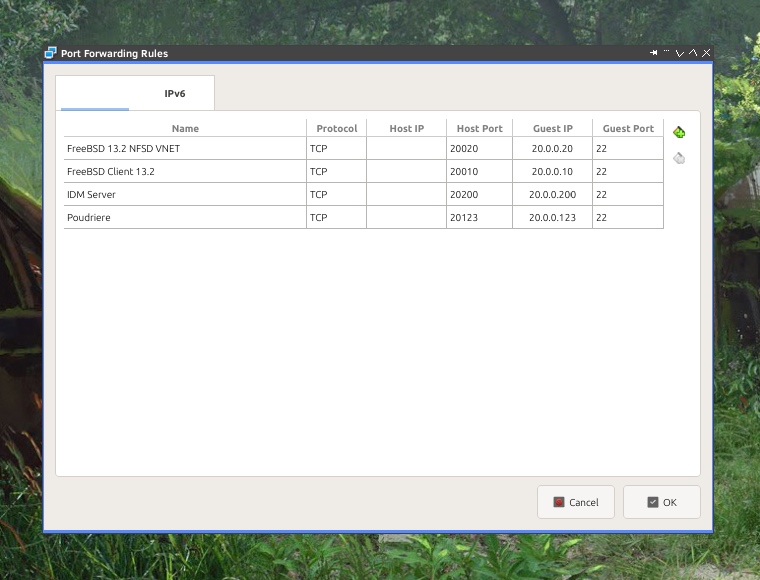
vbox-port-forwarding

… but with Bhyve its even better as no port forwarding in the NAT mode is needed at all! πŸ™‚

You can access the Bhyve VMs in NAT networking mode the same as you can in the bridged mode – with just ssh(1) to their IP address from directly from the 10.1.1.0/24 range.

So to put it bluntly – if a Bhyve VM in NAT mode got 10.1.1.33/24 IP address – then just ssh(1) to that IP address directly from the host system.

Networking Restart

Sometimes – when for example you laptop will boot without network connectivity – the tap(4) interfaces sometimes do not went UP.

bhyve-networking-restart

There is simple fix tor that problem – bhyve-network-restart.sh script.

Its shown below.

# ADD IP ADDRESS TO EACH vm-bhyve SWITCH
vm switch list \
  | sed 1d \
  | while read NAME TYPE IFACE ADDRESS PRIVATE MTU VLAN PORTS a0 a1 a2 a3 a4 a5 a6 a7 a8 a9
    do
      if [ "${ADDRESS}" != "-" ]
      then
             vm switch address ${NAME} ${ADDRESS}
        echo vm switch address ${NAME} ${ADDRESS}
      fi
    done        

# SET TO 'up' ALL vm-bhyve SWITCH MEMBERS
vm switch list \
  | sed 1d \
  | awk '{print $1}' \
  | while read SWITCH
    do
      ifconfig vm-${SWITCH} \
        | awk '/member:/ {print $2}' \
        | while read INTERFACE
          do
                 ifconfig ${INTERFACE} up
            echo ifconfig ${INTERFACE} up
          done
    done


Execute it everytime you lost connectivity with your VMs and you are done.

Datastores

While vm-bhyve supports multiple datastores – you will only need one – the default one.

host # vm datastore list
NAME            TYPE        PATH                      ZFS DATASET
default         zfs         /vm                       zroot/vm

Snapshots and Clones

The vm-bhyve also supports snapshots and clones of the VMs disks. Generally they are just ZFS snapshots and clones.

Templates

While vm-bhyve comes with several handy templates – they are incomplete – and small several changes makes the game more playable.

NVMe

First – we will implement the things that we know work faster – the nvme type for disk images instead of virt-blk or ahci-hd ones. Of course not all operating systems have support for such devices – for them we will use the latter options.

A fast way to change it to nvme is below.

host # sed -i '' s.virtio-blk.nvme.g /vm/.templates/freebsd.conf

ISO Images

Each VM needs an ISO image from which it will be installed. Of course you can also just create new VM and copy the disk contents from other server or use one of the FreeBSD images.

There are two ways to feed vm-bhyve with ISO images.

One is to fetch them from some URL.

host # vm iso http://ftp.freebsd.org/pub/FreeBSD/releases/ISO-IMAGES/13.2/FreeBSD-13.2-RELEASE-amd64-disc1.iso

host # vm iso
DATASTORE           FILENAME
default             FreeBSD-13.2-RELEASE-amd64-disc1.iso

The other way is to just simple copy ISO file to the /vm/.iso directory.

host # cp /home/vermaden/download/ubuntu-mate-23.04-desktop-amd64.iso /vm/.iso/

host # vm iso
DATASTORE           FILENAME
default             FreeBSD-13.2-RELEASE-amd64-disc1.iso
default             ubuntu-mate-23.04-desktop-amd64.iso

Guest OS Install

Generally each VM install is very similar as shown below.

host # vm create -t TEMPLATE NAME

host # vm install NAME ISO

host # vm console NAME

Example for FreeBSD is below.

host # vm create -t freebsd freebsd13

host # vm install freebsd13 FreeBSD-13.2-RELEASE-amd64-disc1.iso
Starting freebsd13
  * found guest in /vm/freebsd13
  * booting...

host # vm console freebsd13

You will probably see something like that below.

freebsd-loader-menu

Then you do the installation in the text mode and after reboot you have your running FreeBSD VM.

host # vm list
NAME          DATASTORE  LOADER     CPU  MEMORY  VNC  AUTO     STATE
freebsd13     default    bhyveload  1    256M    -    Yes [1]  Running (85315)

Some more info to display can be shown with info argument.

host # vm info freebsd13
------------------------
Virtual Machine: freebsd13
------------------------
  state: stopped
  datastore: default
  loader: bhyveload
  uuid: a91287a1-39d3-11ee-b73d-f0def1d6aea1
  cpu: 1
  memory: 256M

  network-interface
    number: 0
    emulation: virtio-net
    virtual-switch: public
    fixed-mac-address: 58:9c:fc:0b:98:30
    fixed-device: -

  virtual-disk
    number: 0
    device-type: file
    emulation: nvme
    options: -
    system-path: /vm/freebsd13/disk0.img
    bytes-size: 21474836480 (20.000G)
    bytes-used: 885089280 (844.086M)

  snapshots
    zroot/vm/freebsd13@fresh    85.2M   Mon Aug 14 11:18 2023

host # env EDITOR=cat vm configure freebsd13
loader="bhyveload"
cpu=1
memory=256M
network0_type="virtio-net"
network0_switch="public"
disk0_type="nvme"
disk0_name="disk0.img"
uuid="a91287a1-39d3-11ee-b73d-f0def1d6aea1"
network0_mac="58:9c:fc:0b:98:30"

If you want to edit and not only display the VM config use this.

host # vm configure freebsd13

FreeBSD

FreeBSD can be boot in two ways. One is with bhyveload which may be translated to legacy BIOS boot. You can also of course boot FreeBSD un UEFI mode.

host # cat /vm/.templates/freebsd.conf
loader="bhyveload"
cpu=1
memory=256M
network0_type="virtio-net"
network0_switch="public"
disk0_type="nvme"
disk0_name="disk0.img"

The above will use bhyveload and it mostly works … but sometimes if you want to install a lot newer version under Bhyve the loader may not have all the needed features. I was hit by this problem recently where I used FreeBSD 13.2-RELEASE for the FreeBSD host system and wanted to try 14.0-ALPHA1 version.

I described the details of this problem here – FreeBSD Bug 273099 – in a BUG report.

This is how such error looks like:

| FreeBSD/amd64 User boot lua, Revision 1.2
| ZFS: unsupported feature: com.klarasystems:vdev_zaps_v2
| ERROR: cannot open /boot/lua/loader.lua: no such file or directory.
| 
| Type '?' for a list of commands, 'help' for more detailed help.
| OK 

To overcome that you will need latest (more up to date then 14.0-ALPHA1 version) FreeBSD sources and below commands.

host # pkg install gitup

host # cp /usr/local/etc/gitup.conf.sample /usr/local/etc/gitup.conf

host # gitup current

host # cd /usr/src/stand

host # make

host # find /usr/obj -type f -name userboot_lua.so
/usr/obj/usr/src/amd64.amd64/stand/userboot/userboot_lua/userboot_lua.so

host # cp /usr/obj/usr/src/amd64.amd64/stand/userboot/userboot_lua/userboot_lua.so /vm/userboot_lua.so

Now – we need to add bhyveload_loader="/vm/userboot_lua.so" option to out FreeBSD 14.0-ALPHA1 machine config.

host # cat /vm/freebsd14/freebsd14.conf
loader="bhyveload"
bhyveload_loader="/vm/userboot_lua.so"
cpu=1
memory=256M
network0_type="virtio-net"
network0_switch="public"
disk0_type="nvme"
disk0_name="disk0.img"
uuid="975bca2a-39c4-11ee-b73d-f0def1d6aea1"
network0_mac="58:9c:fc:03:67:47"

Now it will boot properly.

Of course it was very easy to overcome that using UEFI boot instead.

host # cat /vm/freebsd14uefi/freebsd14uefi.conf
loader="uefi"
cpu=1
memory=256M
network0_type="virtio-net"
network0_switch="public"
disk0_type="nvme"
disk0_name="disk0.img"
uuid="35ca42b7-7f28-43eb-afd9-2488c5ec83cf"
network0_mac="58:9c:fc:0a:16:4b"

Linux

By default for Linux the grub way is the proposed way. I do not use it as at it olny allows console access – and even many so called enterprice grade Linux distributions such as AlmaLinux or Rocky have graphical installer that needs/wants graphical display … and that is only available in uefi mode.

Maybe for Alpine or Void Linux such approach may be usable … but uefi will also work very well – thus I do not see ANY advantages of using grub way here.

I will show you the next example based on AlmaLinux 8.x install but the same worked properly with Ubuntu Mate for example.

First the default template.

host # cat /vm/.templates/linux.conf
loader="uefi"
cpu=2
memory=4G
network0_type="virtio-net"
network0_switch="public"
disk0_type="nvme"
disk0_name="disk0.img"
xhci_mouse="yes"
graphics="yes"

The above added xhci_mouse="yes" uses more precise xhci(4) USB 3.x mouse driver and graphics="yes" forces the exposure of VNC connection.

With such template the installation looks like that.

host # cp AlmaLinux-8.8-x86_64-minimal.iso /vm/.iso/

host # vm create -t linux almalinux8

host # vm install almalinux8 AlmaLinux-8.8-x86_64-minimal.iso
Starting almalinux8
  * found guest in /vm/almalinux8
  * booting...

host # vm list
NAME           DATASTORE  LOADER     CPU  MEMORY  VNC           AUTO  STATE
almalinux8     default    uefi       2    4G      0.0.0.0:5900  No    Running (11819)

host % vncviewer -SendClipboard -AcceptClipboard -LowColorLevel -QualityLevel 6 :5900 &

The last vncviewer(1) command is executed as regular user. It comes from net/tigervnc-viewer package.

If you will be connecting to some external server then use IP address in the command.

host % vncviewer -SendClipboard -AcceptClipboard -LowColorLevel -QualityLevel 6 10.0.0.66::5900 &

After the Linux system is installed you may specify the exact VNC port or IP address. Also the screen resolution or enable/disable waiting for the VNC connection.

graphics_port="5900"
graphics_listen="0.0.0.0"
graphics_res="1400x900"
graphics_wait="no"

Windows 7

A lot of people will criticize me for this one – as Windows 7 is not an officially supported version anymore. I do not care about that when I want to use some localhost software … or older software that works better on older version. Not to mention that its one of the last Windows versions that does not force online Microsoft account down your throat. It also uses less resources and is more responsive.

First – the template – similar to the Linux one.

host # cat /vm/.templates/windows7.conf           
loader="uefi"
graphics="yes"
cpu=2
memory=2G
ahci_device_limit="8"
network0_type="e1000"
network0_switch="public"
disk0_type="ahci-hd"
disk0_name="disk0.img"
disk0_opts="sectorsize=512"
utctime="no"
bhyve_options="-s 8,hda,play=/dev/dsp,rec=/dev/dsp"

If you set the xhci_mouse="yes" option with Windows 7 – you will end up without a working mouse in VNC connection and you will have to make all the install and configuration by keyboard only.

One may think about adding xhci_mouse="yes" after installation when you will already have working RDP connection – but that would also reqiure additional drivers. In theory – the device VEN_8086&DEV_1E31 name is recognized as Intel USB 3.0 eXtensible Host Controller … but for some reason anytime I wanted to install it – the Windows 7 system crashed and instantly rebooted.

The other even more imporant thing is having the disk0_opts="sectorsize=512" option. Without it the Windows 7 instaler will fail with the following error.

win-7-install-error-NO-512-BLOCKS

The last option bhyve_options="-s 8,hda,play=/dev/dsp,rec=/dev/dsp" enables audio.

The install procedure is also similar to Linux.

host # cp win_7_amd64_sp1_en.iso /vm/.iso/

host # vm iso
DATASTORE           FILENAME
default             win_7_amd64_sp1_en.iso

host # vm create -t windows7 -s 40G windows7

host # vm install windows7 win_7_amd64_sp1_en.iso
Starting windows7
  * found guest in /vm/windows7
  * booting...

host # vm list
NAME           DATASTORE  LOADER     CPU  MEMORY  VNC           AUTO  STATE
windows7       default    uefi       2    2G      0.0.0.0:5900  No    Running (11819)

host % vncviewer -SendClipboard -AcceptClipboard -LowColorLevel -QualityLevel 6 :5900 &

After the install we should enable RDP connections for more features. Rememeber to select any version option.

win-7-computer-properties-advanced-remote

You can add one or more CD-ROM drives with following options in the configure argument.

disk1_type="ahci-cd"
disk1_dev="custom"
disk1_name="/vm/.iso/virtio-drivers.iso"

It would be easier for RDP connections to have static IP instead of a DHCP one.
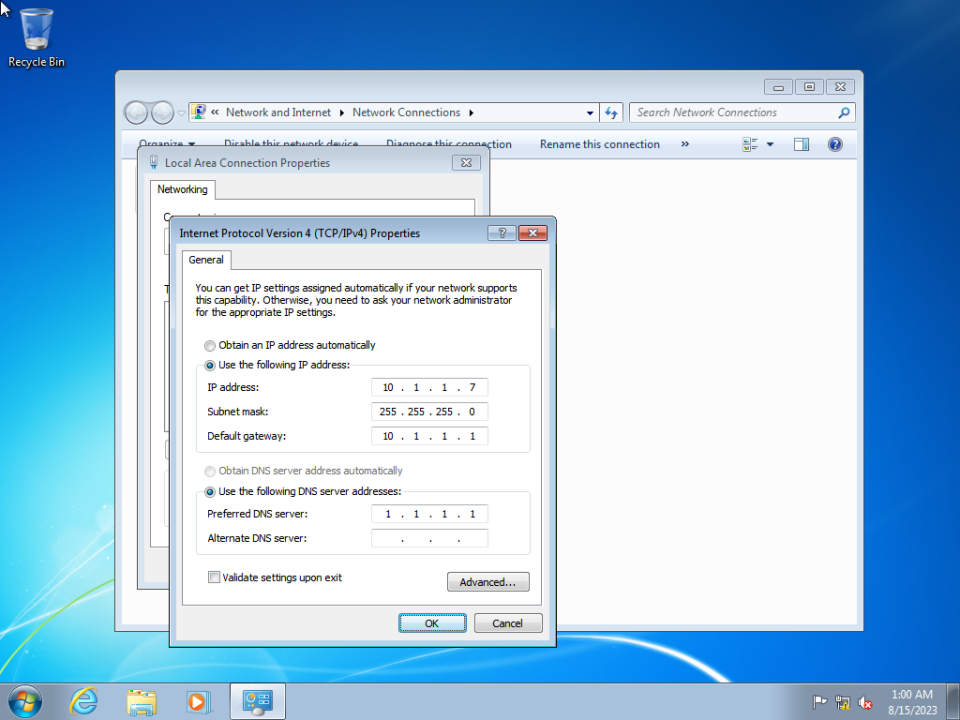
win-7-network-adapter-IPv4-static

Now as we have the static 10.1.1.7 IP address we can use RDP connection with rdesktop(1) command.

host % rdesktop -u buser -p bpass -P -N -z -g 1800x1000 -a 24 -r sound:local -r disk:HOME=/home/vermaden 10.1.1.7
Autoselecting keyboard map 'en-us' from locale

ATTENTION! The server uses and invalid security certificate which can not be trusted for
the following identified reasons(s);

 1. Certificate issuer is not trusted by this system.

     Issuer: CN=vbox


Review the following certificate info before you trust it to be added as an exception.
If you do not trust the certificate the connection atempt will be aborted:

    Subject: CN=vbox
     Issuer: CN=vbox
 Valid From: Mon Aug 14 00:58:25 2023
         To: Mon Feb 12 23:58:25 2024

  Certificate fingerprints:

       sha1: 4ad853c40a8aa0560af315b691038202506e07ce
     sha256: 44ec8f7650486aef6261aea42da99caba4e84d7bc58341c0ca1bb8e28b81d222


Do you trust this certificate (yes/no)? yes
Connection established using SSL.

There are several useful options here.

The -u buser and -p bpass will take care of credentials.

The -P option enables caching of bitmaps to disk (persistent bitmap caching). This improves performance (especially on low bandwidth connections) and reduces network traffic.

The -N option enables numlock synchronization between the X11 server and remote RDP session.

The -z enables compression of the RDP datastream.

The -g 1800x1000 and -a 24 specifies resolution and color depth rate.

The -r disk:HOME=/home/vermaden enables transparent sharing of your home directory and additional share is shown in My Computer in the Windows 7 machine – very handy for sharing files between the host and guest VM as chown below.

win-7-sharing

The last one option -r sound:local specifies that the audio will be realized on the guest VM – this will only work if you added the bhyve_options="-s 8,hda,play=/dev/dsp,rec=/dev/dsp" to the Windows 7 Bhyve config. Alternatively without that hda(4) emulation you can use -r sound:remote option – this would use RDP protocol to transfer audio events from the guest machine to your host machine and then audio will be played then locally on your host machine.

Windows 10

Finally a supported version.

Template is similar to the Windows 7 one.

host # cat /vm/.templates/windows10.conf
loader="uefi"
graphics="yes"
xhci_mouse="yes"
cpu=2
memory=2G
ahci_device_limit="8"
network0_type="e1000"
network0_switch="public"
disk0_type="nvme"
disk0_name="disk0.img"
utctime="no"
bhyve_options="-s 8,hda,play=/dev/dsp,rec=/dev/dsp"

The Windows 10 supports the xhci_mouse="yes" so we enable and keep it all the time.

The Windows 10 does not need the disk0_opts="sectorsize=512" option.

As Windows 10 is newer – the nvme can (and should) be used for performance reasons.

The last option bhyve_options="-s 8,hda,play=/dev/dsp,rec=/dev/dsp" enables audio.

The install procedure is also similar to Windows 7.

host # cp win_10_amd64_en_LTSC.iso /vm/.iso/

host # vm iso
DATASTORE           FILENAME
default             win_10_amd64_en_LTSC.iso

host # vm create -t windows10 -s 40G windows10

host # vm install windows10 win_10_amd64_en_LTSC.iso
Starting windows10
  * found guest in /vm/windows10
  * booting...

host # vm list
NAME           DATASTORE  LOADER     CPU  MEMORY  VNC           AUTO  STATE
windows10      default    uefi       2    2G      0.0.0.0:5900  No    Running (11819)

host % vncviewer -SendClipboard -AcceptClipboard -LowColorLevel -QualityLevel 6 :5900 &

After the install we should enable RDP connections for more features. Remember to select any version option.

win-10-advanced-settings-remote

You can add one or more CD-ROM drives with following options in the configure argument.

disk1_type="ahci-cd"
disk1_dev="custom"
disk1_name="/vm/.iso/virtio-drivers.iso"

It would be easier for RDP connections to have static IP instead of a DHCP one.

win-10-network-settings-adapter-properties-IPv4-static

Now as we have the static 10.1.1.8 IP address we can use RDP connection with rdesktop(1) command.

host % rdesktop -u buser -p bpass -P -N -z -g 1600x900 -a 24 -r sound:local -r disk:HOME=/home/vermaden 10.1.1.8
Autoselecting keyboard map 'en-us' from locale

ATTENTION! The server uses and invalid security certificate which can not be trusted for
the following identified reasons(s);

 1. Certificate issuer is not trusted by this system.

     Issuer: CN=DESKTOP-HKJ3H6T


Review the following certificate info before you trust it to be added as an exception.
If you do not trust the certificate the connection atempt will be aborted:

    Subject: CN=DESKTOP-HKJ3H6T
     Issuer: CN=DESKTOP-HKJ3H6T
 Valid From: Mon Aug 14 10:33:41 2023
         To: Tue Feb 13 09:33:41 2024

  Certificate fingerprints:

       sha1: 967d5cdb164e53f7eb4c5c17b0343f2f279fb709
     sha256: c08b732122a39c44d91fac2a9093724da12d2f3e6ea51613245d13cf762f4cd2


Do you trust this certificate (yes/no)? yes

Options are the same as with Windows 7 and they are described in the Windows 7 section.

Force Windows 10 Offline Account

To force creation of local account instead of forced online account you need to boot the Windows 10 without network.

Do the following steps to do that.

host # yes | vm poweroff windows10

host # vm configure windows10
- network0_type="e1000"
- network0_switch="public"

host # vm start windows10

Now create the offline account.

After creating it poweroff the Windows 10 VM.

host # vm configure windows10
+ network0_type="e1000"
+ network0_switch="public"

host # vm start windows10

Now you have local account on Windows 10 system.

Windows 10 Bloat Removers

You may consider using on of the known Windows 10 bloat removers available here:

Windows 11

The setup/install of Windows 11 is the same as Windows 10.

Dealing with Locked VMs

Lets assume that our host system crashed.

The vm-bhyve will left run.lock files in the machines dirs.

host # ls -l /vm/freebsd14uefi
total 1389223K
-rw-r--r-- 1 root wheel          32 2023-08-16 23:36 console
-rw------- 1 root wheel 21474836480 2023-08-16 23:46 disk0.img
-rw-r--r-- 1 root wheel         200 2023-08-16 23:35 freebsd14uefi.conf
-rw-r--r-- 1 root wheel          11 2023-08-16 23:36 run.lock
-rw-r--r-- 1 root wheel        5583 2023-08-16 23:36 vm-bhyve.log

host # vm list
NAME           DATASTORE  LOADER     CPU  MEMORY  VNC  AUTO     STATE
almalinux8     default    uefi       2    2G      -    No       Stopped
freebsd13      default    bhyveload  1    256M    -    Yes [1]  Running (19258)
freebsd13alt   default    bhyveload  1    256M    -    No       Stopped
freebsd14      default    bhyveload  1    256M    -    No       Stopped
freebsd14uefi  default    uefi       2    8G      -    No       Locked (w520.local)
windows10ltsc  default    uefi       2    2G      -    No       Stopped
windows7       default    uefi       2    2G      -    No       Stopped

host # rm /vm/freebsd14uefi/run.lock

host # vm list
NAME           DATASTORE  LOADER     CPU  MEMORY  VNC  AUTO     STATE
almalinux8     default    uefi       2    2G      -    No       Stopped
freebsd13      default    bhyveload  1    256M    -    Yes [1]  Running (19258)
freebsd13alt   default    bhyveload  1    256M    -    No       Stopped
freebsd14      default    bhyveload  1    256M    -    No       Stopped
freebsd14uefi  default    uefi       2    8G      -    No       Stopped
windows10ltsc  default    uefi       2    2G      -    No       Stopped
windows7       default    uefi       2    2G      -    No       Stopped

Now you may want to start the locked machine properly.

Disk Resize

By default vm-bhyve will create disks with 20 GB in size.

To resize the Bhyve virtual machine disk we would use truncate(1) command.

host # vm stop freebsd13

host # cd /vm/freebsd13

host # truncate -s 40G disk0.img

host # vm start freebsd13

If you are not sure about that – you may work on a copy instead.

host # vm stop freebsd13

host # truncate -s 40G disk0.img.NEW

host # dd bs=1m if=disk0.img of=disk0.img.NEW conv=notrunc status=progress
  20865613824 bytes (21 GB, 19 GiB) transferred 43.002s, 485 MB/s
20480+0 records in
20480+0 records out
21474836480 bytes transferred in 43.454036 secs (494196586 bytes/sec)

host # mv disk0.img disk0.img.BACKUP

host # mv disk0.img.NEW disk0.img

host # vm start freebsd13

Now we need to resize the filesystem inside the VM.

freebsd13 # lsblk
DEVICE         MAJ:MIN SIZE TYPE                                          LABEL MOUNT
nvd0             0:90   40G GPT                                               - -
  nvd0p1         0:91  512K freebsd-boot                           gpt/gptboot0 -
           -:-   492K -                                                 - -
  nvd0p2         0:92  2.0G freebsd-swap                              gpt/swap0 SWAP
  nvd0p3         0:93   18G freebsd-zfs                                gpt/zfs0 
           -:-   1.0M -                                                 - -

freebsd13 # geom disk list
Geom name: nvd0
Providers:
1. Name: nvd0
   Mediasize: 42949672960 (40G)
   Sectorsize: 512
   Mode: r2w2e3
   descr: bhyve-NVMe
   lunid: 589cfc2081410001
   ident: NVME-4-0
   rotationrate: 0
   fwsectors: 0
   fwheads: 0

freebsd13 # gpart show
=>      40  41942960  nvd0  GPT  (40G) [CORRUPT]
        40      1024     1  freebsd-boot  (512K)
      1064       984        - free -  (492K)
      2048   4194304     2  freebsd-swap  (2.0G)
   4196352  37744640     3  freebsd-zfs  (18G)
  41940992      2008        - free -  (1.0M)

freebsd13 # gpart recover nvd0
nvd0 recovered

freebsd13 # gpart show
=>      40  83886000  nvd0  GPT  (40G)
        40      1024     1  freebsd-boot  (512K)
      1064       984        - free -  (492K)
      2048   4194304     2  freebsd-swap  (2.0G)
   4196352  37744640     3  freebsd-zfs  (18G)
  41940992  41945048        - free -  (20G)

freebsd13 # gpart resize -i 3 -a 1m nvd0
nvd0p3 resized

freebsd13 # gpart show
=>      40  83886000  nvd0  GPT  (40G)
        40      1024     1  freebsd-boot  (512K)
      1064       984        - free -  (492K)
      2048   4194304     2  freebsd-swap  (2.0G)
   4196352  79687680     3  freebsd-zfs  (38G)
  83884032      2008        - free -  (1.0M)

freebsd13 # zpool status
  pool: zroot
 state: ONLINE
config:

        NAME        STATE     READ WRITE CKSUM
        zroot       ONLINE       0     0     0
          nvd0p3    ONLINE       0     0     0

freebsd13 # zpool list
NAME    SIZE  ALLOC   FREE  CKPOINT  EXPANDSZ   FRAG    CAP  DEDUP    HEALTH  ALTROOT
zroot  17.5G  17.0G   544M        -         -    87%    96%  1.00x    ONLINE  -

freebsd13 # zpool set autoexpand=on zroot

freebsd13 # zpool online -e zroot nvd0p3

freebsd13 # zpool list
NAME    SIZE  ALLOC   FREE  CKPOINT  EXPANDSZ   FRAG    CAP  DEDUP    HEALTH  ALTROOT
zroot  37.5G  17.0G  20.5G        -         -    41%    45%  1.00x    ONLINE  -

Summary

I hope I was able to provide all needed information.

Let me know in comments if I missed something.

UPDATE 1 – The sysutils/edk2 Issue

Recently a lot of people started to get problems with running UEFI machines on Bhyve. After a short investigation (details in the 273560 BUG report) the root of all cause was the new sysutils/edk2 version that caused the problem. The problem does not exists as long as You use the -A flag for bhyve(8) command. Unfortunately its not the default for vm-bhyve and -A options is needed in the bhyve_options parameter in each UEFI boot VM.

For example:

host % grep bhyve_options /vm/freebsd14uefi/freebsd14uefi.conf 
bhyve_options="-A"

Additional details for vm-bhyve available HERE.

Hope that helps.

EOF
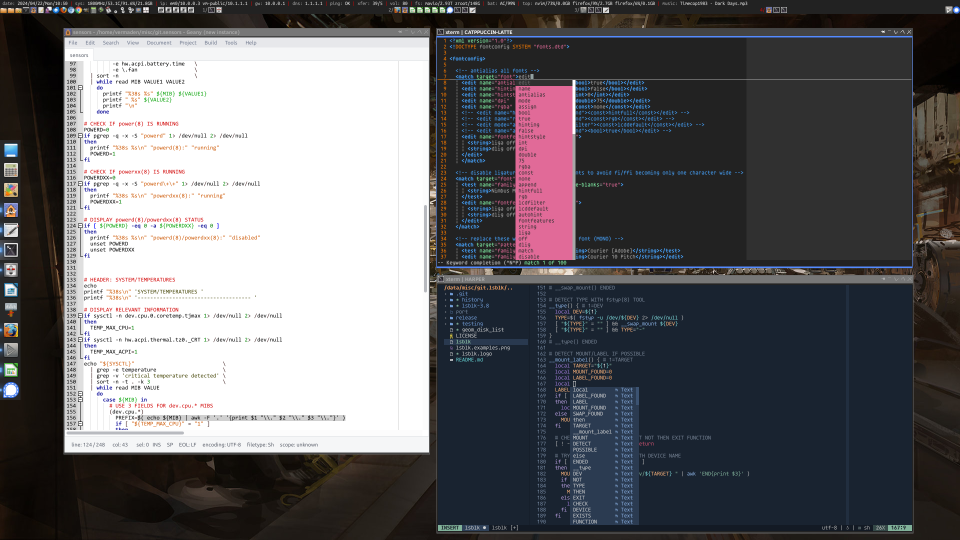
FreeBSD on FreeIPA/IDM with Poudriere Repo

I already wrote twice about this topic:

FreeIPA-logo

In both earlier attempts I compiled and configured everything by hand – at it was a very interactive time consuming process. This time – after having some poudriere(8) experience – Simple FreeBSD Poudriere Harvester Guide – as shared here – I will now automate customized FreeIPA/IDM packages creation in a FreeBSD Poudriere tool.

One final note for the rest of the guide – please use /bin/sh shell for the commands … or zsh(1) for example πŸ™‚

This is the Table of Contents for this article.

  • FreeBSD on FreeIPA/IDM with Poudriere Repo
  • Poudriere Setup
    • FreeBSD Config
    • Development Poudriere Version
    • Nginx Setup
    • Latest Ccache Version
    • FreeIPA/IDM Repo
    • FreeIPA/IDM Configure Options
    • Repo Update
  • FreeBSD Client

Poudriere Setup

For a start lets switch to latest branch for more fresh pkg(8) packages.

# mkdir -p /usr/local/etc/pkg/repos

# sed s-quarterly-latest-g /etc/pkg/FreeBSD.conf > /usr/local/etc/pkg/repos/FreeBSD.conf

We will now install the needed packages.

# pkg install -y \
    poudriere-devel \
    nginx           \
    git-lite        \
    ccache4         \
    tree

FreeBSD Config

Main FreeBSD config.

# cat /etc/rc.conf
# NETWORK
  hostname="poudriere.lab.org"
  ifconfig_vtnet0="inet 10.0.0.122/24"
  defaultrouter="10.0.0.1"

# DAEMONS
  syslogd_flags="-ss"
  sshd_enable="YES"
  zfs_enable="YES"
  ntpdate_enable="YES"
  nginx_enable="YES"

# OTHER
  clear_tmp_enable="YES"
  dumpdev="AUTO"

… and /etc/hosts file.

# cat /etc/hosts
::1              localhost  localhost.my.domain
127.0.0.1        localhost  localhost.my.domain
10.0.0.122       poudriere-devel.lab.org  poudriere-devel

Development Poudriere Version

Contrary to my earlier guide I used the development ports-mgmt/poudriere-devel package because it offers more features.

The most interesting one is -b latest for the poudriere-bulk(8) command. For packages that you do not modify and only need as dependencies – Poudriere will just fetch them from the latest repository using pkg(8) and then (re)build the customized packages you want.

… currently this feature is broken and requires small fix/patch to work properly πŸ™‚

The sort(1) command needs to have -u flag added in two places as described here:

We will now apply this patch.

# pkg info -l poudriere-devel | grep common.sh
        /usr/local/share/poudriere/common.sh
        /usr/local/share/poudriere/include/common.sh.dragonfly
        /usr/local/share/poudriere/include/common.sh.freebsd

# cd /usr/local/share/poudriere/

# cp common.sh common.sh.NEW

# cp common.sh common.sh.OLD

# vi common.sh.NEW

# diff -u common.sh common.sh.NEW | tee PATCH
--- common.sh   2023-08-09 15:08:29.831701000 +0200
+++ common.sh.NEW       2023-08-09 14:49:22.097238000 +0200
@@ -3672,7 +3672,7 @@
            $1 == pkgbase && $3 == "off" {print "-"$2;printed=1}
            $1 != pkgbase && printed == 1 {exit}
            ' \
-           "${remote_all_options}" | sort -k1.2 | paste -s -d ' ' -)
+           "${remote_all_options}" | sort -k1.2 -u | paste -s -d ' ' -)
 
        shash_get pkgname-options "${pkgname}" selected_options || \
            selected_options=
@@ -3698,7 +3698,7 @@
            $1 == pkgbase {print $2;printed=1}
            $1 != pkgbase && printed == 1 {exit}
            ' \
-           "${remote_all_deps}" | sort | paste -s -d ' ' -)
+           "${remote_all_deps}" | sort -u | paste -s -d ' ' -)
        case "${local_deps}" in
        ${remote_deps}) ;;
        *)

# grep sort common.sh | grep -- -u | wc -l
       9

# grep sort common.sh.NEW | grep -- -u | wc -l
      11

# grep sort common.sh.OLD | grep -- -u | wc -l
       9

# patch < PATCH
Hmm...  Looks like a unified diff to me...
The text leading up to this was:
--------------------------
|--- common.sh  2023-08-09 15:08:29.831701000 +0200
|+++ common.sh.NEW      2023-08-09 14:49:22.097238000 +0200
--------------------------
Patching file common.sh using Plan A...
Hunk #1 succeeded at 3672.
Hunk #2 succeeded at 3698.
done

# grep sort common.sh | grep -- -u | wc -l
      11

# grep sort common.sh.NEW | grep -- -u | wc -l
      11

# grep sort common.sh.OLD | grep -- -u | wc -l
       9

Now the SSL keys.

# SSL=/usr/local/etc/ssl

# mkdir -p            /usr/ports/distfiles \
                      ${SSL}/keys \
                      ${SSL}/certs

# chmod 0600          ${SSL}/keys

# openssl genrsa -out ${SSL}/keys/poudriere.key 4096

# openssl rsa     -in ${SSL}/keys/poudriere.key -pubout \
                 -out ${SSL}/certs/poudriere.cert

… and ZFS datasets.

# zfs create -o mountpoint=/usr/local/poudriere zroot/poudriere

# zfs create -o mountpoint=/var/ccache          zroot/var/ccache

Now the Poudriere config.

# IP=10.0.0.122

# cat << EOF > /usr/local/etc/poudriere.conf
ZPOOL=zroot
BASEFS=/usr/local/poudriere
ZROOTFS=/usr/local/poudriere
FREEBSD_HOST=ftp://ftp.freebsd.org
POUDRIERE_DATA=/usr/local/poudriere/data
CHECK_CHANGED_OPTIONS=verbose
CHECK_CHANGED_DEPS=yes
PKG_REPO_SIGNING_KEY=/usr/local/etc/ssl/keys/poudriere.key
URL_BASE=http://${IP}/
USE_TMPFS=no
TMPFS_LIMIT=12
MAX_MEMORY=12
PARALLEL_JOBS=4
PREPARE_PARALLEL_JOBS=4
MAX_FILES=4096
DISTFILES_CACHE=/usr/ports/distfiles
KEEP_OLD_PACKAGES=yes
KEEP_OLD_PACKAGES_COUNT=3
CHECK_CHANGED_OPTIONS=verbose
CHECK_CHANGED_DEPS=yes
CCACHE_DIR=/var/ccache
RESTRICT_NETWORKING=no
EOF

… and symlink for certificate that we will use later.

# mkdir -p /usr/local/poudriere/data/logs/bulk

# ln -s /usr/local/etc/ssl/certs/poudriere.cert \
        /usr/local/poudriere/data/logs/bulk/poudriere.cert

Nginx Setup

Simple Nginx config to host the packages.

# IP=10.0.0.122

# service nginx enable

# sed -i '' -E 's|text/plain[\t\ ]*txt|text/plain txt log|g' /usr/local/etc/nginx/mime.types

# cat << EOF > /usr/local/etc/nginx/nginx.conf

events {
  worker_connections 1024;
}

http {
  include      mime.types;
  default_type application/octet-stream;

  server {
    listen 80 default;
    server_name ${IP};
    root /usr/local/share/poudriere/html;

    location /data {
      alias /usr/local/poudriere/data/logs/bulk;
      autoindex on;
    }

    location /packages {
      root /usr/local/poudriere/data;
      autoindex on;
    }
  }
}
EOF

# service nginx restart

# sockstat -l4
USER     COMMAND    PID   FD PROTO  LOCAL ADDRESS         FOREIGN ADDRESS      
www      nginx      83135 7  tcp4   *:80                  *:*
root     nginx      82843 7  tcp4   *:80                  *:*
root     sendmail   67293 5  tcp4   127.0.0.1:25          *:*
root     sshd       66135 5  tcp4   *:22                  *:*

Latest Ccache Version

Previous guide used older Ccache version 3.x along with some small Memcached addition/modification. I wrote that article just 4 months ago but even after such short period of time the ccache-memcached is not longer available.

I could use ‘generic’ Ccache 3.x or I could move to latest 4.x branch. I have chosen the latter.

It seems a wise decision as the last Ccache release from the 3.x tree (3.7.12) was released almost 3 years ago – on 2020/10/01.

Below we will configure Ccache to our needs.


# mkdir -p /var/ccache

# cat << EOF > /var/ccache/ccache.conf
max_size = 0
cache_dir = /var/ccache
base_dir = /var/ccache
hash_dir = false
EOF

We can check Ccache settings with -p option.

# ccache -p
(default) absolute_paths_in_stderr = false
(/var/ccache/ccache.conf) base_dir = /var/ccache
(/var/ccache/ccache.conf) cache_dir = /var/ccache
(default) compiler = 
(default) compiler_check = mtime
(default) compiler_type = auto
(default) compression = true
(default) compression_level = 0
(default) cpp_extension = 
(default) debug = false
(default) debug_dir = 
(default) depend_mode = false
(default) direct_mode = true
(default) disable = false
(default) extra_files_to_hash = 
(default) file_clone = false
(default) hard_link = false
(/var/ccache/ccache.conf) hash_dir = false
(default) ignore_headers_in_manifest = 
(default) ignore_options = 
(default) inode_cache = true
(default) keep_comments_cpp = false
(default) log_file = 
(default) max_files = 0
(/var/ccache/ccache.conf) max_size = 0 bytes
(default) msvc_dep_prefix = Note: including file:
(default) namespace = 
(default) path = 
(default) pch_external_checksum = false
(default) prefix_command = 
(default) prefix_command_cpp = 
(default) read_only = false
(default) read_only_direct = false
(default) recache = false
(default) remote_only = false
(default) remote_storage = 
(default) reshare = false
(default) run_second_cpp = true
(default) sloppiness = 
(default) stats = true
(default) stats_log = 
(default) temporary_dir = /var/ccache/tmp
(default) umask = 

… and its Ccache cache stats – currently empty as its a fresh install.


# ccache -s
Local storage:
  Cache size (GiB): 0.0

FreeIPA/IDM Repo

Now options to setup for our customized pkg(8) repo.

# cat << EOF > /usr/local/etc/poudriere.d/make.conf
ALLOW_UNSUPPORTED_SYSTEM=yes
DISABLE_LICENSES=yes
EOF

We will now create new jail(8) where our packages will be built.

# poudriere jail -c -j 13-2-R-amd64 -v 13.2-RELEASE
(...)

# poudriere jail -l
13-2-R-amd64 13.2-RELEASE-p1 amd64 http   2023-08-08 20:36:49 /usr/local/poudriere/jails/13-2-R-amd64

Up to date FreeBSD Ports tree will also be needed – we will create a separate idm profile for it.

# poudriere ports -c -p idm
(...)

# poudriere ports -l
idm       git+https 2023-08-09 20:31:07 /usr/local/poudriere/ports/idm

FreeIPA/IDM Configure Options

Below are the options we will have to choose to make our FreeBSD systems be able to join FreeIPA/IDM domain.

# poudriere options -c -n -p idm security/cyrus-sasl2-gssapi
//   SELECT: (*) GSSAPI_MIT

# poudriere options -c -n -p idm net/openldap26-client
//   SELECT: [x] GSSAPI

# poudriere options -c -n -p idm security/sudo
// DESELECT: [ ] PAM
//   SELECT: (*) GSSAPI_MIT
//   SELECT: (*) SSSD

# poudriere options -c -n -p idm security/sssd
//   SELECT: [x] SMB

These options were stored below.

I needed to replace the ANSI line graphics with universal ‘-‘ and ‘+‘ characters as WordPress had issues with them.


# tree /usr/local/etc/poudriere.d/idm-options
/usr/local/etc/poudriere.d/idm-options
+-- net_openldap26-client
|   +-- options
+-- security_cyrus-sasl2-gssapi
|   +-- options
+-- security_sssd
|   +-- options
+-- security_sudo
    +-- options

5 directories, 4 files

We will now specify packages that we want to be sure will be built of fetched from the latest branch.

# cat << EOF > /usr/local/etc/poudriere.d/idm
security/krb5
security/sudo
security/sssd
security/cyrus-sasl2
security/cyrus-sasl2-gssapi
security/pam_mkhomedir
net/openldap26-client
net/samba413
EOF


We can now start the build process.

# poudriere bulk -j 13-2-R-amd64 -b latest -p idm -f /usr/local/etc/poudriere.d/idm

The simplified output with (...) edits in between is shown below.

poudriere-devel-build-log-cut
The full log of such build process is available here.

If not much (or nothing) changed then the following update build process is very short and fast.

poudriere-devel-build-log-rebuild

This is how the built FreeIPA/IDM repo looks like in the Nginx interface.

poudriere-devel-built

After several such builds you will see historic versions as shown below.

poudriere-devel-several-times

Now – below is a summary about our created packages.

[13-2-R-amd64-idm] [2023-08-08_11h15m23s] [committing:] Queued: 197 Built: 11  Failed: 0   Skipped: 0   Ignored: 0   Fetched: 186 Tobuild: 0    Time: 00:17:17

To summarize:

  • From needed 197 packages only 11 were sent to compilation which means about 5.6% of them needed compilation.
  • During compilation of these 11 packages Ccache hit ratio was at 54.4% rate.

To make you visualize how much time was save here – let me just remind you that lang/gcc12 would need 12-16 hours of compilation and another 6-10 hours would be needed for lang/rust. These were only two packages … and the whole process tool about quarter of hour with these optimizations. Not to mention that compilation can sometimes fail – which leaves you without repo and needed packages and with even more work to figure out why it failed. Not worth the hassle IMHO.

The Ccache stats below.

# ccache -s
Cacheable calls:      44834 / 68237 (65.70%)
  Hits:               24389 / 44834 (54.40%)
    Direct:           21118 / 24389 (86.59%)
    Preprocessed:      3271 / 24389 (13.41%)
  Misses:             20445 / 44834 (45.60%)
Uncacheable calls:    23319 / 68237 (34.17%)
Errors:                  84 / 68237 ( 0.12%)
Local storage:
  Cache size (GiB): 65536.0

Some more Ccache stats and disk usage below.

# du -smA /var/ccache
1593    /var/ccache

# du -sm /var/ccache
827     /var/ccache

# zfs get compressratio zroot/var/ccache
NAME              PROPERTY       VALUE  SOURCE
zroot/var/ccache  compressratio  2.35x  -

# zfs list zroot/var/ccache
NAME               USED  AVAIL     REFER  MOUNTPOINT
zroot/var/ccache   841M  28.2G      841M  /var/ccache

Repo Update

Every time you will need to update the packages in that FreeIPA/IDM repo You will need to run these commands.

# poudriere ports -p idm -u

# poudriere jail -j 13-2-R-amd64 -u

# poudriere bulk -j 13-2-R-amd64 -b latest -p idm -f /usr/local/etc/poudriere.d/idm

Which means:

  • Update the idm FreeBSD Ports tree.
  • Update the 13.2-RELEASE 13-2-R-amd64 FreeBSD Jail container.
  • Rebuild/refetch packages against updated idm Ports and 13-2-R-amd64 Jail.

FreeBSD Client

This section would show how to use our newly create pkg(8) repo to install custom packages.

Lets bootstrap pkg(8) for a start with some random package.

# pkg install -y beadm

Copy repo certificate from Poudriere server.

# IP=10.0.0.122

# mkdir -p /usr/local/etc/ssl/certs

# fetch -o /usr/local/etc/ssl/certs/poudriere.cert http://${IP}/data/poudriere.cert

Disable default pkg(8) repo.

# mkdir -p /usr/local/etc/pkg/repos

# echo "FreeBSD: { enabled: no }" > /usr/local/etc/pkg/repos/FreeBSD.conf

Add our custom pkg(8) repository.


# IP=10.0.10.122

# mkdir -p /usr/local/etc/pkg/repos

# cat << EOF > /usr/local/etc/pkg/repos/13-2-R-amd64.conf
13-2-R-amd64-idm: {
    url: "http://${IP}/packages/13-2-R-amd64-idm/",
    mirror_type: "http",
    signature_type: "pubkey",
    pubkey: "/usr/local/etc/ssl/certs/poudriere.cert",
    enabled: yes,
    priority: 100
}
EOF

Update the pkg(8) metadata.

# pkg update

# pkg -vv | grep -A 99 Repositories:
Repositories:
  13-2-R-amd64-idm: { 
    url             : "http://10.0.0.122/packages/13-2-R-amd64-idm/",
    enabled         : yes,
    priority        : 100,
    mirror_type     : "HTTP",
    signature_type  : "PUBKEY",
    pubkey          : "/usr/local/etc/ssl/certs/poudriere.cert"
  }

Install the FreeIPA/IDM required client packages.

# pkg install -y      \
    krb5              \
    sudo              \
    sssd              \
    cyrus-sasl        \
    cyrus-sasl-gssapi \
    openldap26-client \
    pam_mkhomedir

… and now please continue with the FreeBSD Setup section of the older Connect FreeBSD 13.2 to FreeIPA/IDM guide because the client addon process did not changed.

Let me know in comments if something is not clear … or when You have better ideas then me πŸ™‚

EOF

Keep FreeBSD Desktop Updated

While its relatively easy (or brain dead easy with GhostBSD or NomadBSD distributions) to install and configure a FreeBSD Desktop – one have to keep in mind that its also important to keep that system updated and secure.

There are many aspects about FreeBSD to keep it updates and secured.

The Table of Contents for this article is shown below:

  • FreeBSD Base System
  • Packages
  • FreeBSD Linux Browser Installer
  • WINE
  • Cargo Packages
  • FreeBSD Ports Tree
  • Summary

Lets now discuss each section one by one.

FreeBSD Base System

First is the FreeBSD Base System which is updated by the frebsd-update(8) utility. It is not often you need to do this – from my experience its once a month need usually.

The list of needed commands are shown below.

# freebsd-version
# frebsd-update fetch
# frebsd-update install

While the freebsd-version(1) will tell you what version you are currently running the freebsd-update(8) will help you to update your FreeBSD system to have latest patches installed.

… but when to update the FreeBSD Base System anyway? Well – its quite simple – check the FreeBSD Security Advisories page – and if something posted there affects you – then you should move your ass and update it πŸ™‚

Packages

After you have taken care of the FreeBSD Base System the next one to make sure you are not too much far behind are the FreeBSD packages.

You can of course check if any of your installed packages have any reported security holes as shown below.

# pkg audit -F
vulnxml file up-to-date
0 problem(s) in 0 installed package(s) found.

The above message shows that your installed packages are safe – but its not the message you see the most of the time πŸ™‚

Below are the commands that you would use to update your FreeBSD desktop system.

# pkg upgrade
# pkg autoremove
# pkg clean -y --all

… and yes it does include some extra steps to remove cached packages – and probably now not needed as the are already installed anyway.

I do not think that anything more should be added here – maybe a short mention about the packages branch you are using. The default one is the quarterly branch that has packages build every quarter.

Maybe its sometimes reasonable for the server like environments – but I prefer to have the latest versions of what FreeBSD maintainers do offer in their hard and often underestimated work.

This is why I always use – both on desktop and servers – the latest packages branch.

This means that packages are (re)built once a week or faster and you get what is latest and fresh.

I will not convince you what is better – you will have to decide for yourself.

FreeBSD Linux Browser Installer

The Linux Browser Installer helps a lot on FreeBSD systems. It provides browsers (via the Linux Compatibility Layer) that are not natively available on FreeBSD – but with DRM sh!t needed to access for example Netflix content.

The Linux Browser Installer is easy to install – but its also easy to update.

Below you will find commands that will keep your Linux Browser Installer updated and secure.

EDIT: You will need small patch to make it work currently – patch fetch and apply added in this color below – check Fix linux-browser-installer(8) on FreeBSD for details.

# git clone https://github.com/mrclksr/linux-browser-installer.git
# cd linux-browser-installer
# fetch https://raw.githubusercontent.com/vermaden/scripts/master/linux-browser-installer.PATCH
# patch < linux-browser-installer.PATCH
# ./linux-browser-installer chroot upgrade
# cd ../
# rm -rf linux-browser-installer

WINE

One may think that WINE is just another package and that it was already updated during the # pkg upgrade cycle – it depends – the default WINE package is for 64bit excusables … but its also possible to run (and often needed) the older 32bit executables.

The problem is that the 32bit environment has its own separate root with its own packages set.

To be honest its not a big deal – you just need to remember to update it along with other things you update periodically πŸ™‚

Below is the command that updates the 32bit WINE binaries/packages.

% /usr/local/share/wine/pkg32.sh upgrade
% /usr/local/share/wine/pkg32.sh autoremove
% /usr/local/share/wine/pkg32.sh pkg clean -y --all

One of the things you need to keep in mind that it is done by you (user) and not the root user of the machine.

Cargo Packages

While 95% of this topic is covered above – no one prevents you from using the additional Cargo packages – and I do it myself also.

Its just that some software is not yet available by the official FreeBSD packages – but its already official by using the Cargo packages.

I personally use about 10 different Cargo packages that are still not available on the FreeBSD packages.

update

Here are the instructions to keep these Cargo packages updated.

First and most important – you need to install the cargo-update package to be able to update installed Cargo packages.

Then you may just use the other command to have Cargo packages updated.

# cargo install cargo-update
# cargo install-update -a

FreeBSD Ports Tree

Last but not least – the FreeBSD Ports Tree – which even if you only use binary packages – can often come handy in some exceptions.

We all know the ‘default’ rule that mixing Packages and Ports is a bad idea in the FreeBSD world – and I generally agree – its a bad idea if you do not know what you are doing.

If you do know what you are doing – you may mix anything with everything – just do not spam the FreeBSD Forums for help later πŸ™‚

The tool to update the local FreeBSD Ports Tree on your machine is still portsnap(8) and the auto argument is usually more then enough.

# portsnap auto

From the other things – you may want to setup the WRKDIRPREFIX variable to have everything built in the /usr/ports/obj directory – to have everything in one place.

# grep WRKDIRPREFIX /etc/make.conf
WRKDIRPREFIX=${PORTSDIR}/obj
# rm -rf \
    /usr/ports/obj \
    /usr/ports/distfiles

I often also clean the /usr/ports/obj and /usr/ports/distfiles directories.

Summary

Besides the things that I have wrote above I also sometimes save some binaries to the ~/scripts/bin path. There is not upgrade path for them besides manually checking the provider page.

Some examples of such software on my system are doso or cpuc ones.

As I do not have anything more to add here – please feel free to comment what is missing in keeping your workstation updated and secure.

EOF
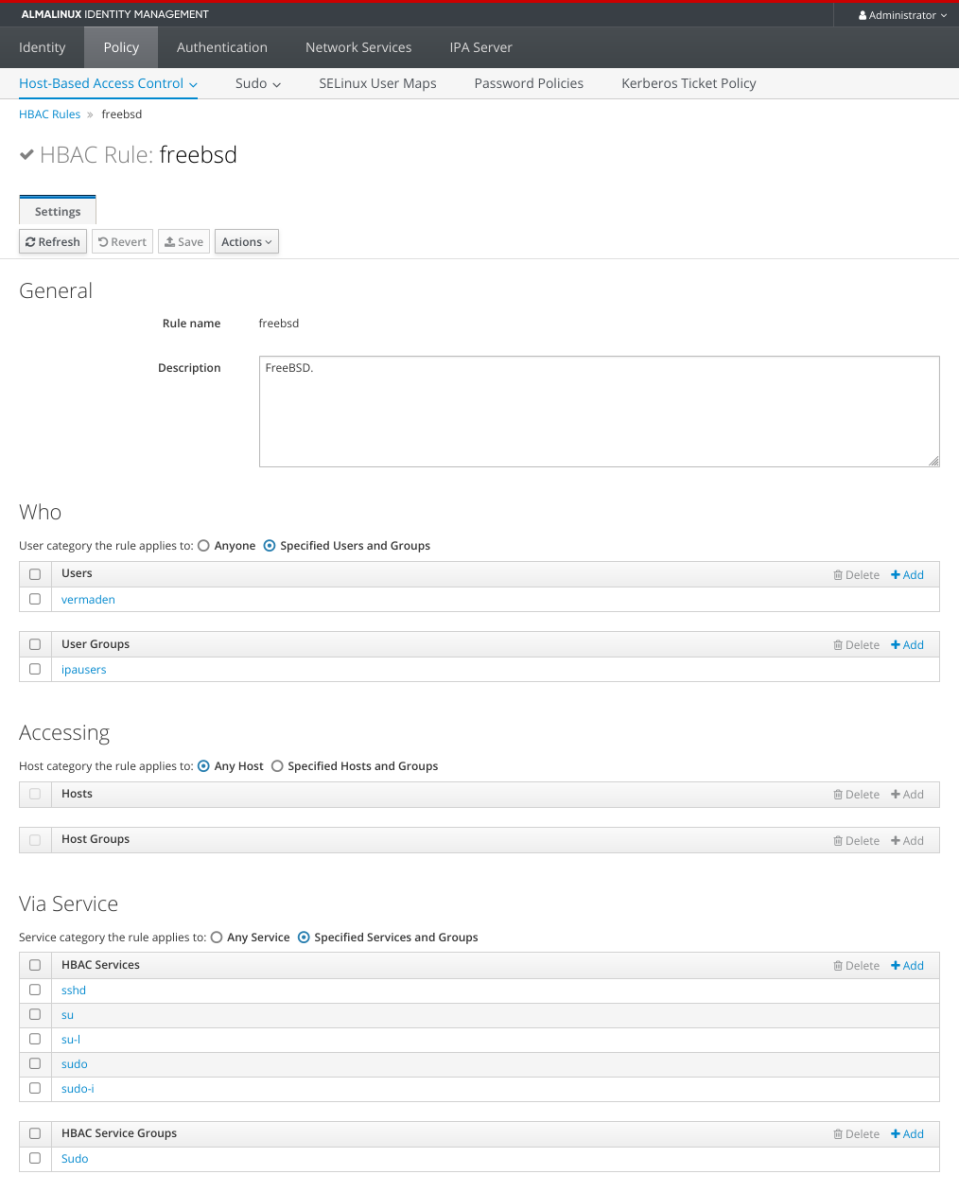
ZFS Boot Environments Revolutions

I do not have to remind you that I am a big fan of ZFS Boot Environments feature. From the time when I first used it on OpenSolaris and Solaris systems I was really fascinated by it. Bulletproof upgrades and changes to entire system … and it was possible more then decade ago. Like a Dream. Today with beadm(8) and bectl(8) tools and also the FreeBSD loader(8) the ZFS Boot Environments are first class and one of the main features of the FreeBSD operating system.

Back in the more ‘normal’ times (before C19) I was able to talk two times about ZFS Boot Environments. I hope I explained them well.

  • 1st in Poland at PBUG meeting – with presentation available HERE.
  • 2nd in Holland at NLUUG conference – with presentation available HERE.

I do not know any downsides of ZFS Boot Environments but if you would stick a gun into my head and make me find one – I would say that you still have to reboot(8) to change to the other BE. This is about to change …

Reroot Instead Reboot

What is reroot? Its the ability to switch to other root filesystem without the need for full system reboot. The loaded and running kernel stays the same of course – but this is the only downside. This feature is implemented in the reboot(8) command with -r argument.

As we can read in the FreeBSD 10.3-RELEASE Release Notes page:

The initial implementation of “reroot” support has been added to the reboot(8) utility, allowing the root filesystem to be mounted from a temporary source filesystem without requiring a full system reboot. (r293744) (Sponsored by The FreeBSD Foundation)

How can reroot be useful here? It will save you a lot of time when you did not updated the kernel. There are two types of update strategies when using the ZFS Boot Environments. You can create new BE (as a backup world that you can get back to) and update the running system. Then you can use checkrestart(1) to verify which processes should be restarted because either binaries or libraries has been updated.

checkrestart.1

The other way was to create new separate BE (while not touching the running one) and then mount it and update that new BE and reboot into it later. This created a need to reboot(8) but not anymore. Especially when you just update the packages with pkg(8) command.

beadm(8)

With the new reroot option of beadm(8) you will tell FreeBSD to reroot your running kernel into specified BE. It will definitely have less impact in virtual machines as they reboot quite fast but imagine saved time on a server class physical machine with about 10 minutes lost for BIOS POST messages and initialization … or personal desktop/laptop GELI encrypted system without the need to type in again the GELI password to decrypt it after reboot.

beadm.reroot

On the screenshot above I use the latest FreeBSD 13.1-BETA1 but it works the same on other production FreeBSD releases such as 12.3-RELEASE or 13.0-RELEASE. The new upgraded beadm(8) is available from its home at GitHub page here:

I will add that updated version to the FreeBSD Ports tree later along with updated man page later.

Usage

Usage of this new feature is quite simple. You type beadm reroot BENAME in the terminal and FreeBSD reroots into that BE without reboot. Takes about 9-10 seconds on my 11 years old ThinkPad W520 so it may be even faster on your more up to date system.

# beadm list
BE        Active Mountpoint  Space Created
12.3      -      -            9.5G 2021-10-18 13:14
13.0.p6   -      -           13.9G 2022-01-27 11:07
13.0      -      -           12.9G 2022-03-05 15:02
13.0.safe -      -            2.8M 2022-03-08 14:54
13.1      NR     /            9.5G 2022-03-12 00:18
13.1.safe -      -          544.0M 2022-03-13 23:18

# beadm activate 13.1.safe
Activated successfully

# beadm reroot 13.1.safe

… and you are going the route similar to typing shutdown now on a running system. All services are stopped. Then root is changed to new one. Then system continues to boot along with starting all its services as usual. Just without the BIOS POST and the bootloader and kernel parts.

The reroot feature is especially useful in one of these scenarios:

From what I know the bectl(8) does not has that reroot feature but maybe it will be added to it somewhere in the future.

Summary

Not sure that ZFS Boot Environments Revolutions is the best title for this blog post, but as I used Reloaded on my 2nd ZFS Boot Environments presentation I though that sticking to The Matrix (1999) schema. I could of course do 3rd and updated presentation … but I am afraid that it will not happen … or at least not soon.

I did not thought that the FreeBSD Enterprise Storage presentation that I gave at 2020/02 PBUG would be my last – it was more then 2 years ago.

UPDATE 1 – Faster Upgrade with New beadm(8) Version

Today (2022/05/06) I introduced new beadm(8) version 1.3.5 that comes with new chroot(8) feature. It has already been committed to the FreeBSD Ports tree under 263805 PR so expect packages being available soon.

You can also update beadm(8) directly like that:

# fetch -o /usr/local/sbin/beadm https://raw.githubusercontent.com/vermaden/beadm

Now for the faster update process – here are the instructions depending on the shell you use.

  • ZSH / CSH
# beadm create 13.1-RC6
# beadm chroot 13.1-RC6
BE # zsh || csh
BE # mount -t devfs devfs /dev
BE # yes | freebsd-update upgrade -r 13.1-RC6
BE # repeat 3 freebsd-update install
BE # exit
# beadm activate 13.1-RC6
# reboot
  • SH / BASH / FISH / KSH
# beadm create 13.1-RC6
# beadm chroot 13.1-RC6
BE # sh || bash || fish || ksh
BE # mount -t devfs devfs /dev
BE # yes | freebsd-update upgrade -r 13.1-RC6
BE # seq 3 | xargs -I- freebsd-update install
BE # exit
# beadm activate 13.1-RC6
# reboot

Happy upgrading πŸ™‚

EOF

Other FreeBSD Version in ZFS Boot Environment

The first FreeBSD 12.3-PRERELEASE snapshots are finally available. This means we can try them in a new ZFS Boot Environment without touching out currently running 13.0-RELEASE system. We can not take the usual path with creating new BE from our current one and upgrade it to newer version because 12.3 has older major version then the 13.0 one.

This is kinda a paradox in the FreeBSD release process that when released the 12.3-RELEASE will have some newer commits and features then older 13.0-RELEASE which was released earlier this year. Of course not all things that have been committed to HEAD goes into 12-STABLE or 13-STABLE automatically – but most of them do. Only the biggest changes will be limited only to 14.0-RELEASE – of course probably somewhere in the middle of 2022 when it will be having its release process.

One note about ZFS filesystem on FreeBSD. People often confuse ‘real’ ZFS Boot Environments with its trying-to-be substitutes like BTRFS snapshots or snapshots used by Ubuntu with zsysctl(8) command. Unfortunately they are only snapshots and are not full writable clones (or entire separate ZFS datasets). They can freeze your system in time so you will be able to get back to working configuration after updating packages for example – but You will not be able to install other separate version of a system as other ZFS dataset making it another independent ZFS Boot Environment.

Create New ZFS Dataset

host # beadm list
BE             Active Mountpoint  Space Created
13.0.w520      NR     /           12.8G 2021-09-14 17:27
13.0.w520.safe -      -            1.2G 2021-10-18 10:01

host # zfs list -r zroot/ROOT
NAME                        USED  AVAIL     REFER  MOUNTPOINT
zroot/ROOT                 12.8G  96.8G       88K  none
zroot/ROOT/13.0.w520       12.8G  96.8G     11.6G  /
zroot/ROOT/13.0.w520.safe     8K  96.8G     11.1G  /

host # zfs create -o mountpoint=/ -o canmount=off zroot/ROOT/12.3

host # beadm list
BE             Active Mountpoint  Space Created
13.0.w520      NR     /           12.8G 2021-09-14 17:27
13.0.w520.safe -      -            1.2G 2021-10-18 10:01
12.3           -      -           96.0K 2021-10-18 13:14

Install FreeBSD 12.3-PRERELEASE

host # beadm mount 12.3 /var/tmp/12.3
Mounted successfully on '/var/tmp/12.3'

host # beadm list
BE             Active Mountpoint     Space Created
13.0.w520      NR     /              12.8G 2021-09-14 17:27
13.0.w520.safe -      -               1.2G 2021-10-18 10:01
12.3           -      /var/tmp/12.3  96.0K 2021-10-18 13:14

host # curl -o - https://download.freebsd.org/ftp/snapshots/amd64/12.3-PRERELEASE/base.txz \
         | tar --unlink -xpf - -C /var/tmp/12.3
  % Total    % Received % Xferd  Average Speed   Time    Time     Time  Current
                                 Dload  Upload   Total   Spent    Left  Speed
100  173M  100  173M    0     0  1889k      0  0:01:33  0:01:33 --:--:-- 2228k

host # exa -1 /var/tmp/12.3
bin
boot
dev
etc
lib
libexec
media
mnt
net
proc
rescue
root
sbin
tmp
usr
var
COPYRIGHT
sys

host # curl -o - https://download.freebsd.org/ftp/snapshots/amd64/12.3-PRERELEASE/kernel.txz \
         | tar --unlink -xpf - -C /var/tmp/12.3
  % Total    % Received % Xferd  Average Speed   Time    Time     Time  Current
                                 Dload  Upload   Total   Spent    Left  Speed
100 43.3M  100 43.3M    0     0  1733k      0  0:00:25  0:00:25 --:--:-- 1663k

host # exa -lh /var/tmp/12.3/boot/kernel/kernel
Permissions Size User Date Modified    Name
.r-xr-xr-x   37M root 2021-10-14 06:31 /var/tmp/12.3/boot/kernel/kernel

host # curl -o - https://download.freebsd.org/ftp/snapshots/amd64/12.3-PRERELEASE/lib32.txz \
         | tar --unlink -xpf - -C /var/tmp/12.3

host # exa -ld /var/tmp/12.3/usr/lib32
drwxr-xr-x - root 2021-10-18 13:45 /var/tmp/12.3/usr/lib32

Install Same Packages as on Host

With the pkg prime-list we will get all installed by hand pkg(8)packages from our currently running system. You may omit this section or just install packages that you need instead all of them.

host # pkg prime-list > /var/tmp/12.3/pkg.prime-list

host # chroot /var/tmp/12.3 /bin/sh

(BE) # export PS1="BE # "

BE # mount -t devfs devfs /dev

BE # sed -i '' s/quarterly/latest/g /etc/pkg/FreeBSD.conf

BE # pkg install -y $( cat pkg.prime-list )
Bootstrapping pkg from pkg+http://pkg.FreeBSD.org/FreeBSD:12:amd64/latest, please wait...
Verifying signature with trusted certificate pkg.freebsd.org.2013102301... done
Installing pkg-1.17.2...
Extracting pkg-1.17.2: 100%
Updating FreeBSD repository catalogue...
Fetching meta.conf: 100%    163 B   0.2kB/s    00:01
Fetching packagesite.pkg: 100%    6 MiB   1.3MB/s    00:05
Processing entries: 100%
FreeBSD repository update completed. 31294 packages processed.
All repositories are up to date.
Updating database digests format: 100%
pkg: No packages available to install matching 'chromium' have been found in the repositories
pkg: No packages available to install matching 'drm-fbsd13-kmod' have been found in the repositories
pkg: No packages available to install matching 'geany-gtk2' have been found in the repositories
pkg: No packages available to install matching 'ramspeed' have been found in the repositories
pkg: No packages available to install matching 'vim-console' have been found in the repositories

As we can see some of the packages that we have installed in the FreeBSD 13.0-RELEASE system are not currently available in the ‘latestpkg(8) branch for the FreeBSD 12.3-PRERELEASE system. This sometimes happens when the build of such package will fail – but you may assume that such package will be available in a week or so as that is the period in which pkg(8) packages are (re)build in the ‘latest‘ branch.

We will now remove the missed packages and also rename some packages that may have different names for 12.x version of FreeBSD.

BE # sed -i '' \
         -e s/drm-fbsd13-kmod/drm-kmod/g \
         -e s/geany-gtk2/geany/g \
         -e s/vim-console/vim-tiny/g \
         pkg.prime-list

BE # pkg install -y $( cat pkg.prime-list | grep -v -e chromium -e ramspeed )
Updating FreeBSD repository catalogue...
FreeBSD repository is up to date.
All repositories are up to date.
The following 1072 package(s) will be affected (of 0 checked):

New packages to be INSTALLED:
        (...)

Number of packages to be installed: 1072

The process will require 11 GiB more space.
2 GiB to be downloaded.
(...)

BE # rm pkg.prime-list

After hour or so later our packages have been installed.

BE # pkg stats
Local package database:
        Installed packages: 1073
        Disk space occupied: 11 GiB

Remote package database(s):
        Number of repositories: 1
        Packages available: 31294
        Unique packages: 31294
        Total size of packages: 96 GiB

Copy Configuration Files

You can now reboot to plain and unconfigured FreeBSD system but you may as well copy your configuration files from your current working installation. These are the files I have copied.

First files from the Base System /etc and /boot places.

host # for I in /boot/loader.conf        \
                /etc/ttys                \
                /etc/rc.conf             \
                /etc/rc.local            \
                /etc/sysctl.conf         \
                /etc/hosts               \
                /etc/ethers              \
                /etc/fstab               \
                /etc/jail.conf           \
                /etc/make.conf           \
                /etc/src.conf            \
                /etc/devfs.rules         \
                /etc/resolv.conf         \
                /etc/localtime           \
                /etc/pf.conf             \
                /etc/resolv.conf         \
                /etc/profile             \
                /etc/csh.cshrc           \
                /etc/wpa_supplicant.conf \
                /etc/freebsd-update.conf \
                /etc/motd.template       \
                /etc/motd                \
                /var/cron/tabs/*
       do
         cp "${I}" /var/tmp/12.3/"${I}"
         echo "${I}"
       done
/boot/loader.conf       
/etc/ttys               
/etc/rc.conf            
/etc/rc.local           
/etc/sysctl.conf        
/etc/hosts              
/etc/ethers             
/etc/fstab              
/etc/jail.conf          
/etc/make.conf          
/etc/src.conf           
/etc/devfs.rules           
/etc/localtime          
/etc/pf.conf            
/etc/resolv.conf        
/etc/profile            
/etc/csh.cshrc          
/etc/wpa_supplicant.conf
/etc/freebsd-update.conf
/etc/motd.template      
/etc/motd               
/var/cron/tabs/vermaden
/var/cron/tabs/root

Now the files for installed packages under /usr/local/etc dir.

host # for I in /usr/local/etc/X11/xdm/Xresources \
                /usr/local/etc/X11/xdm/Xsetup_0   \
                /usr/local/etc/X11/xorg.conf.d/*  \
                /usr/local/etc/devd/*             \
                /usr/local/etc/automount.conf     \
                /usr/local/etc/sudoers            \
                /usr/local/etc/doas.conf          \
                /usr/local/etc/zshrc              \
                /usr/local/etc/smb4.conf          \
                /usr/local/etc/automount.conf     \
                /usr/local/etc/fscd.conf          \
                /usr/local/etc/cups/*             \
                /usr/local/etc/cups/ssl/*         \
                /usr/local/etc/cups/ppd/*
       do
         cp "${I}" /var/tmp/12.3/"${I}"
         echo "${I}"
       done
/usr/local/etc/X11/xdm/Xresources
/usr/local/etc/X11/xdm/Xsetup_0
/usr/local/etc/X11/xorg.conf.d/card.conf
/usr/local/etc/X11/xorg.conf.d/flags.conf
/usr/local/etc/X11/xorg.conf.d/keyboard.conf
/usr/local/etc/X11/xorg.conf.d/touchpad.conf
/usr/local/etc/devd/audio_source.conf
/usr/local/etc/devd/automount_devd.conf
/usr/local/etc/devd/cups.conf
/usr/local/etc/devd/cups.conf.sample
/usr/local/etc/devd/webcamd.conf
/usr/local/etc/automount.conf
/usr/local/etc/sudoers
/usr/local/etc/doas.conf
/usr/local/etc/zshrc
/usr/local/etc/smb4.conf
/usr/local/etc/automount.conf
/usr/local/etc/fscd.conf
/usr/local/etc/cups/classes.conf
/usr/local/etc/cups/command.types
/usr/local/etc/cups/cups-browsed.conf
/usr/local/etc/cups/cups-browsed.conf.sample
/usr/local/etc/cups/cups-files.conf
/usr/local/etc/cups/cups-files.conf.sample
/usr/local/etc/cups/cupsd.conf
/usr/local/etc/cups/cupsd.conf.sample
/usr/local/etc/cups/ppd
/usr/local/etc/cups/printers.conf
/usr/local/etc/cups/printers.conf.O
/usr/local/etc/cups/snmp.conf
/usr/local/etc/cups/snmp.conf.sample
/usr/local/etc/cups/ssl
/usr/local/etc/cups/ppd/HP-M251nw.ppd
/usr/local/etc/cups/ppd/Samsung-ML-1915.ppd

Add Users and Set Passwords

You should now add your regular user and set passwords for both your user and root account.

BE # pw useradd vermaden -u 1000 -d /home/vermaden -G wheel,operator,video,network,webcamd,vboxusers

BE # passwd root

BE # passwd vermaden

Reboot Into New ZFS Boot Environment

You may now exit the chroot(8) of that ZFS Boot Environment and reboot. In the FreeBSD loader(8) menu select the 12.3 boot environment.

BE # exit

host # umount /var/tmp/12.3/dev

host # beadm unmount 12.3
Unmounted successfully

host # beadm list -D
BE             Active Mountpoint  Space Created
13.0.w520      NR     /           11.3G 2021-09-14 17:27
13.0.w520.safe -      -           11.1G 2021-10-18 10:01
12.3        -      -            9.5G 2021-10-18 13:14

host # shutdown -r now

Testing New System

The 12.3-PRERELEASE system started fine for me. I was able to login and use system as usual. One important thing to note … the ZFS pools. I have another newer ZFS pool with zstd compression enabled … and I was not able to import that ZFS pool as FreeBSD 12.3-PREELEASE does not use OpenZFS 2.0 but an older FreeBSD in-house ZFS version.

# zpool import data
This pool uses the following feature(s) not supported by this system:
        org.freebsd:zstd_compress (zstd compression algorithm support.)
        com.delphix:log_spacemap (Log metaslab changes on a single spacemap and flush them periodically.)
        org.zfsonlinux:project_quota (space/object accounting based on project ID.)
        org.zfsonlinux:userobj_accounting (User/Group object accounting.)
cannot import 'data': unsupported version or feature

Keep that in mind … but you can also install newer OpenZFS from the FreeBSD Ports and this is what we will now do.

# pkg install -y openzfs openzfs-kmod
Updating FreeBSD repository catalogue...
FreeBSD repository is up to date.
All repositories are up to date.
The following 2 package(s) will be affected (of 0 checked):

New packages to be INSTALLED:
        openzfs: 2021090800
        openzfs-kmod: 2021090800

Number of packages to be installed: 2

The process will require 22 MiB more space.
4 MiB to be downloaded.
[1/2] Fetching openzfs-2021090800.pkg: 100%    3 MiB 975.3kB/s    00:03
[2/2] Fetching openzfs-kmod-2021090800.pkg: 100%    1 MiB 591.2kB/s    00:02
Checking integrity... done (0 conflicting)
[1/2] Installing openzfs-kmod-2021090800...
[1/2] Extracting openzfs-kmod-2021090800: 100%
pkg: Cannot open /dev/null:No such file or directory
[2/2] Installing openzfs-2021090800...
[2/2] Extracting openzfs-2021090800: 100%
=====
Message from openzfs-kmod-2021090800:

--
Amend /boot/loader.conf as follows to use this module:

- change zfs_load="YES" to NO
- change opensolaris_load="YES" to NO
- add openzfs_load="YES"
- (for ARM64) add cryptodev_load="YES"
=====
Message from openzfs-2021090800:

--
Ensure that any zfs-related commands, such as zpool, zfs, as used in scripts
and in your terminal sessions, use the correct path of /usr/local/sbin/ and
not the /sbin/ commands provided by the FreeBSD base system.

Consider setting this in your shell profile defaults!

We will now have to modify our /boot/loader.conf file.

host # beadm mount 12.3 /var/tmp/12.3
Mounted successfully on '/var/tmp/12.3'

host # chroot /var/tmp/12.3

BE # cp /boot/loader.conf /boot/loader.conf.ZFS

BE # vi /boot/loader.conf

BE # diff -u /boot/loader.conf.ZFS /boot/loader.conf
--- /boot/loader.conf.ZFS       2021-10-19 10:57:04.180732000 +0000
+++ /boot/loader.conf   2021-10-19 10:57:23.992145000 +0000
@@ -12,7 +12,8 @@

 # MODULES - BOOT
   geom_eli_load=YES
-  zfs_load=YES
+  zfs_load=NO
+  openzfs_load=YES

 # DISABLE /dev/diskid/* ENTRIES FOR DISKS
   kern.geom.label.disk_ident.enable=0

BE # shutdown -r now

After reboot and trying again I was able to import that newer ZFS pool.

Hope that you will find that guide useful.

Feel free to add your suggestions.

UPDATE 1 – Notes When Installing Newer Version

This guide was written when I tried FreeBSD 12.3 on a previously used by FreeBSD 13.0 system so bootcode was not needed to be updated. I just tried 13.1 on the same 13.0 system and these two steps are needed to updated the bootcode.

UEFI

For UEFI partition you will need to copy /boot/loader.efi file from the 13.1 installation which means /var/tmp/13.1 dir. Here is the command to be used.

host # gpart show -p ada1
=>       40  250069600    ada1  GPT  (119G)
         40     409600  ada1p1  efi  (200M)          <== UEFI BOOT PARTITION
     409640       1024  ada1p2  freebsd-boot  (512K) <== BIOS BOOT PARTITION
     410664        984          - free -  (492K)
     411648    2097152  ada1p3  freebsd-swap  (1.0G)
    2508800  247560192  ada1p4  freebsd-zfs  (118G)
  250068992        648          - free -  (324K)

host # mount_msdosfs /dev/ada1p1 /mnt

host # cp /var/tmp/13.1/boot/loader.efi /mnt/efi/boot/bootx64.efi

BIOS

For the systems that boot in legacy/BIOS mode you will use this gpart(8) command instead.

host # cd /var/tmp/13.1/boot
host # pwd
/var/tmp/13.1/boot
host # gpart bootcode -b ./pmbr -p ./gptzfsboot -i 2 ada1
partcode written to ada1p2
bootcode written to ada1

As FreeBSD often is installed as BIOS+UEFI boot capable both of these steps would be needed.

EOF

Upgrade FreeBSD with ZFS Boot Environments

I am known as a strong ZFS Boot Environment supporter … and not without a reason. I have stated the reasons ‘why’ many times but most (or all) of them are condensed here – https://is.gd/BECTL – in my presentation about it.

The upcoming FreeBSD 13.0-RELEASE looks very promising. In many tests it is almost TWICE as fast as the 12.2-RELEASE. Ouch!

The detailed tests are available on the phoronix.com site.

Having 12.2-RELEASE installed I wanted to check 13.0-BETA* to check if things that are important for me – like working suspend/resume for example – work as advertised on the newer version. It is the perfect task that can be achieved by using ZFS Boot Environments.

In the example below we will create entire new ZFS Boot Environment with clone of our current 12.2-RELEASE system and upgrade it there (in BE) to the 13.0-BETA3 version … and there will only be required on reboot – not three as in typical freebsd-update(8) upgrade procedure.

I assume that you have FreeBSD 12.2-RELEASE installed with ZFS (default ZFS FreeBSD install) and its installed in UEFI or UEFI+BIOS mode.

Here are the steps that will be needed.

(host) # beadm create 13                        # create new '13' ZFS Boot Environment
       Created successfully
(host) # beadm mount 13 /var/tmp/BE-13          # mount new '13' BE somewhere
       Mounted successfully on '/var/tmp/BE-13'
(host) # chroot /var/tmp/BE-13                  # make chroot(8) into that place
  (BE) # mount -t devfs devfs /dev              # mount the devfs(8) in that BE
  (BE) # rm -rf /var/db/freebsd-update          # remove any old patches
  (BE) # mkdir /var/db/freebsd-update           # create fresh dir for patches
  (BE) # freebsd-update upgrade -r 13.0-BETA3   # fetch the patches needed for upgrade
  (BE) # freebsd-update install                 # install kernel and kernel modules
  (BE) # freebsd-update install                 # install userspace/binaries/libraries
  (BE) # pkg upgrade                            # upgrade all packages with pkg(8)
  (BE) # freebsd-update install                 # remove old libraries and files
Β  (BE) # exit                                   # leave chroot(8) environment
(host) # umount /var/tmp/BE-13/dev              # umount the devfs(8) in that BE
(host) # beadm activate 13                      # activate new '13' BE
       Activated successfully

I am using mine sysutils/beadm for the process but you as well may use the bectl(8)Β from FreeBSD base system.

We will also need new FreeBSD loader(8) which will be updated this way – thanks to @JeffSipek for pointing that out.

On my system FreeBSD is installed on ada1 device.

(host) # gpart show -p ada1 | grep efi                # find UEFI msdosfs(5) partition
               40     409600  ada1p1  efi  (200M)     # <-- this one
(host) # mount_msdosfs /dev/ada1p1 /mnt               # mount it under /mnt
(host) # find /mnt                                    # display its contents
       /mnt
       /mnt/efi
       /mnt/efi/boot
       /mnt/efi/boot/bootx64.efi                      # update bootx64.efi file
(host) # cp /boot/boot1.efi /mnt/efi/boot/bootx64.efi # copy from /boot/boot1.efi file
(host) # umount /mnt                                  # unmount /mnt filesystem

There is small chance that you will not be able to mount the efi partition. Even fsck(8) is not able to help here.

Typical errors that some users faced look like that:

(host) # mount_msdosfs /dev/ada1p1 /mnt # error when trying to mount efi partition
       mount_msdosfs: /dev/ada1p1: Invalid argument

(host) # fsck_msdosfs -y /dev/ada1p1    # error when trying to fsck(8) that partition
       ** /dev/ada1p1
       Invalid signature in boot block: 0b6a

If you hit that problem then first backup your current efi partition to for example /BACKUP.ada1p1 file.

(host) # dd < /dev/ada1p1 > /BACKUP.ada1p1 bs=1m

Now we will create fresh efi partition from scratch.

(host) # newfs_msdos -F 32 -c 1 /dev/ada0p1            # create new FAT32 partition
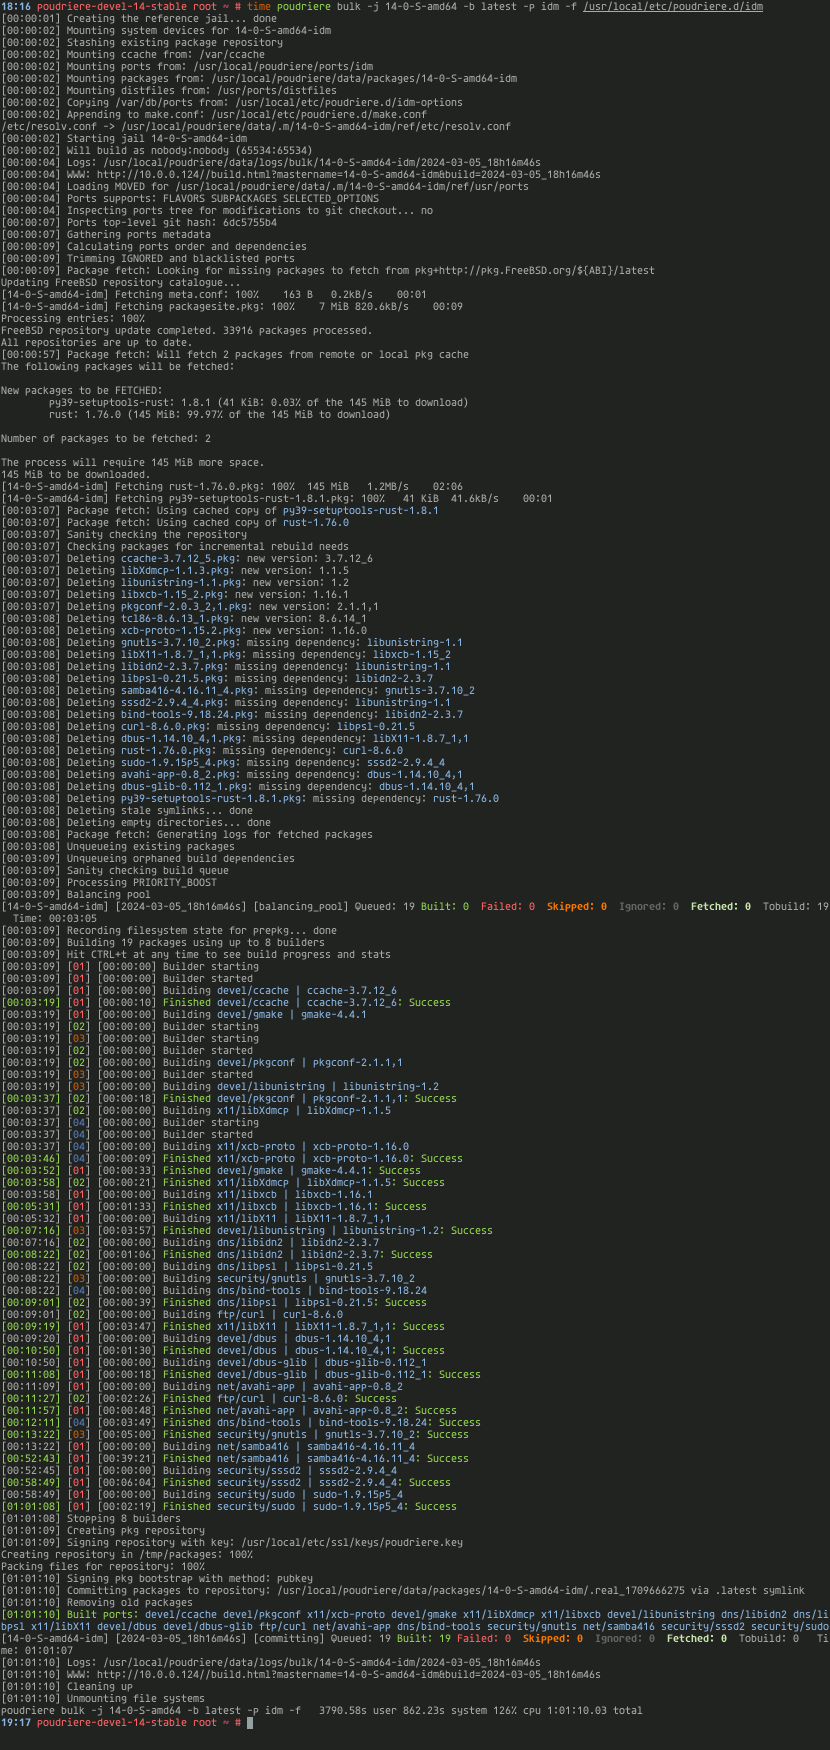
(host) # mount_msdosfs /dev/ada0p1 /mnt                # mount it under /mnt
(host) # mkdir -p /mnt/efi/boot                        # create needed directories
(host) # cp /boot/loader.efi /mnt/efi/boot/bootx64.efi # copy from /boot/loader.efi file
(host) # umount /mnt                                   # unmount /mnt filesystem

Now you should have new ‘working’ efi partition.

The last step is to reboot(8) into the new 13.0-BETA3 system.

(host) # reboot

If you find any problems with new bootloader not being able to load your new FreeBSD then you may alternatively copy the /boot/boot1.efi instead of /boot/loader.efi into the /mnt/efi/boot/bootx64.efi place.

Keep in mind that if you boot from geli(8)encrypted system then /boot/loader.efi is mandatory and you will not be able to boot if you would use /boot/boot1.efi file instead.

Done.

You should now see the new FreeBSD loader(8) in all its glory πŸ™‚

You may now enjoy latest FreeBSD 13.0-BETA3 installation.

Same steps will be required to update to soon to be available FreeBSD 13.0-RC* (RC1/RC2/RC3) version and finally FreeBSD 13.0-RELEASE hopefully somewhere in March 2021.

UPDATE 1 – What if Everything Went Fine

You now have most up to date FreeBSD system that should work faster then 12.2-RELEASE and you still has your older 12.2-RELEASE Boot Environment that you can go back to if you find any problems with 13.0 version.

On my system it looks like that:

(host) # beadm list
       BE   Active Mountpoint Space Created
       12.2 -      -           6.5G 2021-02-12 10:15
       13   NR     /          18.8G 2021-02-13 11:32

The Space column is little misleading as it takes into account snapshots space used for example. To get exact information each Boot Environment takes use -D option. This way you will get information about each Boot Environment space separately.

(host) # beadm list -D
       BE   Active Mountpoint  Space Created
       12.2 -      -            9.8G 2021-02-12 10:15
       13   NR     /            9.6G 2021-02-13 11:32

I will be keeping the 12.2-RELEASE Boot Environment for a while – maybe I will delete it a month or so after 13.0-RELEASE is available but if you tested all your needs and feel that 13.0 fulfills all your needs the same way or better then 12.2-RELEASE then you may delete that older Boot Environment with below command.

(host) # beadm destroy 12.2

UPDATE 2 – What if Something Goes Wrong

Generally if the new BE named ‘13‘ does not boot (or hangs at boot) then just select your earlier Boot Environment that you used before the upgrade – the one that has 12.2-RELEASE inside it.

You now have the system that worked for you before we proceed to the upgrade process.

If that fails (or bootloader is broken) then grab the FreeBSD-13.0-BETA3-amd64-memstick.img image and write it on some pendrive with dd(8) command.

# dd if=FreeBSD-13.0-BETA3-amd64-memstick.img of=/dev/da0 bs=1M status=progress

As you now have the pendrive with FreeBSD 13.0-BETA3 then you may boot from it and fix your installation. Pick LiveCD after its loaded. Then type root at login: prompt and hit [ENTER] for empty password.

The list of tasks that can be done now depends on what is broken and I can not guess every possible error and fix scenario so if you hit any problems during that upgrade process then just contact me with your preferred way and we will figure something out.

UPDATE 3 – Faster Upgrade with New beadm(8) Version

Today (2022/05/06) I introduced new beadm(8) version 1.3.5 that comes with new chroot(8) feature. It has already been committed to the FreeBSD Ports tree under 263805 PR so expect packages being available soon.

You can also update beadm(8) directly like that:

# fetch -o /usr/local/sbin/beadm https://raw.githubusercontent.com/vermaden/beadm

Now for the faster update process – here are the instructions depending on the shell you use.

  • ZSH / CSH
# beadm create 13.1-RC6
# beadm chroot 13.1-RC6
BE # zsh || csh
BE # yes | freebsd-update upgrade -r 13.1-RC6
BE # repeat 3 freebsd-update install
BE # exit
# beadm activate 13.1-RC6
# reboot
  • SH / BASH / FISH / KSH
# beadm create 13.1-RC6
# beadm chroot 13.1-RC6
BE # sh || bash || fish || ksh
BE # yes | freebsd-update upgrade -r 13.1-RC6
BE # seq 3 | xargs -I- freebsd-update install
BE # exit
# beadm activate 13.1-RC6
# reboot

Happy upgrading πŸ™‚

EOF