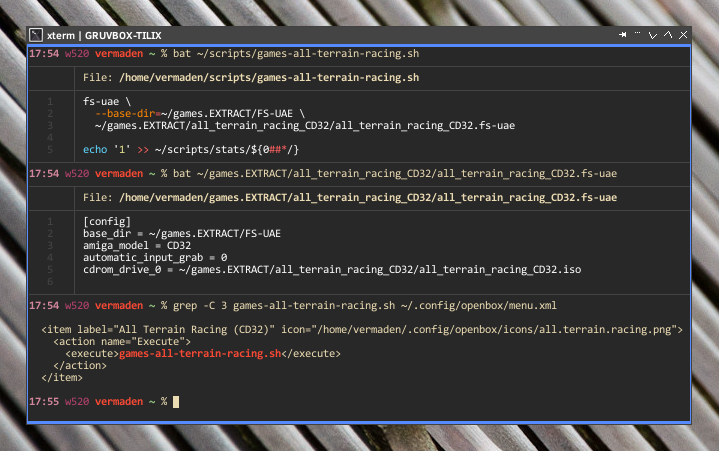
I used to run FreeBSD on older laptops – some more then a decade old – like my favorite ThinkPad W520 daily driver or ThinkPad X220 mobile companion. Today I will share with you my experiences of running latest production ready FreeBSD 13.2-RELEASE system on a quite modern ThinkPad T14 (GEN1) from 2021/2022 (depending on the source of the information) – which is quite new I would say.
… do not interpret this article wrong – The W520 and X220 (sometimes T420s) are still my daily/mobile/… drivers and my points explained in the Epitaph to Laptops article remain the same. I just had an opportunity to use ThinkPad T14 for several days so I thought it would be a good idea to check and document FreeBSD behavior on it.
In many parts this article will be a copy cat of the earlier FreeBSD 13.1 on ThinkPad W520 article – as the topic and configs are mostly the same – you have been warned 🙂
ThinkPad T14 (GEN1)
As the ThinkPad T490 was released Lenovo needed to rethink their naming convention as the next one could have been ThinkPad T4100 (like 100 is after 90) or something different as T500 was already taken by older model … their new naming scheme is not bad – definitely better then their idea of newer keyboard layout after ditching the 7-row keyboard from 2011 and earlier models.
The model I was able to test on had quad core Intel i5-10210U model CPU which is somewhere between 25-35% faster (according to benchmarks) then the Intel i7-2860QM CPU from my ThinkPad W520. Not bad – especially knowing that the time span between their releases is 9 years … but to be honest – in real usage I do not feel that 25-35% more speed.
T14 % lscpu
Architecture:            amd64
Byte Order:              Little Endian
Total CPU(s):            8
Thread(s) per core:      2
Core(s) per socket:      4
Socket(s):               1
Vendor:                  GenuineIntel
CPU family:              6
Model:                   142
Model name:              Intel(R) Core(TM) i5-10210U CPU @ 1.60GHz
Stepping:                12
L1d cache:               32K
L1i cache:               32K
L2 cache:                256K
L3 cache:                6M
Flags:                   fpu vme de pse tsc msr pae mce cx8 apic sep mtrr pge mca cmov pat pse36
                         cflsh ds acpi mmx fxsr sse sse2 ss htt tm pbe sse3 pclmulqdq dtes64
                         monitor ds_cpl vmx est tm2 ssse3 sdbg fma cx16 xtpr pdcm pcid sse4_1
                         sse4_2 x2apic movbe popcnt tsc_deadline aes xsave osxsave avx f16c rdrnd
                         fsgsbase tsc_adjust sgx bmi1 avx2 smep bmi2 erms invpcid fpcsds mpx rdseed
                         adx smap clflushopt intel_pt syscall nx pdpe1gb rdtscp lm lahf_lm lzcnt
Below you can see how ThinkPad T14 (GEN1) looks like.

To be honest I would even prefer to use ThinkPad SK-8855 USB keyboard as showed here below.

Specifications
Below You will find specs of this machine.
CPU: Intel Core i5-10210U (4C/8T) 14nm
RAM: 16 GB (2 * 8GB DDR4)
HDD0: 256GB WD Black SN750 M.2 [nvd(4)]
GFX0: Intel UHD Graphics (integrated) [graphics/drm-kmod]
SCR: 14.1 1920x1080 Touch Screen
USB: 2 x USB-A 3.0 + 1 x USB-C 3.0 [ehci(4) + xhci(4)]
AUDIO: Realtek ALC257 [snd_hda(4)]
PORTS: 1 x HDMI
SD: microSD Card Reader [sdhci(4)]
LAN: 10/100/1000 Intel I219-V Gigabit [em(4)]
WIFI: Intel Comet Lake PCH-LP CNVi WiFi 802.11ax [iwlwifi(4)]
CAM: Webcam 720p [multimedia/webcamd]
I have uploaded the https://bsd-hardware.info/ probe of that ThinkPad T14 to their database and its available – https://bsd-hardware.info/?probe=8aede62ca8 – here.
After messing with this laptop for a while I can tell you that in most areas its on par with mine ThinkPad W520 laptop. The battery time is similar (about 5 hours). The suspend/resume works when you use X11 with graphics/drm-kmod package. Even the touch screen works like a charm – the same as my other ThinkPad X220t (tablet) … and even no additional configuration was needed – I just used the configuration that I use daily on my ThinkPad W520 laptop. But … the WiFi does not work 🙂 While iwlwifi(4) properly attaches to this card the wpa_supplicant(8) is just not able to connect to the Access Point. There are at least several ways on how to Cope with WiFi Fuckup on FreeBSD – feel free to check them out. I used my favorite fallback solution – Realtek RTL8188CUS USB dongle and that one worked really well with rtwn(4) driver.
FreeBSD System Configuration
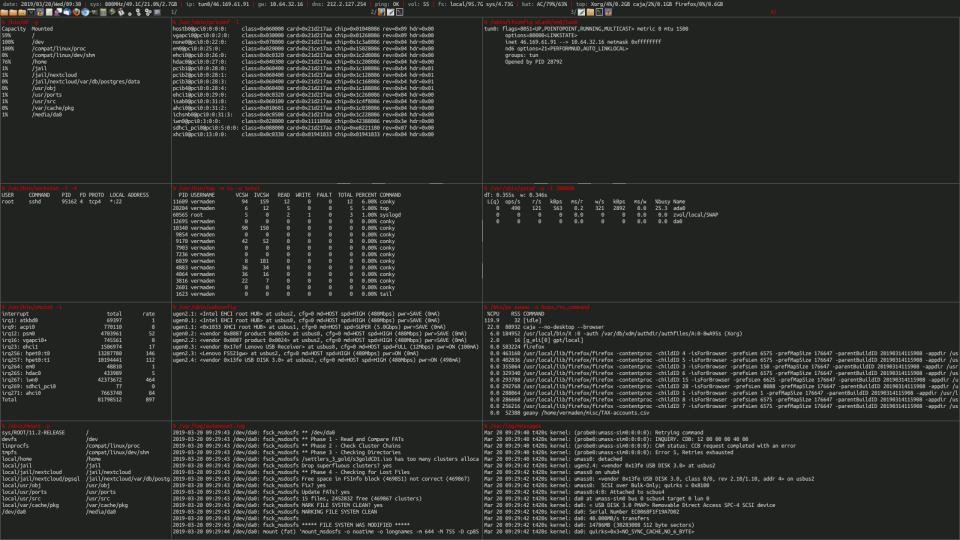
From many things that I really like about FreeBSD (more here – Quare FreeBSD? – in separate article) is that it can be entirely configured using just 3 files. This configuration already features all power management settings that I described in the The Power to Serve – FreeBSD Power Management article.
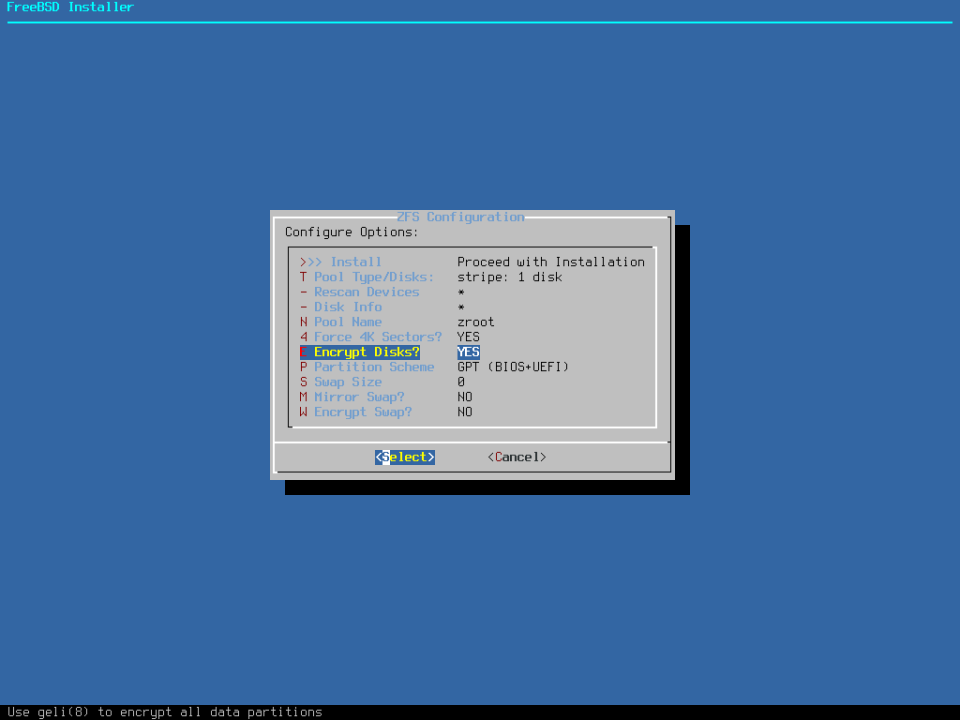
I installed FreeBSD in a pretty standard way with GELI encryption enabled and with ZFS as the filesystem. When in doubt the installation procedure is described in the FreeBSD Desktop – Part 2.1 – Install FreeBSD 12 article.
Main FreeBSD configuration files.
- /etc/rc.conf – to system services
- /etc/sysctl.conf – for runtime parameters
- /boot/loader.conf – for parameters configurable at boot
I will also include these as their are also crucial for the configuration:
- /etc/devfs.rules – devices configuration/li>
- /etc/fstab – filesystems configuration
- /etc/ttys – terminal initialization configuration
- /etc/wpa_supplicant.conf – WiFi configuration
- /usr/local/etc/automount.conf – automount(8) configuration
- /usr/local/etc/doas.conf – doas(1) configuration
- Groups membership.
First the main /etc/rc.conf configuration file.
% cat /etc/rc.conf
# SILENCE # ------------------------------------------------------------------
  rc_startmsgs=NO

# NETWORK # ------------------------------------------------------------------
  hostname=t14.local
  background_dhclient=YES
  extra_netfs_types=NFS
  wlans_rtwn0=wlan0
  create_args_wlan0="country PL regdomain FCC4"
  ifconfig_wlan0="WPA SYNCDHCP"
  defaultroute_delay=3
  defaultroute_carrier_delay=3
  gateway_enable=YES
  harvest_mask=351
  rtsol_flags="-i"
  rtsold_flags="-a -i"

# MODULES/COMMON/BASE # ------------------------------------------------------
  kld_list="${kld_list} /boot/modules/i915kms.ko"
  kld_list="${kld_list} fusefs coretemp sem cpuctl ichsmb cuse"
  kld_list="${kld_list} libiconv cd9660_iconv msdosfs_iconv udf_iconv"

# MODULES/VIRTUALBOX # -------------------------------------------------------
  vboxnet_enable=YES
  kld_list="${kld_list} vboxdrv vboxnetadp vboxnetflt"

# POWER
  performance_cx_lowest=C1
  economy_cx_lowest=Cmax
  powerd_enable=YES
  powerd_flags="-n adaptive -a hiadaptive -b adaptive -m 800 -M 2000"

# DAEMONS | yes # ------------------------------------------------------------
  zfs_enable=YES
  xdm_enable=YES
  xdm_tty=ttyv4
  nfs_client_enable=YES
  ubuntu_enable=YES
  moused_enable=YES
  syslogd_flags='-s -s'
  sshd_enable=YES
  local_unbound_enable=YES
  webcamd_enable=YES
  rctl_enable=YES

# DAEMONS | no # -------------------------------------------------------------
  linux_enable=NO
  sendmail_enable=NONE
  sendmail_submit_enable=NO
  sendmail_outbound_enable=NO
  sendmail_msp_queue_enable=NO

# FS # -----------------------------------------------------------------------
  fsck_y_enable=YES
  clear_tmp_enable=YES
  clear_tmp_X=YES
  growfs_enable=YES

# OTHER # --------------------------------------------------------------------
  keyrate=fast
  keymap=pl.kbd
  virecover_enable=NO
  update_motd=NO
  devfs_system_ruleset=desktop
  hostid_enable=NO
  savecore_enable=NO
Now the runtime parameters /etc/sysctl.conf file.
% cat /etc/sysctl.conf
# SECURITY
  security.bsd.see_jail_proc=0
  security.bsd.unprivileged_proc_debug=0

# SECURITY/RANDOM PID
  kern.randompid=1

# ANNOYING THINGS
  vfs.usermount=1
  kern.coredump=0
  hw.syscons.bell=0
  kern.vt.enable_bell=0

# ZFS DELETE FUCKUP TRIM (DEFAULT: 64)
  vfs.zfs.vdev.trim_max_active=1

# ZFS ARC TUNING
  vfs.zfs.arc.min=134217728
  vfs.zfs.arc.max=536870912

# ZFS ARC FREE ENFORCE @ 1024 \* 1024 \* 3
  vfs.zfs.arc_free_target=3145728

# JAILS/ALLOW UPGRADES IN JAILS
  security.jail.chflags_allowed=1

# JAILS/ALLOW RAW SOCKETS
  security.jail.allow_raw_sockets=1

# DESKTOP/INTERACTIVITY
  kern.sched.preempt_thresh=224

# DESKTOP QUANTUM FOR TIMESHARE THREADS IN stathz TICKS (12) NomadBSD
  kern.sched.slice=3

# DESKTOP/IRIDIUM/CHROMIUM
  kern.ipc.shm_allow_removed=1

# SAMPLE RATE CONVERTER QUALITY (0=low .. 4=high) (1) NomadBSD
  hw.snd.feeder_rate_quality=3

# PERFORMANCE/ALL SHARED MEMORY SEGMENTS WILL BE MAPPED TO UNPAGEABLE RAM
  kern.ipc.shm_use_phys=1

# VIRTUALBOX aio(4) SETTINGS
  vfs.aio.max_buf_aio=8192
  vfs.aio.max_aio_queue_per_proc=65536
  vfs.aio.max_aio_per_proc=8192
  vfs.aio.max_aio_queue=65536

# POWER CONSUMPTION / SILENT FANS Intel 6th GEN+ / ONE LINE FOR EACH TH
# DETAILS IN THE hwpstate_intel(4) MAN PAGE
  dev.hwpstate_intel.0.epp=100
  dev.hwpstate_intel.1.epp=100
  dev.hwpstate_intel.2.epp=100
  dev.hwpstate_intel.3.epp=100
  dev.hwpstate_intel.4.epp=100
  dev.hwpstate_intel.5.epp=100
  dev.hwpstate_intel.6.epp=100
  dev.hwpstate_intel.7.epp=100

# NETWORK/DO NOT SEND RST ON SEGMENTS TO CLOSED PORTS
  net.inet.tcp.blackhole=2

# NETWORK/DO NOT SEND PORT UNREACHABLES FOR REFUSED CONNECTS
  net.inet.udp.blackhole=1

# NETWORK/LIMIT ON SYN/ACK RETRANSMISSIONS (3)
  net.inet.tcp.syncache.rexmtlimit=0

# NETWORK/USE TCP SYN COOKIES IF THE SYNCACHE OVERFLOWS (1)
  net.inet.tcp.syncookies=0

# NETWORK/ASSIGN RANDOM ip_id VALUES (0)
  net.inet.ip.random_id=1

# NETWORK/ENABLE SENDING IP REDIRECTS (1)
  net.inet.ip.redirect=0

# NETWORK/IGNORE ICMP REDIRECTS (0)
  net.inet.icmp.drop_redirect=1

# NETWORK/DROP TCP PACKETS WITH SYN+FIN SET (0)
  net.inet.tcp.drop_synfin=1

# NETWORK/RECYCLE CLOSED FIN_WAIT_2 CONNECTIONS FASTER (0)
  net.inet.tcp.fast_finwait2_recycle=1

# NETWORK/CERTAIN ICMP UNREACHABLE MESSAGES MAY ABORT CONNECTIONS IN SYN_SENT (1)
  net.inet.tcp.icmp_may_rst=0
The biggest difference for ThinkPad T14 against the ThinkPad W520 is this part below.
# POWER CONSUMPTION / SILENT FANS Intel 6th GEN+ / ONE LINE FOR EACH TH
# DETAILS IN THE hwpstate_intel(4) MAN PAGE
  dev.hwpstate_intel.0.epp=100
  dev.hwpstate_intel.1.epp=100
  dev.hwpstate_intel.2.epp=100
  dev.hwpstate_intel.3.epp=100
  dev.hwpstate_intel.4.epp=100
  dev.hwpstate_intel.5.epp=100
  dev.hwpstate_intel.6.epp=100
  dev.hwpstate_intel.7.epp=100
It was not needed/non existent on the ThinkPad W520 hardware.
Now the boot parameters /boot/loader.conf file.
% cat /boot/loader.conf
# CONSOLE COMMON
  autoboot_delay=2       # OPT. '-1' => NO WAIT | OPT. 'NO' => INFINITE WAIT
  hw.usb.no_boot_wait=1  # DO NOT WAIT FOR USB DEVICES FOR ROOT (/) FILESYSTEM
  boot_mute=YES          # LIKE '-m' IN LOADER - MUTE CONSOLE WITH FreeBSD LOGO
  loader_logo=none       # DESIRED LOGO OPTIONS: fbsdbw beastiebw beastie none
  loader_menu_frame="none"
  screen.font="6x12"

# CONSOLE RESOLUTION
  kern.vt.fb.default.mode="1920x1080"
  efi_max_resolution="1920x1080"

# WINE FIX
  machdep.max_ldt_segment=2048

# MODULES - BOOT
  aesni_load=YES
  geom_eli_load=YES
  cryptodev_load=YES
  zfs_load=YES

# drm-kmod PACKAGE - USE SEMAPHORES FOR INTER-RING SYNC
  compat.linuxkpi.semaphores=1

# drm-kmod PACKAGE - ENABLE POWER-SAVING RENDER C-STATE 6
  compat.linuxkpi.enable_rc6=7

# drm-kmod PACKAGE - ENABLE POWER-SAVING DISPLAY C-STATES
  compat.linuxkpi.enable_dc=2

# drm-kmod PACKAGE - ENABLE FRAME BUFFER COMPRESSION FOR POWER SAVINGS
  compat.linuxkpi.enable_fbc=1

# ENABLE SYNAPTICS
  hw.psm.synaptics_support=1

# DISABLE /dev/diskid/* ENTRIES FOR DISKS
  kern.geom.label.disk_ident.enable=0

# DISABLE /dev/gptid/* ENTRIES FOR DISKS
  kern.geom.label.gptid.enable=0

# TERMINAL vt(4) COLORS
  kern.vt.color.0.rgb="#000000"
  kern.vt.color.1.rgb="#dc322f"
  kern.vt.color.2.rgb="#859900"
  kern.vt.color.3.rgb="#b58900"
  kern.vt.color.4.rgb="#268bd2"
  kern.vt.color.5.rgb="#ec0048"
  kern.vt.color.6.rgb="#2aa198"
  kern.vt.color.7.rgb="#94a3a5"
  kern.vt.color.8.rgb="#586e75"
  kern.vt.color.9.rgb="#cb4b16"
  kern.vt.color.10.rgb="#859900"
  kern.vt.color.11.rgb="#b58900"
  kern.vt.color.12.rgb="#268bd2"
  kern.vt.color.13.rgb="#d33682"
  kern.vt.color.14.rgb="#2aa198"
  kern.vt.color.15.rgb="#6c71c4"

# RACCT/RCTL RESOURCE LIMITS
  kern.racct.enable=1

# DISABLE ZFS PREFETCH
  vfs.zfs.prefetch_disable=1

# POWER MGMT / POWER OFF DEVICES WITHOUT ATTACHED DRIVER
  hw.pci.do_power_nodriver=3

# POWER MANAGEMENT FOR EVERY USED AHCI CHANNEL (ahcich 0-7)
  hint.ahcich.0.pm_level=5
  hint.ahcich.1.pm_level=5
  hint.ahcich.2.pm_level=5
  hint.ahcich.3.pm_level=5
  hint.ahcich.4.pm_level=5
  hint.ahcich.5.pm_level=5
  hint.ahcich.6.pm_level=5
  hint.ahcich.7.pm_level=5

# GELI THREADS
  kern.geom.eli.threads=4
Now the mentioned /etc/devfs.rules file.
% cat /etc/devfs.rules
[desktop=10]
add path 'acd*'      mode 0660 group operator
add path 'cd*'       mode 0660 group operator
add path 'da*'       mode 0660 group operator
add path 'pass*'     mode 0660 group operator
add path 'xpt*'      mode 0660 group operator
add path 'fd*'       mode 0660 group operator
add path 'md*'       mode 0660 group operator
add path 'uscanner*' mode 0660 group operator
add path 'lpt*'      mode 0660 group cups
add path 'ulpt*'     mode 0660 group cups
add path 'unlpt*'    mode 0660 group cups
add path 'ugen*'     mode 0660 group operator
add path 'usb/*'     mode 0660 group operator
add path 'video*'    mode 0660 group operator
add path 'cuse*'     mode 0660 group operator
Filesystems and SWAP configuration.
% cat /etc/fstab
# SWAP
  /dev/gpt/swap0  none  swap  sw  0 0

# FreeBSD PSEUDO - NEEDED BY wine(1)
  procfs  /proc  procfs  rw  0 0

# Ubuntu Linux PSEUDO
  linprocfs  /compat/ubuntu/proc     linprocfs  rw,late                    0 0
  linsysfs   /compat/ubuntu/sys      linsysfs   rw,late                    0 0
  devfs      /compat/ubuntu/dev      devfs      rw,late                    0 0
  fdescfs    /compat/ubuntu/dev/fd   fdescfs    rw,late,linrdlnk           0 0
  tmpfs      /compat/ubuntu/dev/shm  tmpfs      rw,late,size=1g,mode=1777  0 0
  /home      /compat/ubuntu/home     nullfs     rw,late                    0 0
  /tmp       /compat/ubuntu/tmp      nullfs     rw,late                    0 0
Terminals configuration under /etc/ttys file. Important part is the ttyv4 entry to match the xdm_tty=ttyv4 value from /etc/rc.conf file.
% grep '^[^#]' /etc/ttys | cat
console none                            unknown off insecure
ttyv0   "/usr/libexec/getty Pc"         xterm   onifexists secure
ttyv1   "/usr/libexec/getty Pc"         xterm   onifexists secure
ttyv2   "/usr/libexec/getty Pc"         xterm   onifexists secure
ttyv3   "/usr/libexec/getty Pc"         xterm   onifexists secure
ttyv4   "/usr/libexec/getty Pc"         xterm   off secure
ttyv5   "/usr/libexec/getty Pc"         xterm   off secure
ttyv6   "/usr/libexec/getty Pc"         xterm   off secure
ttyv7   "/usr/libexec/getty Pc"         xterm   off secure
ttyv4   "/usr/local/bin/xdm -nodaemon"  xterm   off secure
ttyu0   "/usr/libexec/getty 3wire"      vt100   onifconsole secure
ttyu1   "/usr/libexec/getty 3wire"      vt100   onifconsole secure
ttyu2   "/usr/libexec/getty 3wire"      vt100   onifconsole secure
ttyu3   "/usr/libexec/getty 3wire"      vt100   onifconsole secure
dcons   "/usr/libexec/getty std.9600"   vt100   off secure
xc0     "/usr/libexec/getty Pc"         xterm   onifconsole secure
rcons   "/usr/libexec/getty std.9600"   vt100   onifconsole secure
I kept wireless config in /etc/rc.conf file this time – it does conflicts with my own network.sh solution to connect to various both wire and wireless networks – FreeBSD Network Management with network.sh Script – described in details here.
# cat /etc/wpa_supplicant.conf
# GENERAL
eapol_version=2
ap_scan=1
fast_reauth=1

# OPEN NETWORKS
network={
  key_mgmt=NONE
  priority=0
}

# NETWORK WITH HIDDEN SSID
network={
  scan_ssid=1
  ssid="hidden-network"
  psk="12341234"
  priority=0
}

# NAMED OPEN NETWORK
network={
  ssid="Free_Internet"
  key_mgmt=NONE
  priority=0
}

# NORMAL WPA/WPA2 SECURED NETWORK
network={
  ssid="SECURED"
  psk="12345678"
}
The automount(8) config.
% cat /usr/local/etc/automount.conf
  USERUMOUNT=YES
  USER=vermaden
  FM='caja --no-desktop'
  NICENAMES=YES
The doas(1) configuration.
# cat /usr/local/etc/doas.conf
# CORE
  permit nopass keepenv root     as root
  permit nopass keepenv vermaden as root

# THE network.sh SCRIPT
  # pw groupmod network -m YOURUSERNAME
  # cat /usr/local/etc/doas.conf
  permit nopass :network as root cmd /etc/rc.d/netif args onerestart
  permit nopass :network as root cmd /usr/sbin/service args squid onerestart
  permit nopass :network as root cmd dhclient
  permit nopass :network as root cmd ifconfig
  permit nopass :network as root cmd killall args -9 dhclient
  permit nopass :network as root cmd killall args -9 ppp
  permit nopass :network as root cmd killall args -9 wpa_supplicant
  permit nopass :network as root cmd ppp
  permit nopass :network as root cmd route
  permit nopass :network as root cmd tee args -a /etc/resolv.conf
  permit nopass :network as root cmd tee args /etc/resolv.conf
  permit nopass :network as root cmd umount
  permit nopass :network as root cmd wpa_supplicant
Groups I am member of.
% id vermaden | tr ' ' '\n' | tr ',' '\n'
uid=1000(vermaden)
gid=1000(vermaden)
groups=1000(vermaden)
0(wheel)
5(operator)
44(video)
69(network)
145(webcamd)
920(vboxusers)
I also do not rely on ‘stock’ fan speeds and set my own speeds according to CPU temperature with acpi-thinkpad-fan.sh script.
X11
While X11 did not need any custom configuration and it worked out of the box – I have done two things to make it work slightly differently.
First one is to allow CTRL+ALT+BACKSPACE fast way to restart X11.
t14 % cat /usr/local/etc/X11/xorg.conf.d/flags.conf
Section "ServerFlags"
  Option "DontZap" "off"
EndSection
The other one is to enable Tap to Click and Natural Scrolling on a Synaptics touchpad.
t14 % cat /usr/local/etc/X11/xorg.conf.d/touchpad.conf
Section "InputClass"
  Identifier "touchpad"
  MatchIsTouchpad "on"
  Driver "libinput"
  Option "Tapping" "on"
  Option "NaturalScrolling" "on"
EndSection
Comparison to ThinkPad W520
I compared the two laptops. While ThinkPad W520 is heavy and bulky the ThinkPad T14 (GEN1) is light and slim. They both have similar 5 hours battery time on FreeBSD.
You can see the screen brightness comparison between these two below.

The ThinkPad T14 (GEN1) has several flavors of the FullHD screen – check reviews and specs for details. For the record – ThinkPad W520 is on the left.
Below you will find size comparisons.
The view from the top.

View from the side.

… and from the side one over another.

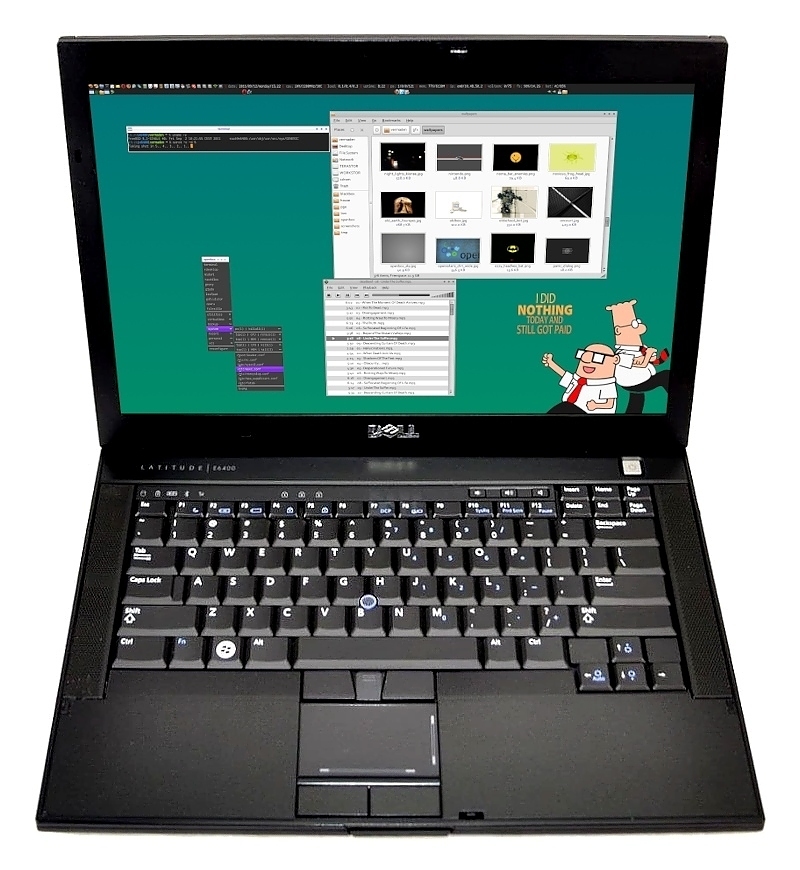
Desktop Environment
Openbox
As for the ‘desktop environment’ that I use – its my custom setup with Openbox along with tools like Tint2 and Dzen2 – for the most basic setup. The screenshot is from FreeBSD 11.1 but it looks exactly the same today.
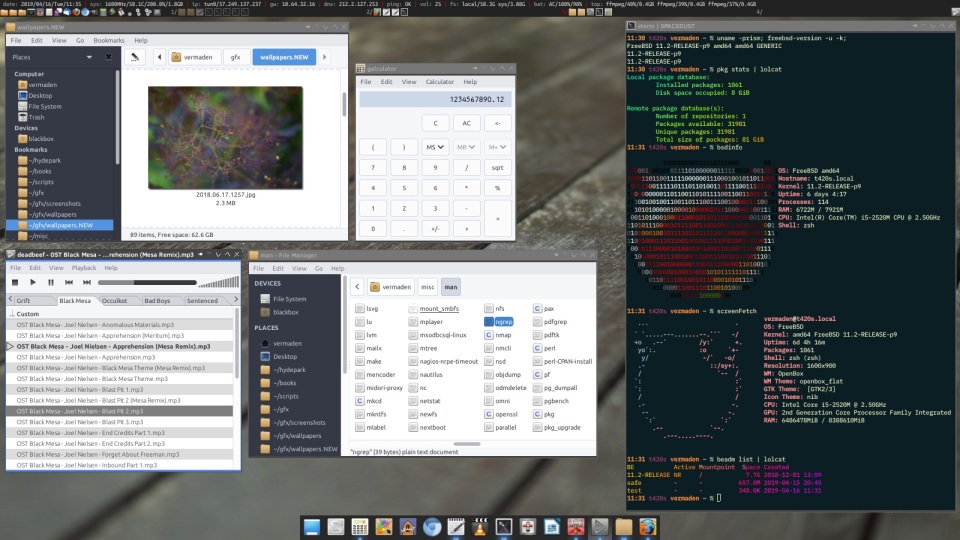
I described this setup in details in the entire FreeBSD Desktop series.
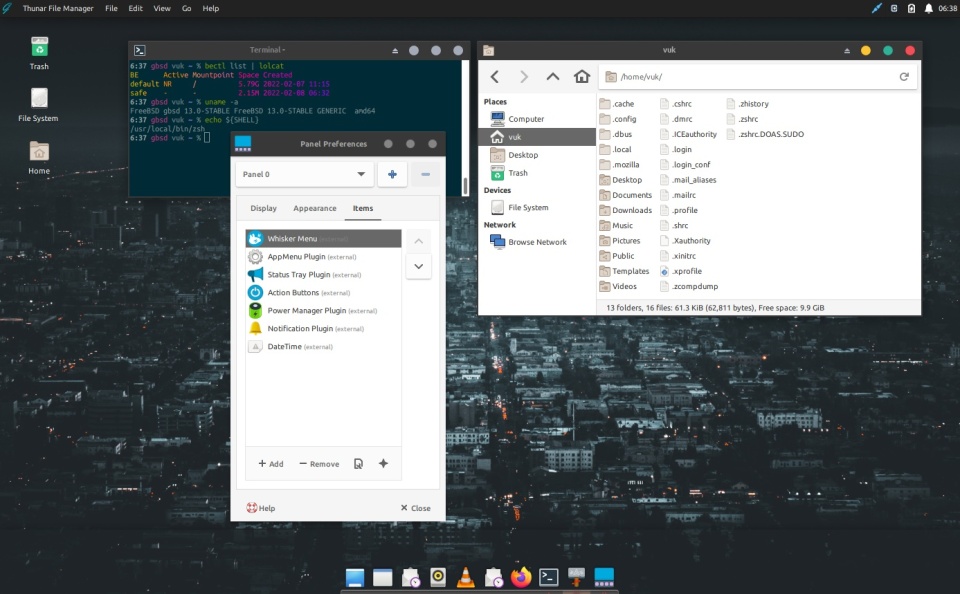
XFCE
I have also tried XFCE – I liked it especially with the Global Menu appmenu plugin. You go this way with this XFCE Cupertino Way handy guide.
GNOME
I also tried GNOME for a test – it did not suit me well so I went back to my Openbox setup – but You may find it more comfortable to use. Here is the FreeBSD GNOME 3 Fast Track article that will help you with that.

Temperatures
I used mine sensors.sh script for that – results below.
t14 # sensors.sh

            BATTERY/AC/TIME/FAN/SPEED
 ------------------------------------
             dev.acpi_ibm.0.fan_level: 1
             dev.acpi_ibm.0.fan_speed: 65535
                   dev.acpi_ibm.0.fan: 0
               dev.cpu.0.cx_supported: C1/1/1 C2/2/151 C3/3/1034
                   dev.cpu.0.cx_usage: 9.02% 35.95% 55.02% last 35us
                       dev.cpu.0.freq: 802
                       hw.acpi.acline: 0
                 hw.acpi.battery.life: 99
                 hw.acpi.battery.time: 275
                hw.acpi.cpu.cx_lowest: C8
                            powerd(8): running

                  SYSTEM/TEMPERATURES
 ------------------------------------
                dev.cpu.0.temperature: 38.0C (max: 100.0C)
                dev.cpu.1.temperature: 39.0C (max: 100.0C)
                dev.cpu.2.temperature: 39.0C (max: 100.0C)
                dev.cpu.3.temperature: 39.0C (max: 100.0C)
                dev.cpu.4.temperature: 40.0C (max: 100.0C)
                dev.cpu.5.temperature: 41.0C (max: 100.0C)
                dev.cpu.6.temperature: 38.0C (max: 100.0C)
                dev.cpu.7.temperature: 38.0C (max: 100.0C)
           dev.pchtherm.0.temperature: 46.0C
      hw.acpi.thermal.tz0.temperature: 46.1C (max: 128.1C)

                   DISKS/TEMPERATURES
 ------------------------------------
             smart.nvme0.temperature:: 44.0C
Accessories
There are some accessories that are very handy with the ThinkPad T14 laptop – I will describe them below.
Power Supply
You can use the default ThinkPad T14 power supply and you can also use any USB-C power delivery charger – that is nice addition.
Mouse Companion
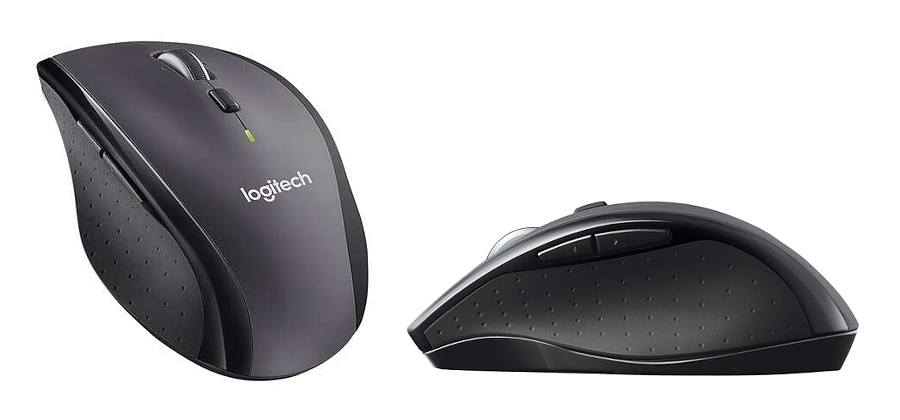
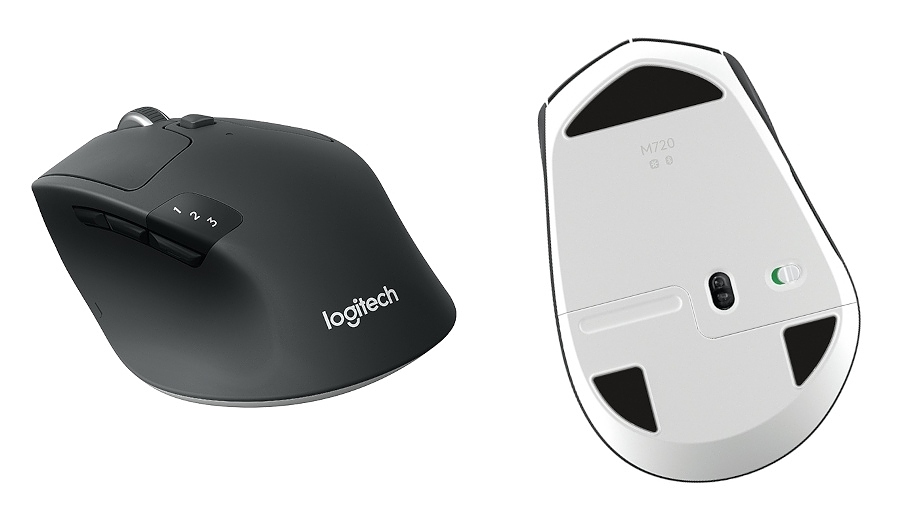
After checking many mouse models – as described in the UNIX Mouse Shootout article – I finally settled with Logitech Triathlon M720 mouse. I have plugged the Lenovo USB Receiver into the back ‘powered’ USB port. While I use that mouse over the USB receiver you can also connect it using Bluetooth – also to other computers. This mouse has a special dedicated button to switch between 3 different computers. Unfortunately the copy-paste between them does not work 🙂
Battery
Some battery details below.
t14 % acpiconf -i 0
Design capacity:        50450 mWh
Last full capacity:     45760 mWh
Technology:             secondary (rechargeable)
Battery Swappable Capability:   Non-swappable
Design voltage:         11520 mV
Capacity (warn):        2288 mWh
Capacity (low):         200 mWh
Cycle Count:            204
Mesurement Accuracy:    95 %
Max Average Interval:   1000 ms
Min Average Interval:   500 ms
Low/warn granularity:   -1 mWh
Warn/full granularity:  -1 mWh
Model number:           5B10W13906
Serial number:           1071
Type:                   LiP
OEM info:               SMP
State:                  discharging
Remaining capacity:     99%
Remaining time:         4:31
Present rate:           10094 mW
Present voltage:        12681 mV
Experience
Today I ‘recognize’ three laptop keyboard layouts.
- Best in class 7-row keyboards with INS/DEL and HOME/END and PGUP/PGDN keys block on the right top side.
- Least PITA ThinkPad T14 like keyboards where PGUP/PGDN keys are in the ARROWS area and HOME/END/INS/DEL block is provided on the top right part.
- Everything else that I treat like shit.
My fingers do not remember this HOME/END/INS/DEL block that much well – but at its still several ways of magnitude better then any Macbook keyboard layout.
Summary
I will still use mine ThinkPad W520 daily – I still do not need to move to other/less old laptop.
As you can see FreeBSD works quite well with modern laptops – hope someone can find that article useful.
UPDATE 1 – WiFi Works with FreeBSD 14.0-BETA1
As the FreeBSD 14.0-RELEASE is approaching completion I checked again the ThinkPad T14 WiFi with newer FreeBSD version. I am happy to report that now – with 14.0-BETA1 version of FreeBSD – the WiFi works. The iwlwifi(4) driver now successfully works. There is only one downside – its very slow – usable for browsing the Internet and stuff – but slow.
My ThinkPad W520 has Intel Centrino Ultimate-N 6300 WiFi card supported by the iwn(4) driver. This card was introduced in 2011 – 12 years ago. With that old Intel 6300 card I am able to reach 12 MB/s speed both for upload and download speeds on FreeBSD – using 802.11g mode as 802.11n is not (yet) supported on FreeBSD.
The Intel Comet Lake CNVi WiFi card from 2019 on ThinkPad T14 with current state of iwlwifi(4) driver allows about 500 KB/s for upload and 2.5 MB/s for download.
Still better then attaching the additional USB WiFi adapter or device passthru to Bhyve hypervisor for wifibox workaround 🙂