Long time no see. Its been a while since last post in the Ghost in the Shell series. Its also exactly one full year since I started this blog – from the first Ghost in the Shell series article – the Part 1 – that was published on 2018/03/15 day.
Today I would like to show you new pack of useful tricks and features for productive terminal/shell use. Lets start with something simple yet useful.
You may want to check other articles in the Ghost in the Shell series on the Ghost in the Shell – Global Page where you will find links to all episodes of the series along with table of contents for each episode’s contents.
Named Pipes
We all (or at least most :>) know and love pipes in UNIX. For the record – ls | grep match | awk '{print $3}' | sed 's/.jpg//g' – command ‘chains’ like that one 🙂
What is a named pipe then? A manually defined pipe for special purposes. For example some applications – especially the so called Enterprise ones – often do not support UNIX pipes mechanisms – they only can dump something to a file. A great example of such Enterprise software is Oracle database whose dump command can only make dump to a file. With tool that supports UNIX pipes you would probably want to pipe that data to gzip(1)/xz(1) to compress it on the fly or even pipe it directly to ssh(1) to the Backup server for example, but not with Oracle.
This is where named pipes feature helps. We will create named pipe called /tmp/PIPE so Oracle’s dump command will be able to use it and on the other side of this pipe we will attach a pipe to gzip -9 command to compress that data on the fly.
Below example is from Linux system so mknod(1) command will be used. For example on FreeBSD you would use mkfifo(1) command for named pipe. Complete example of such named pipe is presented below.
root # cd /tmp
root # mknod /tmp/PIPE p
root # chown oracle:oinstall /tmp/PIPE
root # dd if=/tmp/PIPE bs=1M | gzip -9 > /mnt/oracle/oracle-database-backup.dmp.gz &
Now the /tmp/PIPE named pipe is ready to be used. When any process will start to write something to the /tmp/PIPE named pipe it will be automatically grabbed by dd(8) command and piped to the gzip(1) command that will compress that input and write it into the /mnt/oracle/oracle-database-backup.dmp.gz file.
Now we can start the Oracle dumping process with dump command.
root # su - oracle
oracle % dump file=/tmp/PIPE
When the dump command finishes its work you will find all your dumped data compressed in the /mnt/oracle/oracle-database-backup.dmp.gz file.
Other example of named pipes usage is my desktop dzen2 setup with unusual update schedule – described in detail in the FreeBSD Desktop – Part 13 – Configuration – Dzen2 article.
Modify Command Environment on the Fly
For most of the time we use export(1) builtin to export needed environment values that our command needs. You can then check what environment exported values are with the env(1) command of course … but you can use the same env(1) command to run any command with modified environment without exporting variables using export(1).
Here is brief example of this feature.
For the record – the gls(1) command is a GNU/Linux ls(1) command from sysutils/coreutils package/port but to make it work without name conflicts on FreeBSD where BSD ls(1) is also present it had to be renamed to gls(1).
% gls -l | head -1
total 8609K

% env LC_ALL=pl_PL.UTF-8 gls -l | head -1
razem 8609K
In the example above we run gls(1) command with default environment – I use en_US.UTF-8 locale daily. The second invocation with LC_ALL=pl_PL.UTF-8 modified environment made gls(1) command display its output in Polish (pl_PL.UTF-8) language. The word ‘razem‘ means ‘total‘ in Polish.
Other useful example may be using make(1) to build FreeBSD port with known vulnerabilities. By default FreeBSD’s build(7) system will not allow us to build such port (and that is good defaults) but if we know what we are doing we will use following spell.
# env DISABLE_VULNERABILITIES=yes make -C /usr/ports/security/bdes/ build install clean
Its also useful with commands that do not play well with UTF-8 input like tr(1) for example. When LC_ALL is set to en_US.UTF-8 it will throw an error upon as.
% tr -cd '0-9' < /dev/random | head -c 16
tr: Illegal byte sequence
%
We just wanted to generate random 16 numbers.
To make it work we will modify the LC_ALL environment for this invocation.
% env LC_ALL=C tr -cd '0-9' < /dev/random | head -c 16
9571949869123855
%
Much better 🙂
Other example with timezones using date(1) command and TZ variable as shown in the example below.
% date
Fri Mar 15 14:03:38 CET 2019

% env TZ=Australia/Darwin date
Fri Mar 15 22:35:26 ACST 2019
The Real Path
The symlinks with ln(1) are very useful for many ways, to organize stuff, for quick fixes, for versioning … you will find tons of other use cases.
There is just one problem, if you make to many levels or symlinks or its just too much nested you do not know where you are anymore … this is where the realpath(1) comes handy. No matter how many levels of links you have made, it will tell you the truth – what is the current real path. The pwd(1) command will not help you here thou.
Here is a short example how it works.
% pwd
/home/vermaden
% ln -s /home/vermaden ASD
% cd ASD
% pwd
/home/vermaden/ASD
% realpath
/home/vermaden
Browsing the PATH
Many times I wanted to ‘browse’ through the PATH to search for something. As you possibly know the PATH variable stores paths that are colon (:) separated.
You can redefine the IFS variable which by default contains space ‘ ‘ which will work as field delimited for the for loop.
Here is the example.
% export IFS=":"

% for I in $( echo ${PATH} ); do echo ${I}; done
/sbin
/bin
/usr/sbin
/usr/bin
/usr/local/sbin
/usr/local/bin

% for I in $( echo ${PATH} ); do find "${I}" -name ifconfig; done
/sbin/ifconfig
The other way to do this is to use plain old tr tool to translate colons (:) into newlines (\n) so we will be able to use the while loop here.
Here is the tr(1) example.
% echo ${PATH} | tr ':' '\n' | while read I; do echo ${I}; done
/sbin
/bin
/usr/sbin
/usr/bin
/usr/local/sbin
/usr/local/bin

% echo ${PATH} | tr ':' '\n' | while read I; do find ${I} -name dd; done
/bin/dd
You can also achieve same thing using the Parameter Expansion in which we will change the colons (:) into newlines (\n) as shown in the example below.
% echo "${PATH//:/\n}"
/sbin
/bin
/usr/sbin
/usr/bin
/usr/local/sbin
/usr/local/bin

# echo "${PATH//:/\n}" | while read I; do find ${I} -name camcontrol; done
/sbin/camcontrol
Parameter Expansion
I will not show all possible Parameter Expansion methods – just the most useful ones.
The typical use is to get the extension of a file or to ’emulate’ basename(1) or dirname(1) commands – it will be faster to use Parameter Expansion instead of invoking these commands each time. Below are two tables showing what you will get from which Parameter Expansion method.
PARAMETER    RESULT                       DESC
-----------  ---------------------------  --------------
${name}      kubica.polish.racing.legend  content
${name#*.}          polish.racing.legend  -
${name##*.}                       legend  extension
${name%%.*}  kubica                       -
${name%.*}   kubica.polish.racing         -
… and with slash (/) character.
PARAMETER    RESULT                       DESC
-----------  ---------------------------  --------------
${name}      kubica/polish/racing/legend  content
${name#*/}          polish/racing/legend  -
${name##*/}                       legend  basename(1)
${name%%.*}  kubica                       root directory
${name%/*}   kubica/polish/racing         dirname(1)
You can also use Parameter Expansion methods to grab the protocol from an URL like shown below.
% URL="https://vermaden.wordpress.com"

% echo "${URL%%/*}"
https:
Sort Human Readable Values
Its simple and easy to sort just numerical values, we use sort -n for that – but values sometimes comes in human readable form like 4G, 350M and 120K. To sort these properly you will have to use sort -h flag as shown in the example below.
% du -sh /usr/*
102M    /usr/bin
228G    /usr/home
9.0M    /usr/include
 53M    /usr/lib
 43M    /usr/lib32
116K    /usr/libdata
1.9M    /usr/libexec
365M    /usr/local
512B    /usr/obj
9.5M    /usr/sbin
 39M    /usr/share
251K    /usr/tests

% du -sh /usr/* | sort -h
512B    /usr/obj
116K    /usr/libdata
251K    /usr/tests
1.9M    /usr/libexec
9.0M    /usr/include
9.5M    /usr/sbin
 39M    /usr/share
 43M    /usr/lib32
 53M    /usr/lib
102M    /usr/bin
365M    /usr/local
228G    /usr/home
If the values are in the first column then its simple but what to do when the values are not in the first column? You will use -k parameter of sort(1) which takes which column to sort as argument. Needed example below sorted bu human readable values and on the second USED column.
% zfs list | sort -h -k 2
NAME                         USED  AVAIL  REFER  MOUNTPOINT
local/usr/obj                 88K   130G    88K  /usr/obj
local/var/cache/pkg          128K   130G   128K  /var/cache/pkg
local/var/cache              216K   130G    88K  none
local/var                    304K   130G    88K  none
sys/ROOT/11.1-RELEASE        482M  2.39G  6.04G  /
local/usr/ports              729M   130G   729M  /usr/ports
local/jail/nextcloud         927M   130G   897M  /jail/nextcloud
local/jail                  1.00G   130G   100M  /jail
local/usr/src               1.28G   130G  1.28G  /usr/src
local/usr                   1.99G   130G    88K  none
sys/ROOT/11.2-RELEASE       8.69G  2.39G  7.10G  /
sys/ROOT                    9.16G  2.39G    88K  none
sys                         9.17G  2.39G    88K  none
local/home                   281G   130G   281G  /home
local                        288G   130G    88K  none
Write a File from vi(1) with Different Rights
How many times you have opened a system configuration file like /etc/sysctl.conf or /etc/fstab in your favorite vi(1) editor, made some changes and then when you wanted to save it – no luck – you are trying to write to file owned by root with regular user … the Read-only file, not written; use ! to override. message will be displayed. Of course you can save that file somewhere else like your home directory and them move it with doas(1)/sudo(8)/su(8) help to original location and fix its rights … or you may do that in one step instead.
After opening a file with vi(1) and some changes to write a file with doas(1)/sudo(8) rights you just need to type this.
:w !doas tee %
Then exit the vi(1) editor with force.
:q!
Here is how it looks in the editor.
:w !doas tee %

+=+=+=+=+=+=+=+
File contents are displayed here.

Press any key to continue [: to enter more ex commands]: [ENTER]
Here is the ‘legend’ for that spell.
:      vi(1) prompt
w      write a file
!doas  invoke doas(1) command
tee    command that will be started using doas(1) command
%      tells vi(1) to use current filename
In this process the current vi(1) contents will be redirected using tee(1) with doas(1) rights to the current (open that you opened) filename.
Of course it also works in vim(1) or neovim(1) and if sudo(8) is your poison then just use sudo instead doas(1) there.
Search Contents of PDF Files
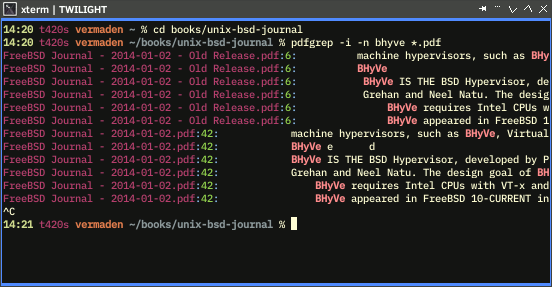
We all love plain text files then they can be searched using grep(1) for data that is interesting for us … but grep(1) does not work with PDF files … or should I say its pointless/useless to use grep(1) to search PDF files. Fortunately pdfgrep(1) command exists and works beautifully with PDF files – including colored output.
Recently FreeBSD Journal has been made free and you will like to search for bhyve articles in FreeBSD Journal issues then this is the command for you.
% cd books/unix-bsd-journal
% exa
FreeBSD Journal - 2014-01-02.pdf FreeBSD Journal - 2016-09-10.pdf
FreeBSD Journal - 2014-03-04.pdf FreeBSD Journal - 2016-11-12.pdf
FreeBSD Journal - 2014-05-06.pdf FreeBSD Journal - 2017-01-02.pdf
FreeBSD Journal - 2014-07-08.pdf FreeBSD Journal - 2017-03-04.pdf
FreeBSD Journal - 2014-09-10.pdf FreeBSD Journal - 2017-05-06.pdf
FreeBSD Journal - 2014-11-12.pdf FreeBSD Journal - 2017-07-08.pdf
FreeBSD Journal - 2015-01-02.pdf FreeBSD Journal - 2017-09-10.pdf
FreeBSD Journal - 2015-03-04.pdf FreeBSD Journal - 2017-11-12.pdf
FreeBSD Journal - 2015-05-06.pdf FreeBSD Journal - 2018-01-02.pdf
FreeBSD Journal - 2015-07-08.pdf FreeBSD Journal - 2018-03-04.pdf
FreeBSD Journal - 2015-09-10.pdf FreeBSD Journal - 2018-05-06.pdf
FreeBSD Journal - 2015-11-12.pdf FreeBSD Journal - 2018-07-08.pdf
FreeBSD Journal - 2016-01-02.pdf FreeBSD Journal - 2018-09-10.pdf
FreeBSD Journal - 2016-03-04.pdf FreeBSD Journal - 2018-11-12.pdf
FreeBSD Journal - 2016-05-06.pdf FreeBSD Journal - 2019-01-02.pdf
FreeBSD Journal - 2016-07-08.pdf

% pdfgrep -i -n bhyve *.pdf
FreeBSD Journal - 2014-01-02 - Old Release.pdf:6: machine hypervisors, such as BHy
FreeBSD Journal - 2014-01-02 - Old Release.pdf:6: BHyVe
FreeBSD Journal - 2014-01-02 - Old Release.pdf:6: BHyVe IS THE BSD Hypervisor, de
FreeBSD Journal - 2014-01-02 - Old Release.pdf:6: Grehan and Neel Natu. The desig
FreeBSD Journal - 2014-01-02 - Old Release.pdf:6: BHyVe requires Intel CPUs w
FreeBSD Journal - 2014-01-02 - Old Release.pdf:6: BHyVe appeared in FreeBSD 1
FreeBSD Journal - 2014-01-02.pdf:42: machine hypervisors, such as BHyVe, Virtual
FreeBSD Journal - 2014-01-02.pdf:42: BHyVe e d
FreeBSD Journal - 2014-01-02.pdf:42: BHyVe IS THE BSD Hypervisor, developed by P
FreeBSD Journal - 2014-01-02.pdf:42: Grehan and Neel Natu. The design goal of BH
FreeBSD Journal - 2014-01-02.pdf:42: BHyVe requires Intel CPUs with VT-x and
FreeBSD Journal - 2014-01-02.pdf:42: BHyVe appeared in FreeBSD 10-CURRENT in
(...)
Here is how it looks in the xterm(1) terminal.
Hope that today’s pack of spells will end up useful for you.

Pingback: Ghost in the Shell – Part 3 | 𝚟𝚎𝚛𝚖𝚊𝚍𝚎𝚗
Pingback: Ghost in the Shell – Part 2 | 𝚟𝚎𝚛𝚖𝚊𝚍𝚎𝚗
Pingback: Ghost in the Shell – Part 1 | 𝚟𝚎𝚛𝚖𝚊𝚍𝚎𝚗
Although it’s not well known, you don’t need to use env to add or modify existing environment variables for a single command, at least if you’re using some version of the Bourne shell. Instead you can just put the environment variables before the command: ‘TZ=Australia/Darwin date’. Env remains useful if you want to run a command with minimal environment variables, because you can tell it to remove everything except what you provide on the command line.
LikeLike
Thank you for comment, forgot about that 🙂
… same as with creating empty file.
Only this is needed:
% > newfile
… but for some reason I always use this:
% :> newfile
Probably because ‘:>’ is really nice smiley :>
LikeLike
POSIX/SUS covers ‘pwd -P’, which resolves the current path to remove any symlinks. See http://pubs.opengroup.org/onlinepubs/9699919799/utilities/pwd.html for reference. This is a more portable alternative to realpath for this case.
LikeLiked by 1 person
Shame on me, I should at least check the pwd man page
… but thanks to Your comment I have found a bug in the FreeBSD pwd man page 🙂
The FreeBSD page – https://man.freebsd.org/pwd – tells that:
… which is a lie, the -L is assumed – same as with POSIX link you shared.
FreeBSD bug submitted:
https://bugs.freebsd.org/bugzilla/show_bug.cgi?id=236559
Thanks,
vermaden
LikeLike
Pingback: In Other BSDs for 2019/03/16 – DragonFly BSD Digest
Pingback: ‘Ghostly’ tips (4) | 0ddn1x: tricks with *nix
Pingback: Valuable News – 2019/03/25 | 𝚟𝚎𝚛𝚖𝚊𝚍𝚎𝚗