This is the second post in the FreeBSD Desktop series.
You may want to check other articles in the FreeBSD Desktop series on the FreeBSD Desktop – Global Page where you will find links to all episodes of the series along with table of contents for each episode’s contents.
How about actually installing FreeBSD? On a real hardware? You may first want to mess with the FreeBSD installer in a virtualized hardware (Bhyve/KVM/XEN/Virtualbox/…) so You will gain some confidence. In these posts series we will create a complete step by step FreeBSD desktop installation on USB 2.0 pendrive. 8 GB size or more is required. This way You will not have to ‘touch’ you installed system and as You gain confidence in FreeBSD You may want to switch to it if it suits your needs better then the currently installed system on your hardware. This way You can also try it on various computers without the need of (re)install or You may use it as You ‘go/mobile’ system on a stick.
For the series I will use one of the best laptops ever made – Lenovo ThinkPad X220 – shown below.
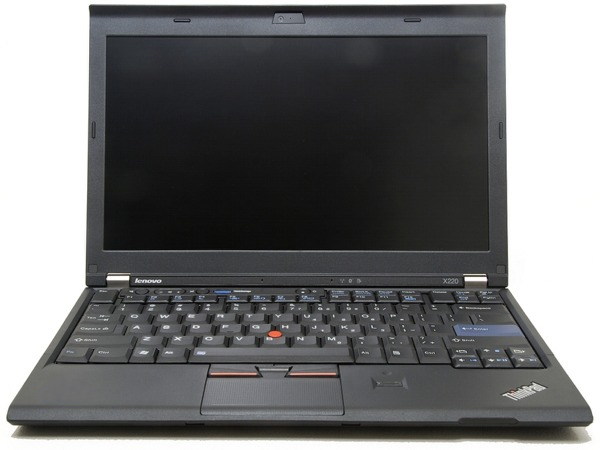
Its a 2011 12.5″ screen laptop with best keyboard layout on the world. As the series will progress I will also show the differences to other laptop – Lenovo ThinkPad T420s – another great machine. Besides being one of the best laptops ever made they also today have another advantage – they are dirt cheap. You can get any of them in a really good condition for about $150-180.
BIOS
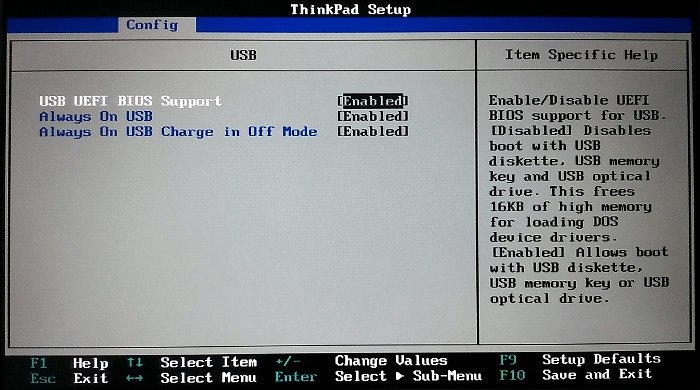
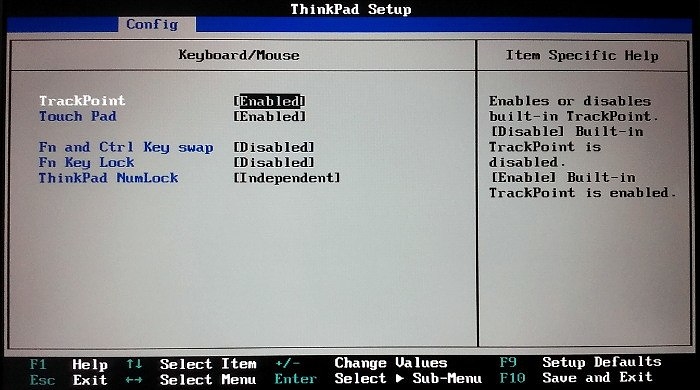
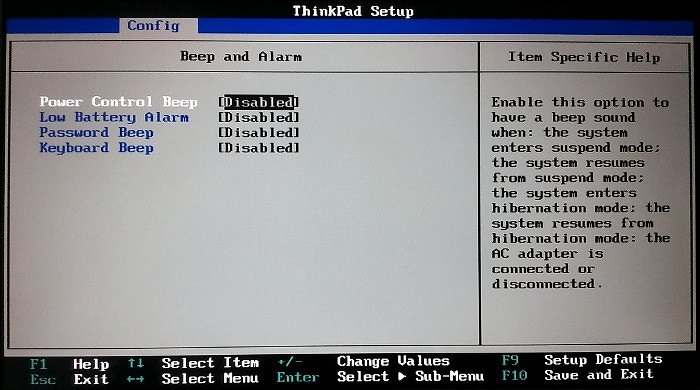
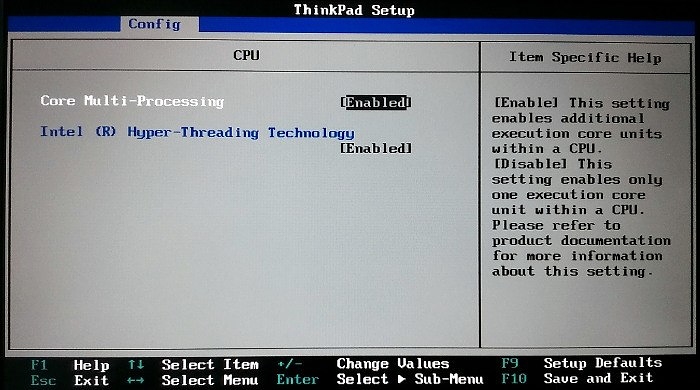
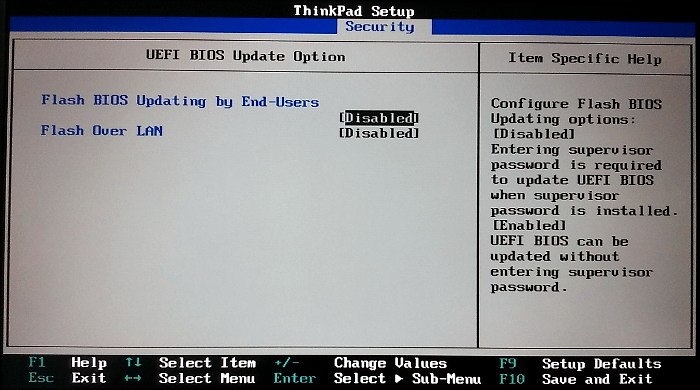
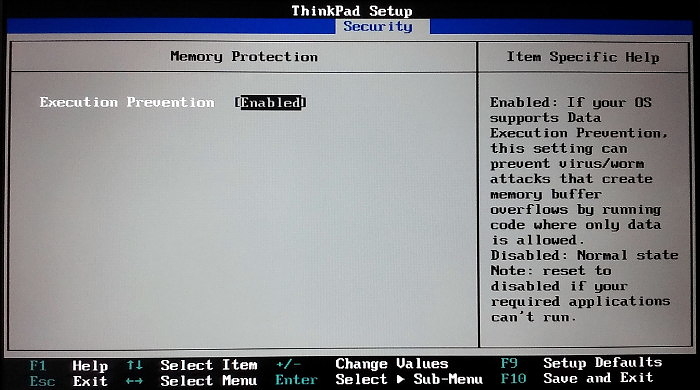
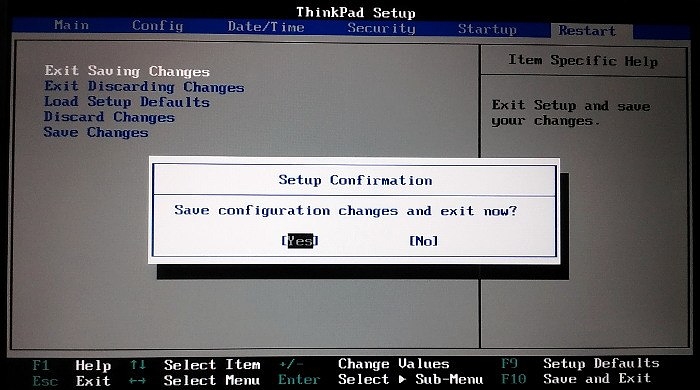
First we need to setup our machine, I mean the BIOS settings in the laptop. We will disable unused (Express Card/Bluetooth/Camera/Fingerprint Reader/…) and unwanted options (Intel AMT/Security Chip/UEFI/…). Below are screens with these settings.


Install
The install is very similar to the HardenedBSD install made in earlier post – Introduction to HardenedBSD World.
You will need:
* 8GB or larger USB pendrive for the installation (or install directly to hard disk)
* 1GB or larger USB pendrive or 700MB CD-R(W) disk for the FreeBSD installer to boot/install from
Besides all Lenovo ThinkPad XY20 (X220/T420/T420s/T520/W520) laptops being one of the best ever made they have one amusing problem – the broken GPT boot 🙂 The installer – on these Lenovo laptops – will ask You if You want to apply that fix – answer ‘yes’ there. Later in the setup process this option is called GPT + Lenovo Fix (BIOS) as a Partition Scheme option. You can read more about GPT issue on this FreeBSD Mailing Lists post – using GPT / EFI booting on Lenovo BIOSes – https://lists.freebsd.org/pipermail/freebsd-i386/2013-March/010437.html.
One more thing to mention, this GPT BUG is present only when You want to boot FreeBSD from GPT partition in BIOS/Legacy mode. If You make UEFI install (which we will do in one of the next articles in the series) this problem is not present and FreeBSD boots properly on Lenovo ThinkPad X220 (and other from XY20 series) from GPT partition in UEFI mode.
Now the install process. First You need the FreeBSD 11.1-RELEASE install image, download it from here – FreeBSD-11.1-RELEASE-amd64-memstick.img – http://ftp.freebsd.org/pub/FreeBSD/releases/ISO-IMAGES/11.1/FreeBSD-11.1-RELEASE-amd64-memstick.img.
To put the image on the pendrive we will use the dd(1) tool available on almost any Mac OS X (macOS) and Linux system – You can read more about that command on following Wikipedia article on dd command.
For Windows You will have to download it from here – dd for windows – http://www.chrysocome.net/dd.
On FreeBSD such command will look like that:
# dd if=FreeBSD-11.1-RELEASE-amd64-memstick.img of=/dev/da1
… but for performance reasons its better to add bs=1m (bs=1M on Linux/Windows) to the command.
# dd if=FreeBSD-11.1-RELEASE-amd64-memstick.img of=/dev/da1 bs=1m
Alternatively You may want to burn the ISO image to the CD-R(W) disc and boot from it instead of USB pendrive, in such case here is the ISO image link – FreeBSD-11.1-RELEASE-amd64-disc1.iso – http://ftp.freebsd.org/pub/FreeBSD/releases/ISO-IMAGES/11.1/FreeBSD-11.1-RELEASE-amd64-disc1.iso
Now to install. Attach the USB pendrive or CD disc with FreeBSD installer and boot from it, on most laptops You may show the temporary boot list selection with [F11] or [F12] key.
After You have booted to the screen below with Welcome message, leave the ‘focus’ on the Install button and attach the 8GB or larger USB pendrive for installation.

You will see kernel buffer messages messing the screen and showing that new drive has been attached, but as the ‘focus’ is still on the Install button so just hit [ENTER] key and proceed with the installation process as shown on the images below.
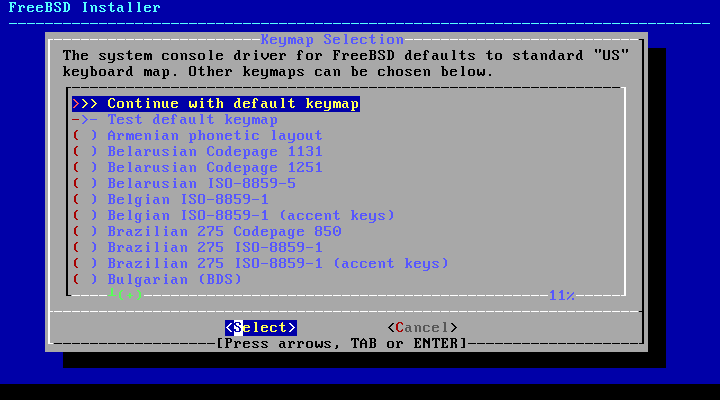
You can select your desired keyboard layout, it can also be changed later, your choice.
When we have a new machine there is always a problem with new name for it. The RFC 1178 Choosing a Name for Your Computer from 1990 year tries to address that issue – https://tools.ietf.org/html/rfc1178. For machine hostname we will use Slavic word for the wind which would be vetru – in normalized form – as original as You can imagine is not in ASCII compatible – вѣтръ (větrŭ) 🙂

We do not need any additional components, with all deselected as shown below only the (not shown) base and kernel will be installed.

We will use ZFS because we want to use Boot Environments with sysutils/beadm port.
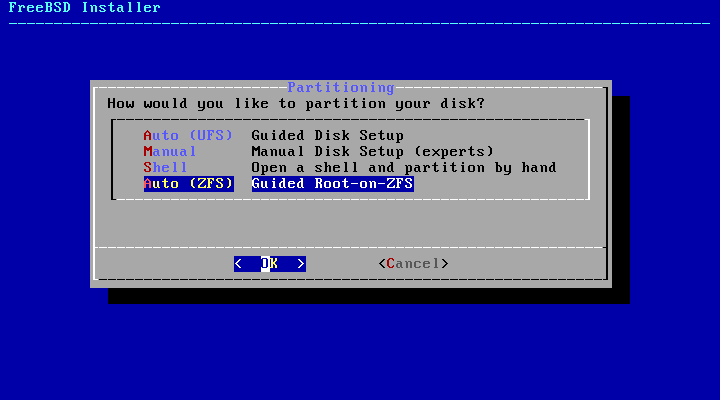
Hit [ENTER] on the Pool Type/Disks to select target disk to install FreeBSD on.

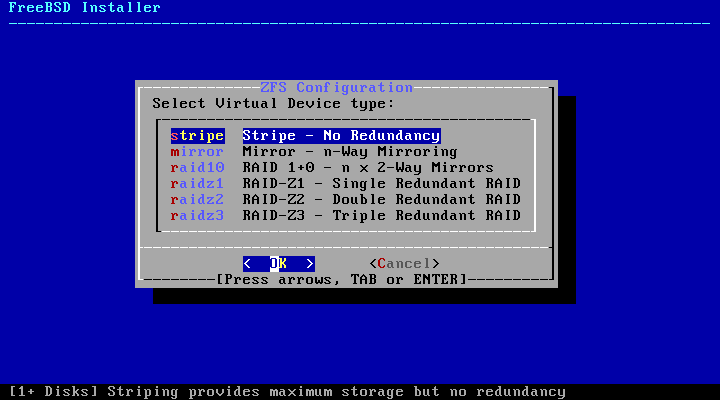
As we will be using only single disk without redundancy select stripe here.
This may vary, select the pendrive (or disk) that You want to install FreeBSD on.

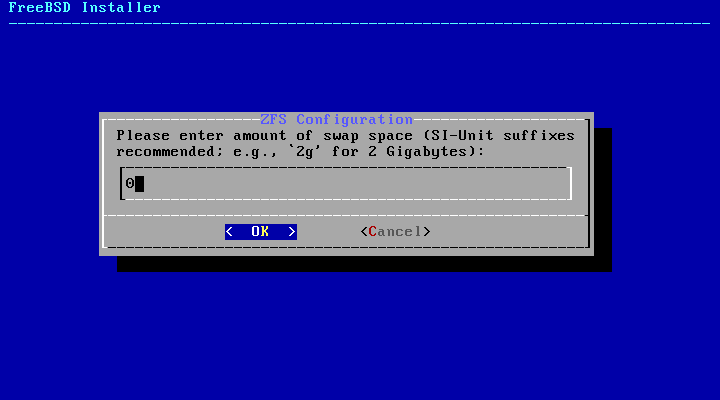
We will set SWAP size to ‘0‘ (no SWAP) as it will not be needed. If we will need SWAP in the future, then we will create ZVOL on ZFS and use it as a SWAP device.

As we are installing it on a Lenovo ThnikPad X220 with GPT BUG then we need to select GPT + Lenovo FIX (BIOS) here.
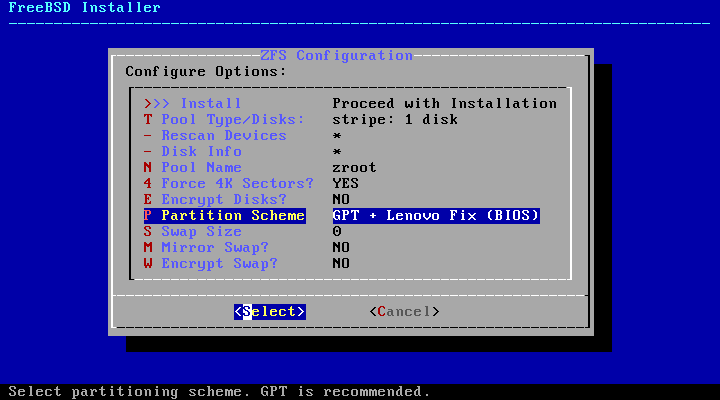
Now move ‘focus’ to Install and hit [ENTER] to proceed with installation.

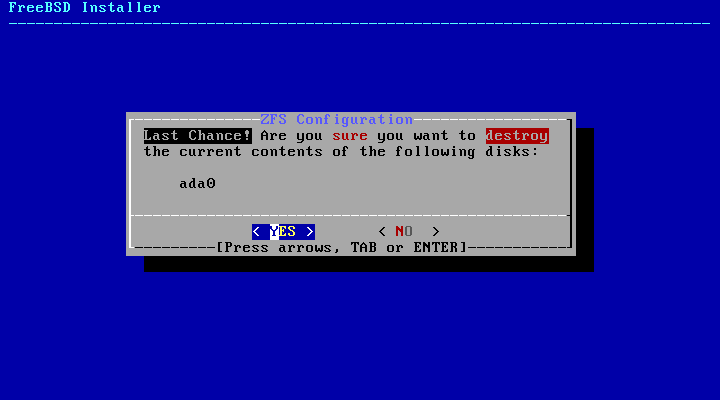
This is the last chance to not overwrite your precious data.
Then You will see the install progress.

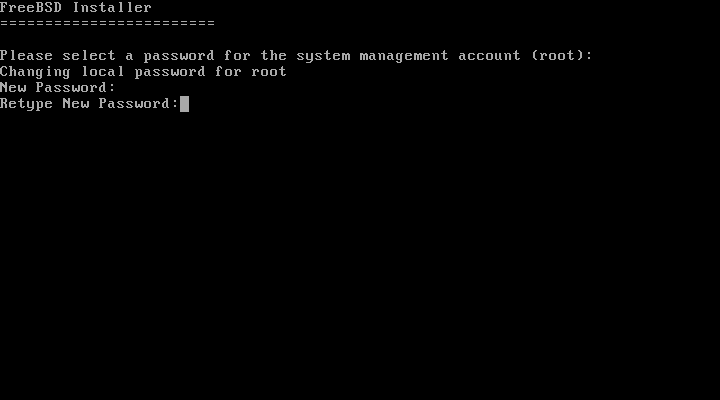
Fill in your root user password.
Select any interface here as we will not be making any configuration here.
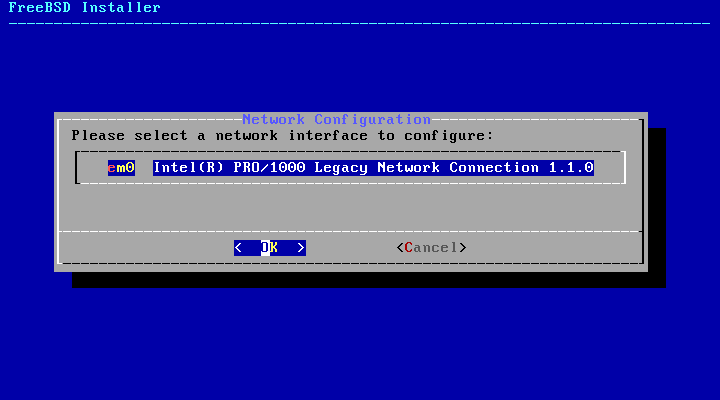
Leave the interface unconfigured for now, we will take care about that later.


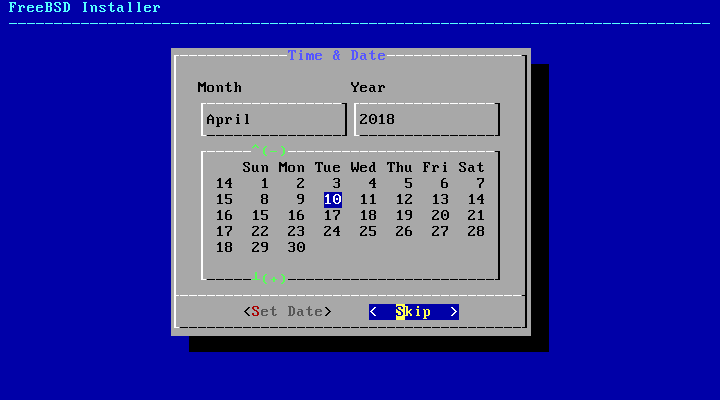
Now we will configure the time zone, I have configured Europe/Poland as shown below.


Now you may correct the date and time.

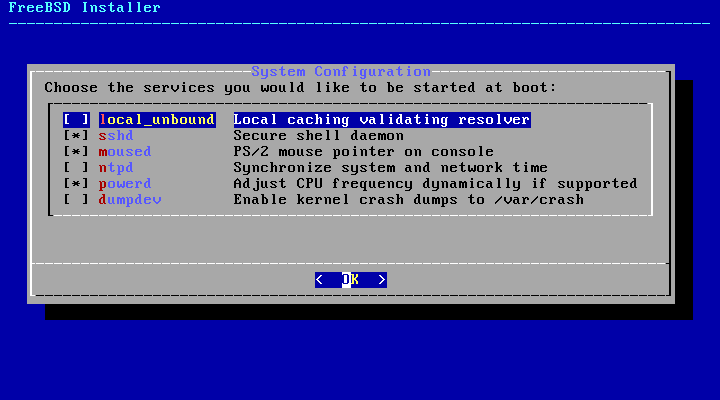
Select services as shown below.
Enable all security hardening features as shown below.

We want to create new ‘regular’ user so answer Yes here.

For the username we will use Slavic word for wolf which is Vuk.


Our job is done here, hit [ENTER] key with ‘focus’ on Exit name,

Installer will ask You if You want to modify the installed system before rebooting into it. We do not have any needs now so hit [ENTER] key on No option.

As we finished hit [ENTER] on Reboot button.

Boot
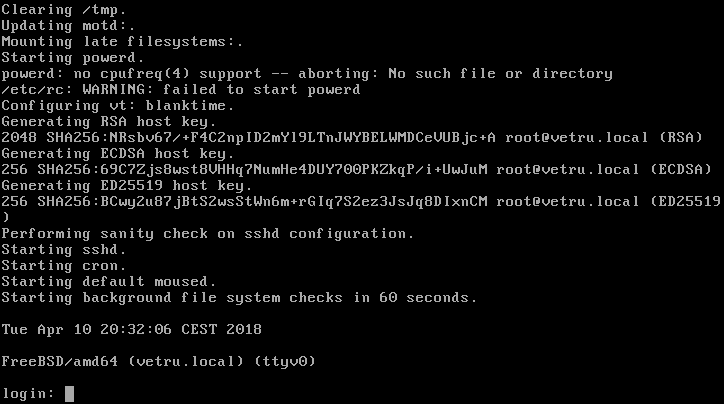
After the boot process of the newly installed FreeBSD 11.1-RELEASE USB pendrive You will see an image similar to below one.

What to do next? Lets make some basic network connectivity. Later in the FreeBSD Desktop series we will switch to network.sh for networking – FreeBSD Network Management with network.sh Script but now lets see how its done the raw way. If You will have attached LAN cable and your interface is em0 (check ifconfig(8) command output) then dhclient em0 command should grant You the working connection to the Internet – assuming that You have DHCP server on that network. Here are the commands.
# ifconfig em0 up

# dhclient em0
DHCPREQUEST on em0 to 255.255.255.255 port 67
DHCPACK from 10.254.17.1
bound to 10.254.17.3 -- renewal in 2147483647 seconds.
To test the network connectivity use the ping(8) command.
# ping -c 3 freebsd.org
PING freebsd.org (8.8.178.110): 56 data bytes
64 bytes from 8.8.178.110: icmp_seq=0 ttl=52 time=242.421 ms
64 bytes from 8.8.178.110: icmp_seq=1 ttl=52 time=234.535 ms
64 bytes from 8.8.178.110: icmp_seq=2 ttl=52 time=245.120 ms

--- freebsd.org ping statistics ---
3 packets transmitted, 3 packets received, 0.0% packet loss
round-trip min/avg/max/stddev = 234.535/240.692/245.120/4.491 ms
Also check LAN network chapter in the FreeBSD Handbook – https://freebsd.org/handbook/config-network-setup.html
If You would like to connect to the World with wireless connection then here are the needed commands.
First lets check what wireless card You have.
# sysctl net.wlan.devices
net.wlan.devices: iwn0
We will now create wlan(4) virtual device on top of our iwn0 device and bring it up.
# ifconfig wlan0 create wlandev iwn0

# ifconfig wlan0 up
We can scan for existing nearby WiFi access points if needed.
# ifconfig wlan0 scan
SSID/MESH ID    BSSID              CHAN RATE    S:N     INT CAPS
xxxxxxx         xx:xx:xx:xx:xx:xx    7   54M  -85:-95   100 EPS  HTCAP RSN WME BSSLOAD WPS
WIFI-NETWOR...  xx:xx:xx:xx:xx:xx    8   54M  -71:-95   100 EPS  HTCAP APCHANREP WME ATH RSN WPA
xxxxxxx         xx:xx:xx:xx:xx:xx    1   54M  -90:-95   100 EPS  RSN HTCAP WME ATH WPS
xxxxxxx         xx:xx:xx:xx:xx:xx    1   54M  -90:-95   100 EP   RSN WME WPS
In case the name of the network does not fit into the first column, then use -v flag for verbose (and wider) output.
# ifconfig -v wlan0 scan
Now we need to add the desired WiFi network to the /etc/wpa_supplicant.conf file as shown below.
# cat > /etc/wpa_supplicant.conf << __EOF
network={
  ssid="WIFI-NETWORK-NAME"
  psk="PASSWORD"
}
__EOF
The You may connect to it using the wpa_supplicant(8) daemon. We will connect to the WiFi hot spot, and as the message ‘CTRL-EVENT-CONNECTED‘ will be displayed we hit the [CTRL]+[Z] key combination to put the process into suspended state (SIGTSTP signal). Then we type the bg(1) command to put it back into running state, but in the background (SIGCONT signal) so we can continue to type next commands.
# wpa_supplicant -i wlan0 -c /etc/wpa_supplicant.conf
Successfully initialized wpa_supplicant
wlan0: Trying to associate with xx:xx:xx:xx:xx:xx (SSID='WIFI-NETWORK-NAME' freq=2447 MHz)
wlan0: Associated with xx:xx:xx:xx:xx:xx
wlan0: WPA: Key negotiation completed with xx:xx:xx:xx:xx:xx [PTK=CCMP GTK=TKIP]
wlan0: CTRL-EVENT-CONNECTED - Connection to xx:xx:xx:xx:xx:xx completed [id=17 id_str=]
^Z
[1]  + Suspended  sudo wpa_supplicant -i wlan0 -c /etc/wpa_supplicant.conf
# bg
[1]    sudo wpa_supplicant -i wlan0 -c /etc/wpa_supplicant.conf &
Now we will request for the IP address from the access point DHCP server.
# dhclient wlan0
DHCPREQUEST on wlan0 to 255.255.255.255 port 67
DHCPACK from 10.254.17.1
bound to 10.254.17.8 -- renewal in 2147483647 seconds.
To test the network connectivity use the ping(8) command.
# ping -c 3 freebsd.org
PING freebsd.org (8.8.178.110): 56 data bytes
64 bytes from 8.8.178.110: icmp_seq=0 ttl=52 time=242.421 ms
64 bytes from 8.8.178.110: icmp_seq=1 ttl=52 time=234.535 ms
64 bytes from 8.8.178.110: icmp_seq=2 ttl=52 time=245.120 ms

--- freebsd.org ping statistics ---
3 packets transmitted, 3 packets received, 0.0% packet loss
round-trip min/avg/max/stddev = 234.535/240.692/245.120/4.491 ms
Also check WLAN chapter in the FreeBSD Handbook – https://www.freebsd.org/doc/en_US.ISO8859-1/books/handbook/network-wireless.html
Knowledge
In case You want to learn more about FreeBSD the FreeBSD Handbook and FreeBSD FAQ are good place to start.
GPT Fix
In case the installer would not made its job properly You can make the fix by yourself, you just need a FreeBSD system for it (You already have it on the USB pendrive or CD disk). Boot into the first question and move the ‘focus’ to the Live CD button on the right but do not hit the [ENTER] yet. Now, attach the USB pendrive with FreeBSD installed. Screen will be flooded with kernel buffer about attaching new da device, note the da device number (for example da1) and now hit [ENTER] key.
You will be welcomed with login: prompt, type root and hit [ENTER] (no password is required).
Remember the kernel buffer messages screen earlier? They started with the device name (like da0 or da1), we will use that device name to apply the fix. I will assume its da0. First, lets dump partition table to FDISK file.
# fdisk -p /dev/da0 > FDISK

# cat FDISK
# /dev/da0
g c1886 h255 s63
p 1 0xee 63 30298527
Now we need to make the fix, after the 'p 1 (...)' line add 'a 1' an below that line copy the line that starts with 'p 1 (...)' and name it 'p 2 (...)'. Now in the ‘first’ line with 'p 1 (...)' change the 0xee into 0x00. Final result is shown below.
# vi FDISK
# /dev/da0
g c1886 h255 s63
p 1 0x00 63 30298527
a 1
p 2 0xee 63 30298527
:wq
After writing the file, apply this new partition table into the da0 device with fdisk(8) command.
# fdisk -f FDISK /dev/da0
Verify that fix is applied.
# fdisk -p /dev/da0
# /dev/da0
g c1886 h255 s63
p 2 0xee 63 30298527
Indeed it is. Now You have Lenovo GPT fix applied. Important to mention that this ‘fix’ does not break the USB pendrive for computers that do not have GPT problem, so with GPT FIX applied you may use it on computers other then Lenovo.
Image
In case You may want to start after the installation I have uploaded the installed image here – http://www.mediafire.com/file/ywcnw99ghqezd6u/usb-freebsd-11.1-lenovo.raw.xz – keep in mind that its compressed by xz(1) so in order to apply it to USB pendrive You must first unpack it. You may do that on the fly with following command assuming that we will be writing that image to da1 device:
# xz -c -d usb-freebsd-11.1-lenovo.raw.xz | dd > /dev/da1 bs=1m
For the record, this image contains the Lenovo GPT FIX. The passwords are set to ‘asd‘ for convenience.
Enough for one post 😉
UPDATE 1 – Lenovo GPT Fix with gpart(8)
Initially I described how to apply a fix for broken Lenovo GPT bug with fdisk(8) tool. This is very tricky and error prone but there is a lot easier way to make the same fix. Its made with other FreeBSD tool called gpart(8) and its one line only.
# gpart set -a lenovofix /dev/ada0
lenovofix set on ada0
Done. No longer the need to dance with fdisk(8) tool.

It is perhaps worth noting, that the T420 – and presumably all the XY20 series and perhaps even XYZ0 series Thinkpads from Sandy Bridge (2011) and forward from Lenovo – all come with TianoCore EDK II, and if used with UEFI-only boot, won’t need to use the BIOS fix that bsdinstall offers.
My T420 that I got back in January/Febuary of this year, for this very experiment that you’re blogging about now, has [1] as a partition table, and it means that once the new UEFI loader arrives, I can specify the panels native resolution (1600×900 in my case) for UEFI-GOP in /boot/loader.conf and have it working as it’s supposed to.
It’s definitely also worth pointing out that keeping ctrl_interface=/var/run/wpa_supplicant and fast_reauth=1 in /etc/wpa_supplicant.conf is worth doing, because it lets you debug wpa issues with wpa_cli as well as reconnect faster (useful for when you’re roaming from one access point to another, especially when using [2].
[1] http://termbin.com/6kwj
[2] https://www.freebsd.org/doc/handbook/book.html#networking-lagg-wired-and-wireless
LikeLike
Thank You for Your comment.
Yes, its only BIOS/Legacy mode GPT issue, UEFI on GPT works same as everywhere, not fix/hack needed. I unconsciously assumed that as I am doing the BIOS/Legacy install in this post I am describing issue about it.
Could You post the contents of Your /boot/loader.conf file?
I use these settings in my /etc/wpa_supplicant.conf file and I will address them in more detail in future parts along with optional network.sh script usage and related to it configuration. I wanted to show fastest (or should I say least characters to type) method to get a working WiFi connection.
About the lagg interface between LAN and WLAN interface, I tried that in the past and it of course works, but I found myself today working mostly on wireless interfaces and switching consciously between limited 3G connection (limited by amount of data transfer) and WiFi when its available. From what I know there is no possible way to create a lagg device between WLAN connection and WWAN connection (ppp/tun), but even if such method existed I would not use it because of the amount of data transfer on the 3G connection.
LikeLike
Well, it’s natural to cover the edge-cases to a particular setup when you’re describing that setup – I just wanted to highlight that there is an alternative.
Switching between LAN and WLAN NICs works by faking the either NICs MAC to be that of the other NIC, such that packets destined for the same MAC address end up at either NIC depending on which one is active. The switch-over isn’t as fluid as it would be if MP-TCP was available, but it’s pretty good everything considered. However, it won’t work for a PPP tunnel (I assume you’re using PPP), since that only handles layer3 traffic.
Funny that you should mention 3G WWAN adapters, though – I’ve been using one in my T420 too, but wanted to try and use MPD5 for it since that implements it in netgraph (not that the 21/4Mbps of HSPA+ is too fast for pppd, but just because I thought it was neat), but unfortunately I haven’t been able to get it to work as evidenced by [2] – if you have the time, could you maybe try setting ppp up via mpd5, and see if it works for you?
I don’t mind sharing my /boot/loader.conf file – it’s at [1], just don’t expect much from it since I use it as sparingly as possible and prefer setting things with /etc/sysctl.conf and /etc/rc.conf instead. For completeness’ sake, here are the modules I’ve loaded via /etc/rc.conf’s kld_list entry: i915kms iwn6000fw acpi_video acpi_ibm aesni coretemp cuse4bsd cc_htcp vmm libiconv libmchain cd9660_iconv msdosfs_iconv iicsmb acpi_call. And [3] is the contents of my /etc/sysctl.conf, although I’m not sure how cc_abe affects cc_htcp and need to test it now that it’s landed in 12-CURRENT.
The reason I load almost everything with rc instead of the loader, is because I want kernel initialization to be as fast as possible – see [4].
[1] http://termbin.com/kx0t
[2] https://sourceforge.net/p/mpd/discussion/44693/thread/fe2c9b89/
[3] http://termbin.com/pakf
[4] https://www.youtube.com/watch?v=NeJ2ztPasso
LikeLike
I will try to dig into that.
Thanks, I also do that (load as many modules from /etc/rc.conf instead of /boot/loader.conf file).
Probably You meant the /boot/loader.rc.local file for the UEFI/GOP settings? I haven’t found any resolution related settings in Your /boot/loader.conf file.
LikeLike
The UEFI loader changes which implements proper resolution setting for UEFI-GOP have only been landed in HEAD recently as seen in [1], so I’m not sure they can be merged to -STABLE before the flush so they’ll land in 11.2, when that hits -RELEASE which is what I’m running (hence why I said that I can make the change, once those additions land).
Apparently there’s also a limit to the threading on wordpress, because I couldn’t reply to your reply.
[1] https://svnweb.freebsd.org/changeset/base/331464
LikeLike
Again, thank You 😉
I hope this loader change will make it into the soon to be released 11.2-RELEASE.
As WordPress is for free I am not going to yell about it :p
LikeLike
I’m not sure it will, unless it got MFC’d to STABLE before a certain date, or it gets special approval by re@.
LikeLike
I have asked kevans@ about it – he said that chances for these loader modifications to be in 11.2-RELEASE are ‘slim to none’.
LikeLike
I tried for a couple days to get FreeBSD installed on my laptop. BSD installed easy, got networking working easy; the hard part was trying to configure X11 and a desktop environment. I tried so many different things to get it working and ended up just going back to linux.
LikeLike
I will cover X11 setup but I only have two hands and I still need to obey 24 hours per day limit 😉
Not to mention that this post (Part 2) was too long even at the moment covering only basic install and network connectivity …
… about going back to Linux, I also learned that ‘hard’ way, first getting into Linux when I was comfortable on Windows, mess some time with new OS, something not works, get back to the place I know, rest a little, arm more and try again 🙂
This way I moved from Windows to Slackware Linux, then to Gentoo Linux and then to FreeBSD and then to … I think its a natural way to learn new technologies with ‘steep learning curve’.
LikeLike
Pingback: FreeBSD desktop (2) | 0ddn1x: tricks with *nix
Pingback: [How-To] Nextcloud 13 on FreeBSD - FreeBSDNews.com
Pingback: Bareos Backup Server on FreeBSD | vermaden
Pingback: Addendum – MongoDB Cluster Replica Set on FreeBSD | vermaden
Pingback: Home | vermaden
Pingback: FreeBSD Desktop – Part 3 – X11 Window System | vermaden
Pingback: Silent Fanless FreeBSD Desktop/Server | vermaden
Pingback: FreeBSD Desktop – Part 6 – Key Components – Task Bar | vermaden
Pingback: FreeBSD Desktop – Part 7 – Key Components – Wallpaper Handling | vermaden
Pingback: FreeBSD Desktop – Part 8 – Key Components – Application Launcher | vermaden
Pingback: FreeBSD Desktop – Part 9 – Key Components – Keyboard/Mouse Shortcuts | vermaden
Pingback: FreeBSD Desktop – Part 4 – Key Components – Window Manager | vermaden
Pingback: FreeBSD Desktop – Part 5 – Key Components – Status Bar | vermaden
Pingback: FreeBSD Desktop – Part 10 – Key Components – Locking Solution | vermaden
Pingback: FreeBSD Desktop – Part 11 – Key Components – Blue Light Spectrum Suppress | vermaden
Pingback: FreeBSD Desktop – Part 12 – Configuration – Openbox | vermaden
Pingback: FreeBSD Desktop – Part 13 – Configuration – Dzen2 | vermaden
Pingback: [How-To] FreeBSD Desktop Configuration - FreeBSDNews.com
Pingback: FreeBSD Desktop – Part 14 – Configuration – Tint2 | vermaden
Pingback: FreeBSD Desktop – Part 15 – Configuration – Fonts & Frameworks | vermaden
Pingback: FreeBSD Desktop – Part 1 – Simplified Boot | vermaden
Very good ones!
All the ThinkPad will be BSD compatible? I would like a powerful laptop computer of these features compatible all the hardware with FreeBSD and it doesn’t cost much.
Screen Size : 14.0 inches
Screen Resolution : 1366×768
Hard Drive or SSD : 1 Tb
Processor: Intel Core i7, 3.2 GHz or more…
RAM : 16 GB DDR4 or more…
Intel HD Graphics 3000 or more powerful for 3D games or more.
On the other hand, in the GPT Fix chapter and what is the of FDISK directory ? There are file inconsistencies that a new user does not know about the directory.
I’ve been testing the installation of the FreeBSD system inside the 120 Gb USB stick, it’s super slow and I ended up getting tired and desperate.
LikeLike
Thanks 🙂
Most of them for sure.
ThinkPad W520 fits good here, up to 32 GB RAM with 4 physical cores and dedicated powerful graphics card … and cheap.
The FDISK is/was a file if that helps and it was generated from fdisk -p output.
You will need faster USB stick (3.0 or SSD USB) then 🙂
Regards,
vermaden
LikeLike
Pingback: FreeBSD Desktop – Part 16 – Configuration – Pause Any Application | vermaden
Pingback: FreeBSD Desktop – Part 17 – Automount Removable Media | 🆅🅴🆁🄼🄰🄳🅔🅝
Pingback: FreeBSD Desktop – Part 2.1 – Install FreeBSD 12 | 𝚟𝚎𝚛𝚖𝚊𝚍𝚎𝚗
Pingback: FreeBSD Desktop – Part 18 – Global Dashboard | 𝚟𝚎𝚛𝚖𝚊𝚍𝚎𝚗
Thanks for this FreeBSD series.
I have install 3 times the OS in a ThinkPad X230 but encounter the same problem every time.
Thus after
# sysctl net.wlan.devices
net.wlan.devices:
# interface wlan0 scan
Does not exist
# ifconfig wlan0 create wlandev iwn0
Ifconfig: SIOCIFCREATE2: Device not configured
I have research in many forums for over a month, but apparently my WiFi card is not supported. I really want to install and run FreeBSD and was hopeful that since you are installing it in a very similar computer I was going to be able to do it. Any suggestions?
Thanks again
LikeLike
Thanks.
Pity to hear that your WiFi card is not supported.
At your place I would get one of these:
– Intel 6205 (2×2 Antennas)
– Intel 6300 (3×3 Antennas)
Both of them cost about $7 on EBAY so its ‘nothing’ almost.
Hope that help.
Regards.
LikeLike
Thanks. I’ll give it a try
LikeLike
Hellos Vermaden
How to install the same FreeBSD system on a USB stick, to carry the system in your pocket. Not to be confused with creating a live ISO image on USB.
Greetings!
LikeLiked by 1 person
Take some computer (does not matter if its laptop or desktop).
Write ‘memstick’ image on USB pendrive or write ‘iso’ image to CD/DVD and boot from it.
When you see the first installer message – which looks like that:

Now attach your USB pendrive to the computer that you want to install FreeBSD on.
You will see messages on the screen like these below with white font on black background:
Now select INSTALL on that screen and make installation on da1 disk (assuming that da1 devices appeared on your screen).
After completing the installation remove all other media and boot from your da1 pendrive.
Viola!
You now have FreeBSD installed on USB pendrive.
Hope that helps.
Regards.
LikeLike